Blog
- Home
- Blog
Getting Started with NestJS in 2023
Introduction Node.js applications often become difficult to maintain as they grow in size and complexity. As new features are added,

Getting Started with NestJS in 2023
Introduction
Node.js applications often become difficult to maintain as they grow in size and complexity. As new features are added, the codebase can become disorganized and difficult to manage.
Nest.js offers a solution to this problem by providing a framework for building efficient and scalable server-side applications. It offers a modular structure for organizing code and was built using TypeScript and Express.js, making it compatible with many Express middleware.
With Nest.js, you can create clean and organized code that is easy to maintain. In this tutorial, we’ll be creating a small RESTful API for a bookstore, allowing users to fetch, create and delete books.
Prerequisites
Before starting this tutorial, there are a few prerequisites that need to be in place. You will need a local development environment for Node.js.
Understanding the Building blocks of Nest.js
The following are the building blocks used when building Nest.js applications:
- Controllers
- Providers
- Modules
Controllers are a crucial component in Nest.js, as they handle incoming requests and generate responses for the client side of the application. In the context of a RESTful API, for example, if a request is made to the endpoint ‘/home’, the designated controller will receive this request and return the appropriate response based on the available resources.
Nest.js has a flexible routing mechanism that allows developers to control which controller will handle each request. This helps to ensure that requests are properly handled and that the right information is returned to the client. To define a controller in Nest.js, a TypeScript file is created and decorated with the @Controller() decorator.
To define a controller in Nest.js, create a TypeScript file and include a decorator @Controller() as shown in the following code snippet:
import { Controller, Get } from '@nestjs/common';

@Controller('users')
export class UsersController {
 @Get()
 findAll() {
   return 'This will return all the users';
 }
}
The prefix of users within the Controller decorator will prompt the UsersController to handle any /users GET request within an application and return the appropriate response as specified. Other HTTP request handled by the controller includes POST , PUT, DELETE as we will see later in the tutorial.
Once a controller is created, it needs to be added to the module definition before Nest.js can easily recognise it. This could be the root ApplicationModule or any other module created within the application. More about this in the module section of this post.
Now let’s look at providers.
As mentioned earlier, Nest.js was heavily inspired by Angular and similar to an Angular application, you can create a provider and inject it into controllers or other providers. These providers are also called services, and they’re designed to abstract any form of complexity and logic.
A service provider in Nest.js is a JavaScript class with a special @Injectable() decorator at the top. For example, you can create a service to fetch users:
import { Injectable } from '@nestjs/common';
import { User } from './interfaces/user.interface';

@Injectable()
export class UsersService {
  private readonly users: User[] = [];

  create(user: User) {
    this.users.push(user);   }

  findAll(): User[] {
    return this.users;
  }
}
The provider created above is a class with two methods create() and findAll(), which can be used to create and return all users respectively. And to easily help with type checking an interface was used to specify the type of elements that should be received by the methods.
Finally, let’s look at Modules. Modules let you group related files. They are Typescript files decorated with @Module decorator. This attached decorator provides metadata that Nest makes use of to organize the application structure.
Each Nest.js application must have at least one module, usually referred to as the root module. This root module is the top-level module and usually enough for a small application. It is advisable to break a large application into multiple modules as it helps to maintain the structure of the application.
If you have an application that manages a lot of data or functionality about users , you can group the controller, services, and other related files into a single module, like UsersModule:
import { Module } from '@nestjs/common';
import { UsersController } from './users.controller.ts';
import { UsersService } from './users.service.ts';

@Module({
  controllers: [UsersController],
  providers: [UsersService]
})

export class UsersModule {}
In this example, we are exported a UsersModule that contains both the UsersController and UsersService. With this in place, we can then proceed to import and use the UsersModule within the root module of the application as shown in the following code snippet:
...
import { UsersModule } from './users/users.module';

@Module({
  ...
})

export class AppModule { }
There are a few other important concepts in Nest.js:
- DTO: Data transfer object is an object that defines how data will be sent over the network.
- Interfaces: TypeScript interfaces are used for type-checking and defining the types of data that can be passed to a controller or a Nest service.
- Dependency injection: Dependency injection is a design pattern used to increase efficiency and modularity of applications. It is often used by the biggest frameworks to keep code clean and easier to use. Nest.js also makes use of it to basically create coupled components.
With this pattern, it is very easy to manage dependencies between building blocks like controllers, providers and modules. The only thing required is to define the dependency for example a UsersService() in the constructor of a controller as shown here:
...
@Controller('users')
export class UsersController {
constructor(private readonly usersService: UsersService){}
 ...
}
With some of these concepts briefly covered, you can now proceed to the next section, where you will put all the knowledge gained so far in this post into use as you will learn how to seamlessly build a RESTful API using Nest.js.
As stated earlier in this post, you will create a sample application that will help you get a good grasp on some of the core concepts of Nest.js.
This application will be specifically for a bookstore. At the end of the post you would have created a micro-service that will enable users to create and add a new book with few descriptions to an existing list of books.
This could be from a database, but to ensure simplicity in this post, we won’t really be connecting our application to a database yet. But instead, we will make use of a mock data of books and once a new book is created, we will push and add it to the list.
Step 1 – Installing Nest.js
In order to scaffold a new Nest.js application, you will need to globally install the Nest CLI application. It is a command-line tool specifically created to craft a new Nest.js app and provide access to several commands to generate different files and produce a well-structured application.
Apart from using the CLI tool, you can also install a new Nest.js application by cloning the starter project from GitHub using Git, but for the purpose of this tutorial run the following command to install the Nest CLI:
npm install -g @nestjs/cli
This will give you access to the nest command for project installation and other project specific commands.
Next, run the following command to install a new project named bookstore-nest within your development folder:
nest new bookstore-nest
You will be asked a few questions during the installation, just follow the prompt and respond accordingly. Next, once the installation is complete, switch your working directory into the newly created project:
cd bookstore-nest
Start the application with:
npm run start
You can also run the followingcommand in order to use Nodemon for the project:
// start the application using nodemon
npm run start:dev
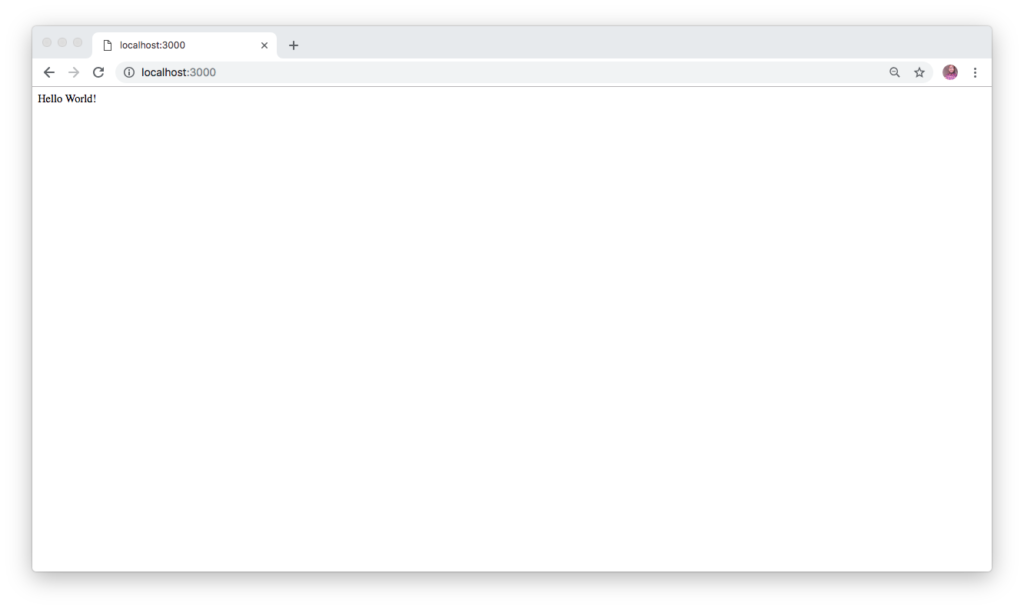
Navigate to http://localhost:3000 in your browser and you will see the Hello World! message as shown in the following image:
With the project started, let’s create the root module.
Step 2 – Generating a Module
Let’s generate a module for the bookstore. To do this, you will leverage the Nest CLI’s file generator. Run the following command to scaffold a new module for the application:
nest generate module books
This creates a new folder named books within the src folder. Within the books folder you will find a books.module.ts file:
import { Module } from '@nestjs/common';
@Module({})
export class BooksModule {}
This was generated by the command and the module has also been added to the app.module.ts which happens to be the root module of the application.
Next, you will create routes for the endpoints
Step 3 – Creating Routes and Controllers
As mentioned earlier, routes exist in controllers, so you need to create controllers that will handle individual endpoints. Again, use Nest CLI to generate your controllers, run the following command:
nest generate controller books
This creates a controller inside the books folder. Since we won’t be connecting to the database for now, create a sample mock data for the bookstore. Under the src folder, create a subfolder named mocks and within the newly created folder, create a new TypeScript file named books.mock.ts and add the following code in it:
export const BOOKS = [
    { id: 1, title: 'First book', description: "This is the description for the first book", author: 'Olususi Oluyemi' },
    { id: 2, title: 'Second book', description: "This is the description for the second book", author: 'John Barry' },
    { id: 3, title: 'Third book', description: "This is the description for the third book", author: 'Clement Wilfred' },
    { id: 4, title: 'Fourth book', description: "This is the description for the fourth book", author: 'Christian nwamba' },
    { id: 5, title: 'Fifth book', description: "This is the description for the fifth book", author: 'Chris anderson' },
    { id: 6, title: 'Sixth book', description: "This is the description for the sixth book", author: 'Olususi Oluyemi' },
];
Next, you will create a service to hold all the logic for the bookstore.
Step 4 – Setting up a Service
Run the following command to generate a service:
nest generate service books
This command will create a new file named books.service.ts within ./src/books folder.
Next, open the newly created file and paste the following:
  import { Injectable, HttpException } from '@nestjs/common';
  import { BOOKS } from '../mocks/books.mock';

  @Injectable()
  export class BooksService {
      books = BOOKS;

      getBooks(): Promise<any> {
          return new Promise(resolve => {
              resolve(this.books);
          });
      }
      getBook(bookID): Promise<any> {
          let id = Number(bookID);
          return new Promise(resolve => {
              const book = this.books.find(book => book.id === id);
              if (!book) {
                  throw new HttpException('Book does not exist!', 404);
              }
              resolve(book);
          });
      }
  }
First, you imported the requires modules from Nest.js and also BOOKS from the mock data you created earlier.
Next, you created two different methods named getBooks() and getBook() to retrieve the list of books from the mock data and to fetch just one book using the bookID as a parameter.
Next, add the following method to the /src/books/books.service.ts immediately after the getBook() method:
import { Injectable, HttpException } from '@nestjs/common';
import { BOOKS } from '../mocks/books.mock';
@Injectable()
export class BooksService {
    books = BOOKS;
    ...
    addBook(book): Promise<any> {
        return new Promise(resolve => {
            this.books.push(book);
            resolve(this.books);
        });
    }
}
The method above will be used to push a new book to the existing list
Finally, add the last method to delete a particular book using the bookID as a parameter:
import { Injectable, HttpException } from '@nestjs/common';
import { BOOKS } from '../mocks/books.mock';
@Injectable()
export class BooksService {
    books = BOOKS;
    ...
    deleteBook(bookID): Promise<any> {
        let id = Number(bookID);
        return new Promise(resolve => {
            let index = this.books.findIndex(book => book.id === id);
            if (index === -1) {
                throw new HttpException('Book does not exist!', 404);
            }
            this.books.splice(1, index);
            resolve(this.books);
        });
    }
}
Step 5 – Injecting the Service into the Controller
Here, you will use dependency injection design pattern to pass the BooksService into the BooksController through a constructor. Open the BooksController created earlier and paste the following code in it:
import { Controller, Get, Param, Post, Body, Query, Delete } from '@nestjs/common';
import { BooksService } from './books.service';
import { CreateBookDTO } from './dto/create-book.dto';

@Controller('books')
export class BooksController {
    constructor(private booksService: BooksService) { }

    @Get()
    async getBooks() {
        const books = await this.booksService.getBooks();
        return books;
    }

    @Get(':bookID')
    async getBook(@Param('bookID') bookID) {
        const book = await this.booksService.getBook(bookID);
        return book;
    }

    @Post()
    async addBook(@Body() createBookDTO: CreateBookDTO) {
        const book = await this.booksService.addBook(createBookDTO);
        return book;
    }

    @Delete()
    async deleteBook(@Query() query) {
        const books = await this.booksService.deleteBook(query.bookID);
        return books;
    }
}
First, the important modules were imported from @nestjs/common and you also import both the BooksService and CreateBookDTO respectively. CreateBookDTO is a data transfer object, a TypeScript class created for type-checking and to define the structures of what an object looks like when creating a new book. We will create this DTO in a bit.
Next, you used constructor to inject the BooksService into the controller and created four different methods which are:
getBooks(): Used to fetch the list of all books. It has@Get()decorator attached to it. This helps to map anyGETrequest sent to /books to this controller.getBook(): Used to retrieve the details of a particular book by passing thebookIDas a parameter.addBook(): Used to create and post a new book to the existing book list. And because we are not persisting into the database, the newly added book will only be held in memory.deleteBook(): Used to delete a book by passing thebookIDas a query parameter.
Each of the methods has a special decorator attached to it, which makes it very easy to route each HTTP request to a specific method within the controller.
Step 6 – Defining The DTO
In the previous section, you made use of a data transfer object called CreateBookDTO. To create it, navigate to the ./src/books folder and create a new subfolder name dto. Next, within the newly created folder, create another file and call it create-book.dto.ts and paste the following in it:
export class CreateBookDTO {
    readonly id: number;
    readonly title: string;
    readonly description: string;
    readonly author: string;
}
You are almost done with the application. Navigate back to the ./src/books/books.module.ts file you created earlier and update it with the following code:
import { Module } from '@nestjs/common';
import { BooksController } from './books.controller';
import { BooksService } from './books.service';
@Module({
  controllers: [BooksController],
  providers: [BooksService]
})
export class BooksModule {}
Start the application again if it is not running at the moment with:
npm run start
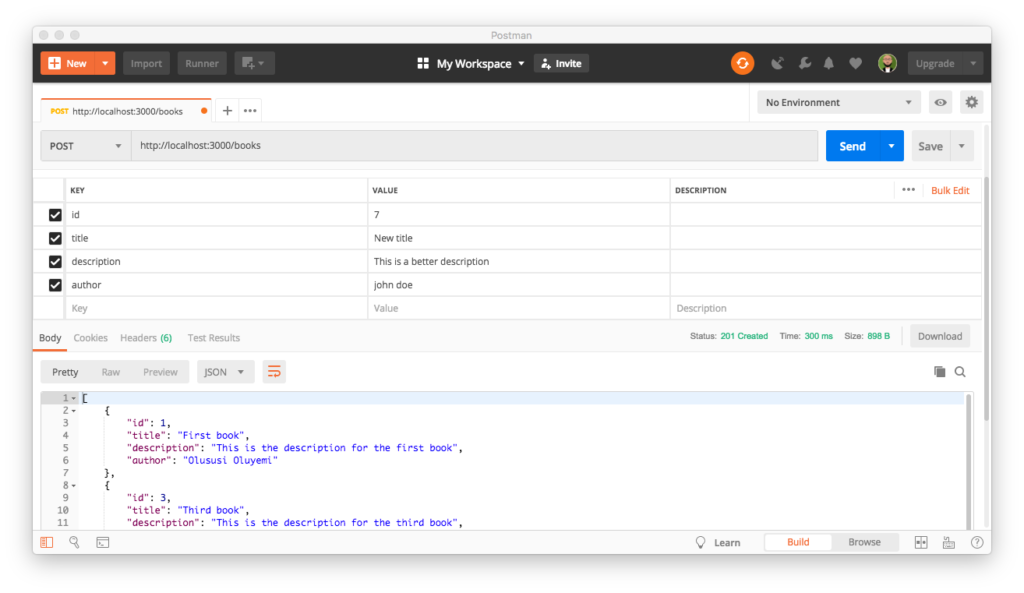
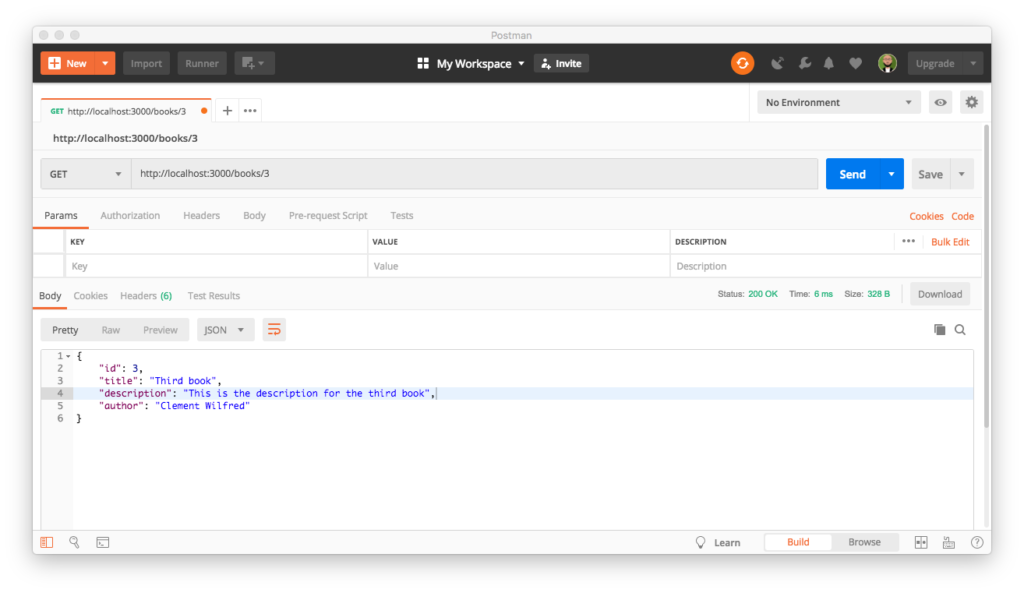
Then use postman to test the API:
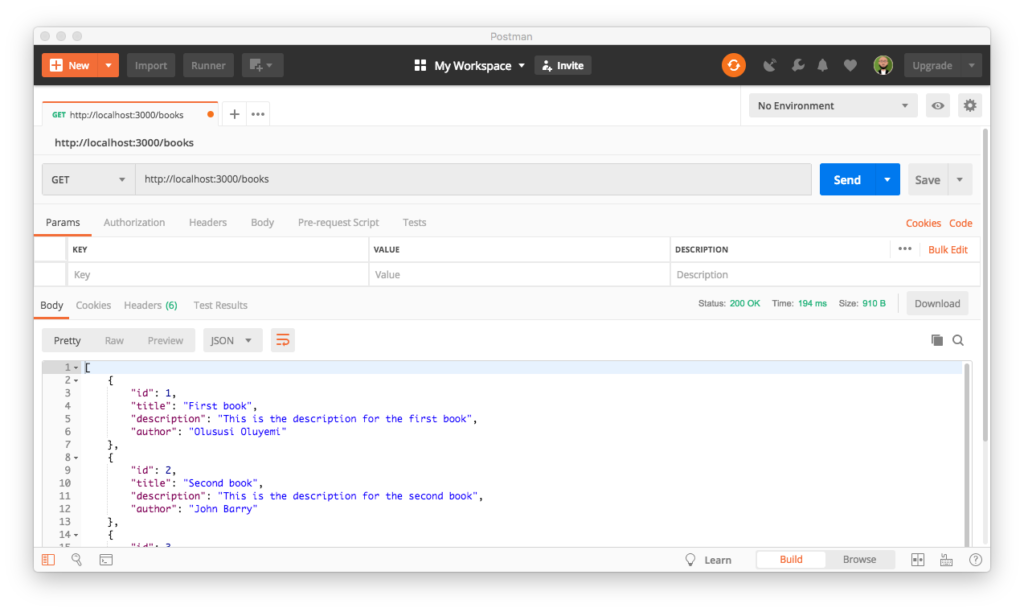
Create some new books:
Get a book using an ID:
Conclusion
In this tutorial you took a quick look at the fundamentals and basic building blocks of Nest.js and then built a RESTful API.
You will find the complete source code of this tutorial here on GitHub.
How to Install WordPress on Localhost (5 Easy Steps)
As the most popular web platform, WordPress is already powering up over one-third of the entire website. Hundreds of people

How to Install WordPress on Localhost (5 Easy Steps)
As the most popular web platform, WordPress is already powering up over one-third of the entire website.
Hundreds of people are entering the community every day. If you too are one of them, we are welcoming you with this easy and beginner-friendly tutorial- “How to Install WordPress on Localhost” in five easy steps.
Learning WordPress is just fun. Nowadays, anyone can build a website for his/her blogging, business, or any other purpose within minutes. Yes, CMS (Content Management System) made it such easy for all of us. And WordPress is leading the CMS industry with a surprising market share of more than 64.2%!
In this post, we have shown how to install WordPress on localhost in 5 easy steps.
- Download XAMPP
- Install & Run the XAMPP on Your PC
- Download WordPress Latest Version
- Create a Database
- Install WordPress on Localhost
We have also added an a-z video tutorial at the end to make your journey easier! So, nothing to worry about.
Now, let’s start with this basic question.
Why Install WordPress on Localhost?
A site in a localhost environment is basically for personal purposes, not for users or audiences. The only person who can see the site is you! So, why does anyone need to create a site in localhost?
The answer is already given in the above paragraph. Before going live with our site or making a visual presence, we should learn the basics and test the output of our developed solution. A localhost site lets us check and experience the updates, changes, settings, etc. to be sure about the final outputs.
Basically, developers use these sites to check their works for being sure about the quality and issues on it. But as a user, you too should create and use one or more localhost sites before making any update or adding a new feature.
So, a localhost site actually supports you to prepare for your next final move. Technology is going ahead rapidly so is the software industry. There is no chance to ignore the updating-upgrading process. Here comes the local host site to the rescue.
WordPress made it easy to install the solution with ease both in a c-panel or local host. Most of the famous hosting provider companies offer one-click installation for WordPress. But, you need to depend on a localhost webserver solution to create a database and save your files when you are creating a local site.
And there is a number of popular solution out there to set up your WordPress on Localhost. To make your job easy, we are mentioning four of the most popular localhost service providers.
In this post, we will show you how to install WordPress on localhost using XAMPP. This localhost server is famous for its overall support and quick response. You can install WordPress using WAMP, LAMP or MAMP, following the same way.
These are the software that creates localhost on your PC by utilizing web server software Apache, PHP, and MySQL. You may know-
PHP is a programming language and MySQL is a database management software. Both of them are required to run a WordPress site.
Installing each of this software separately is difficult and time-consuming for beginners. That’s why you need to depend on solutions like XAMPP/WAMP/LAMP/MAMP.
XAMPP vs WAMP vs MAMP vs LAMP: Which One is Perfect for Your Device
Among these solutions, XMAPP and WAMP are open-source and provide a free solution.
XAMPP is better than WAMP because it’s compatible with all the available operating systems like Windows, OS-X, and Linux. On the other hand, WAMP is limited only to the Windows operating system.
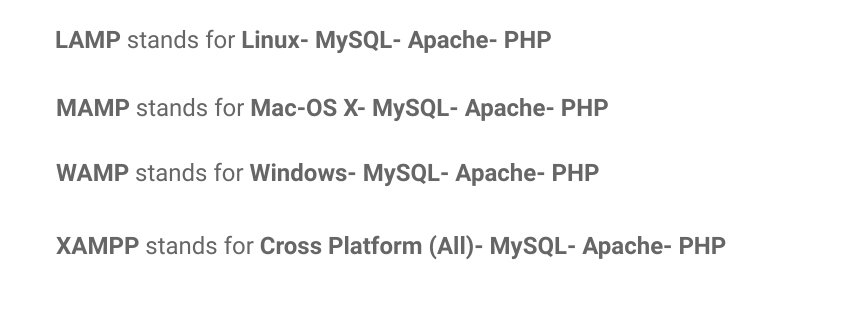
LAMP and MAMP are also open-source-based free localhost solutions and provide good support. But the problem is LAMP stands basically for Linux operating system and MAMP is limited only to Mac operating system.
And there are more localhost platforms like AMPPS.
So, which one is better compared to the others? You could find XAMPP as the best suite for any of the operating systems with its lots of features.
Now, let’s start with the first step.
Step 1- Download XAMPP
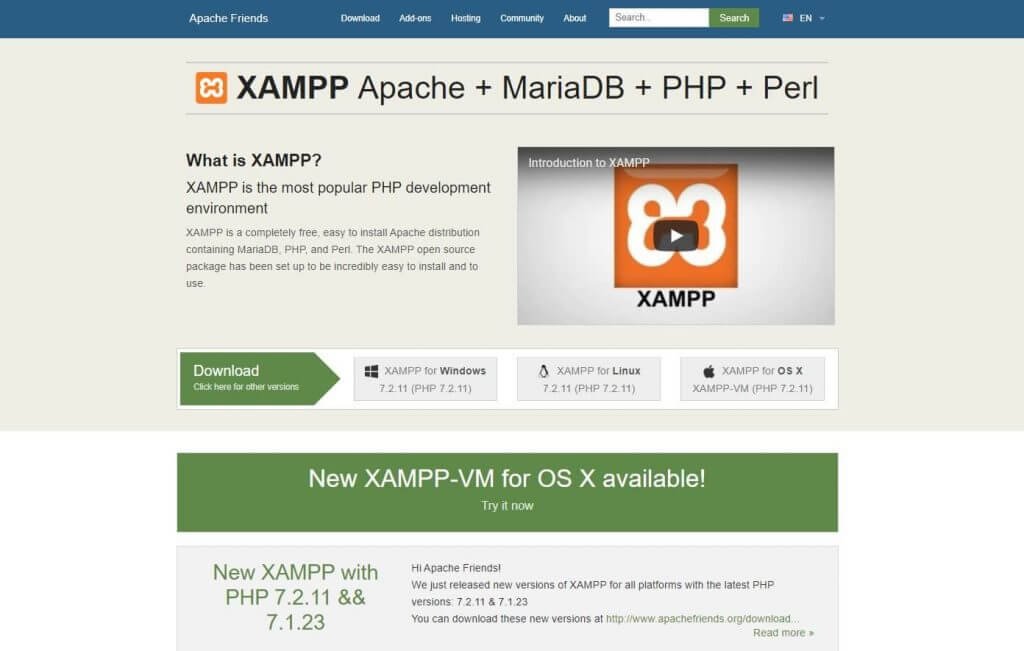
- Simply go to the XAMPP’s official website. Select your operating system and click on the download button.
- There are different versions for different operating systems. Choose the perfect one for your device.
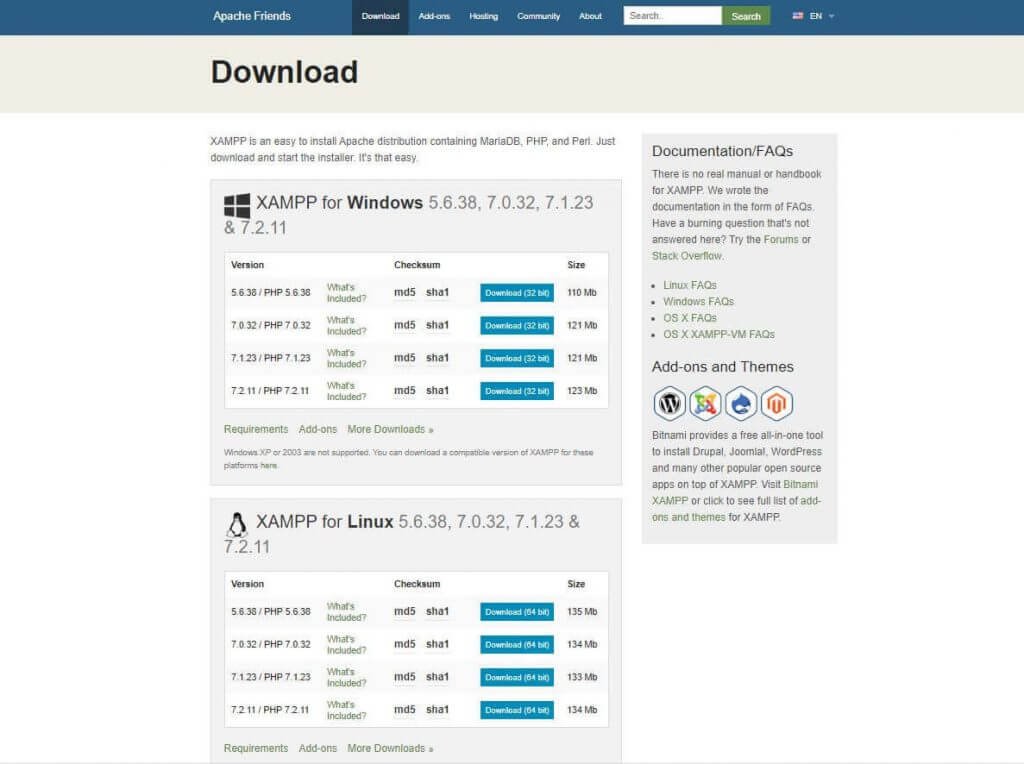
After clicking on the download button, wait for a few moments. It’s around 150 MB file, so you should give some time for it to get downloaded.
Step 2- Install & Run the XAMPP on Your PC
This is the second step. After downloading the software, you need to unzip it. When the file is ready, just select the Install button or click on it twice. Soon you will discover that the installation process has begun.
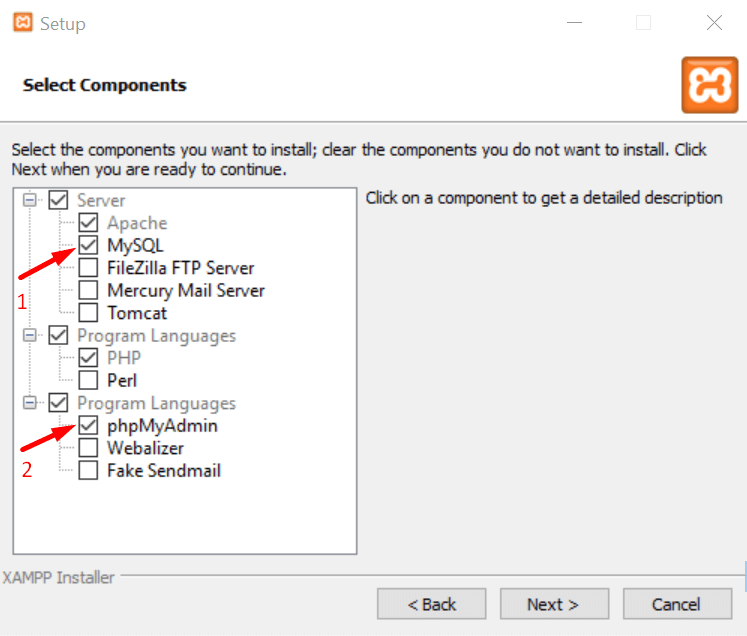
- In the next step, you will see some checkboxes that are already marked. You only need MySQL and phpMyAdmin, so unmark all the others.
- After a few moments, you would see a welcome notice. That means your installation process is working perfectly.
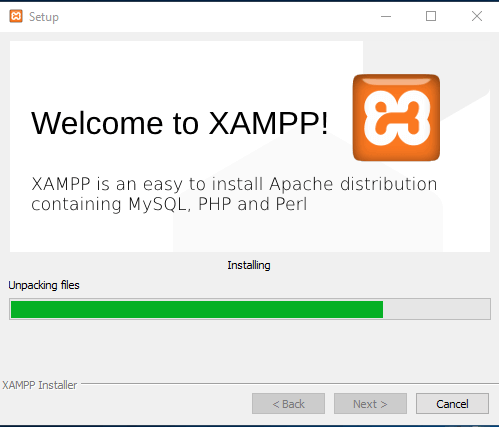
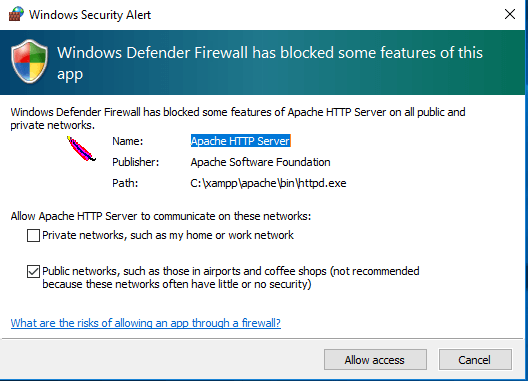
- If you have any antivirus software installed on your PC, you may see a security alert like this. Don’t worry, check any of the given networks and go ahead by clicking on the Allow access button.
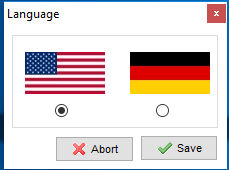
- You would see a language selection option, check one that you want and click on the Save button.
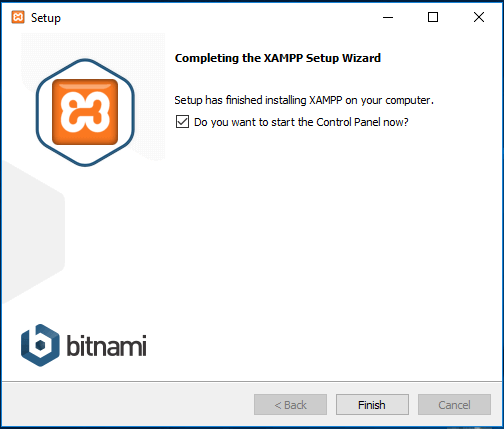
- You are almost at the end of the installation process. Just mark this question box and click on Finish button. The XAMPP control panel will automatically run on your device.

Congratulations! You have completed the XAMPP installation process!
Step 3- Download WordPress Latest Version
Now is the time to create a database and start installing WordPress on localhost. To do that, you need to download the latest version of WordPress.
- Go to the WordPress official website, and click on the Get WordPress button from the top right side. You will be redirected to a new page.
- Now hit on Download WordPress button.
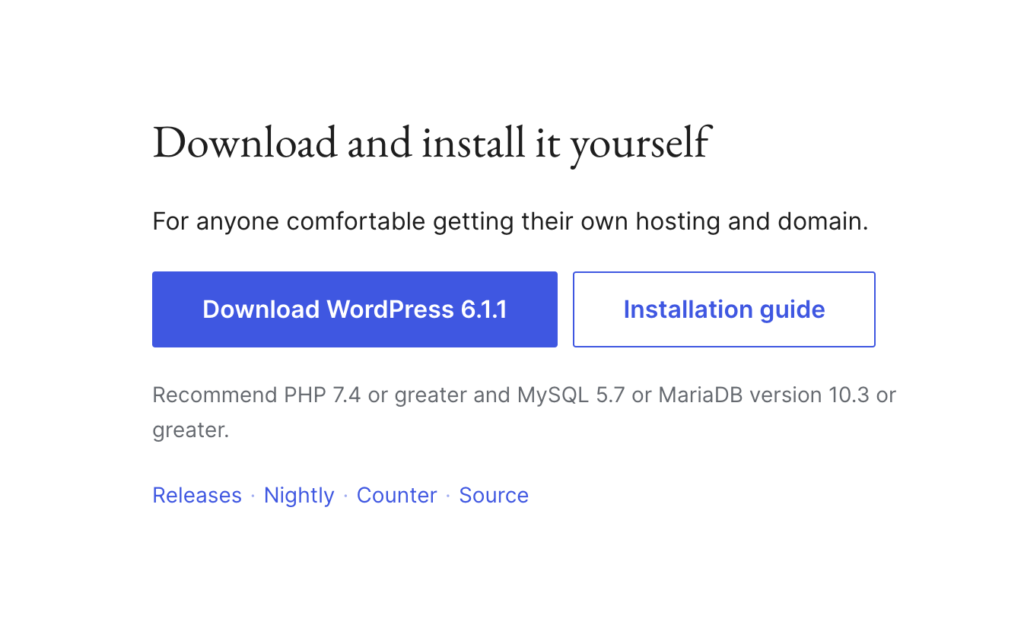
The download process might take a few moments to begin. You will get a zip file. Unzip the file and copy that for your next use.
Step 4- Create a Database
To create a database, first, you need to prepare a folder on your PC in which you want to save all the data of your local site.
- Go to your local disk, where you saved the downloaded XAMPP file.
- Select the htdocs folder and paste the WordPress latest version you copied earlier.
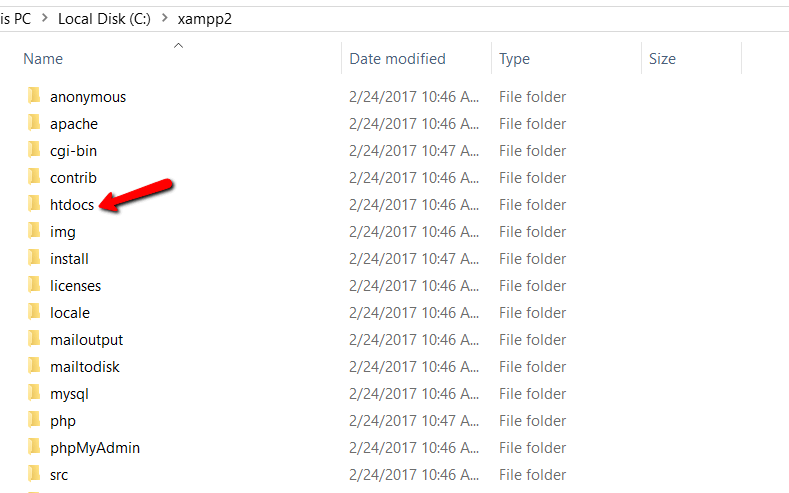
Now, rename the WordPress folder. You can avoid this option if you want to build your site with the name ‘WordPress’ itself.
We named the folder here ‘mytest’. Check the below screenshot. You should remember the name you have selected for your database.
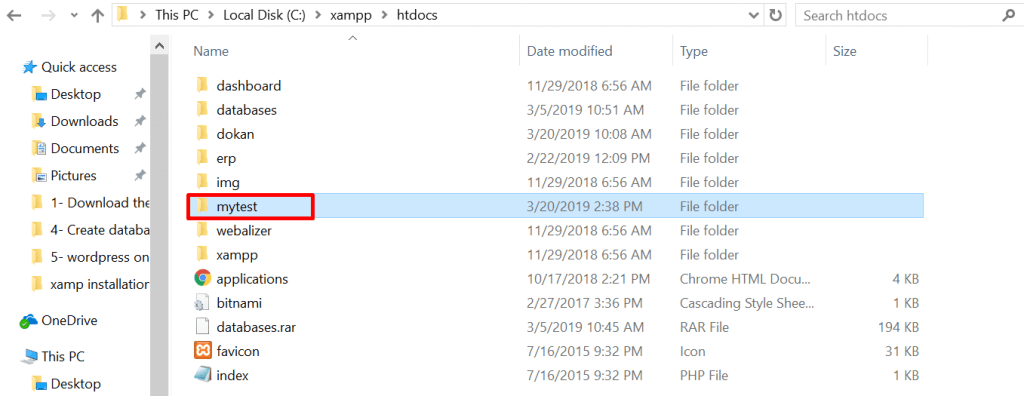
- Now, open a new tab on your browser and go to localhost/phpmyadmin
- Select Database
- Write the same name you have written on your local disk. And finally, click on the Create button. Your database will be created within a few seconds.

You have successfully created your localhost database. Now, is the turn to install WordPress on the localhost.
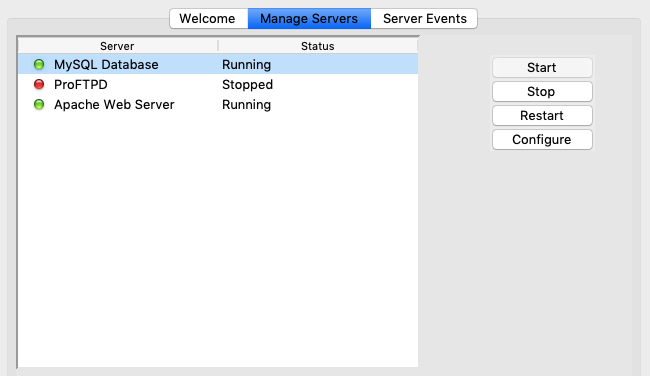
Note: Before going to the final step, you need to start both Apache Web Server and MySQL Database from the Xampp control panel installed on your PC or Mac. Without starting both of them, you can’t get access to PHPMyAdmin.
Just go to your app folder. Select the Xampp control panel and click on MySQL and Apache buttons. Have a look at below screenshot.
Step 5- Install WordPress on Localhost
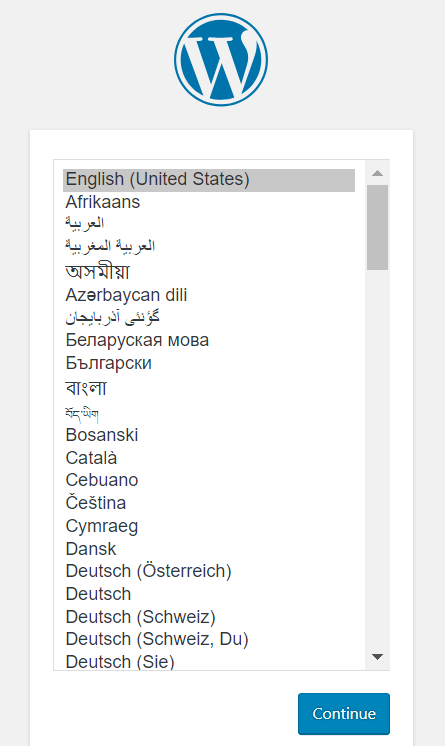
Open a new tab on your browser and write localhost/your given name (‘mytest‘ in our case) and hit on the Enter button. You will see a WordPress setup wizard like below.
- Select your language and click on continue
- You would see a welcome notice on behalf of WordPress. In the next step, WordPress will require
- A database Name
- A user name
- A password
- And a database host
- Just click on the Let’s go button
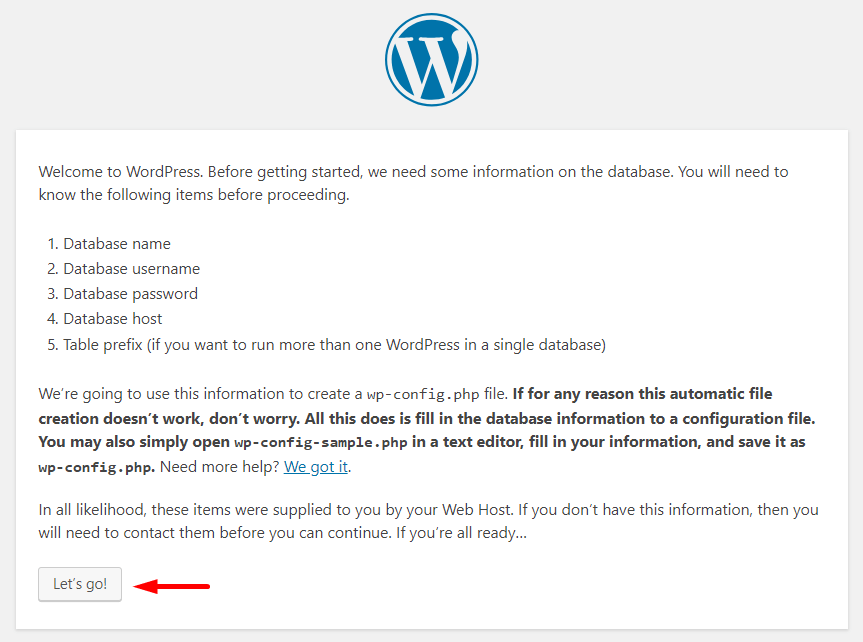
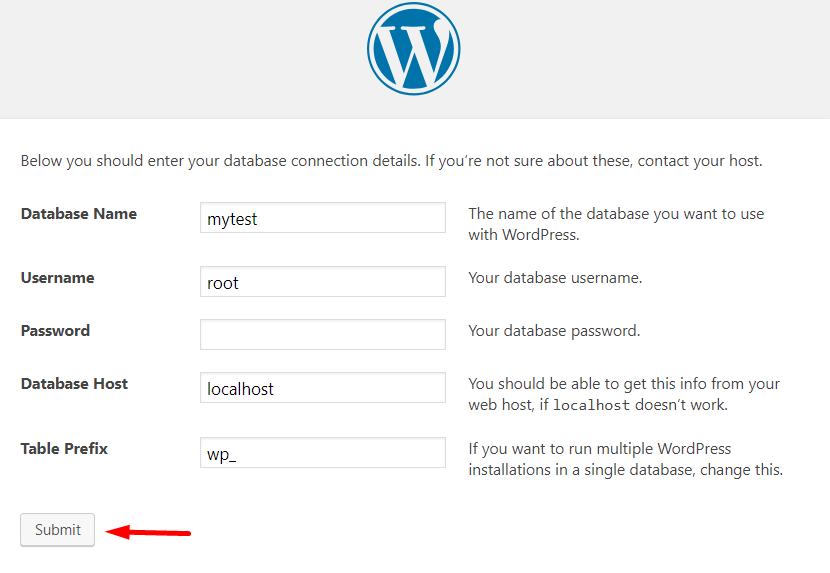
- These are the fields you can see in the below screenshot.
- Provide your database name, you can write ‘root’ as user name, and keep the password option blank- it’s better and you would find other fields filled up from earlier.
- Click on Submit button
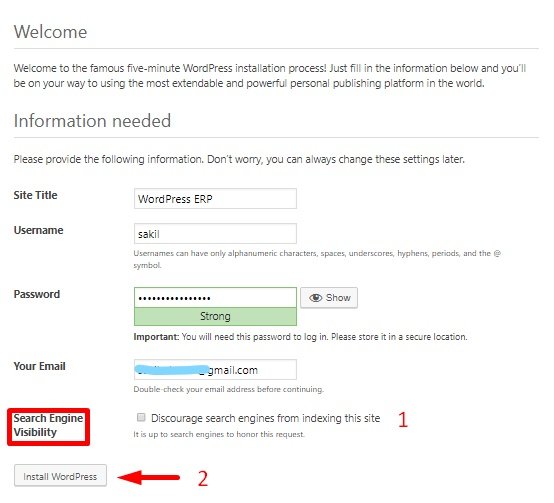
- This is your final step of installation.
- Give a name to your site. we named our site WordPress ERP here. You can also keep your database name as your site’s name.
- Write your username
- Give a strong password
- Write your personal e-mail address
- Carefully check the search engine visibility button. Otherwise, Google would start indexing your local site too!
- And, finally, click on the Install WordPress button!
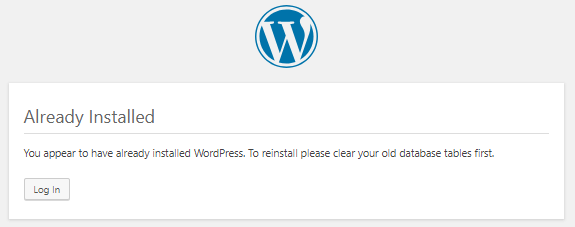
Yes, you have completed your installation. You should see a notice like below.
Check out the Site You Have Built
This is the time to check out your local site. How would it look like or how would it work? Give a check.
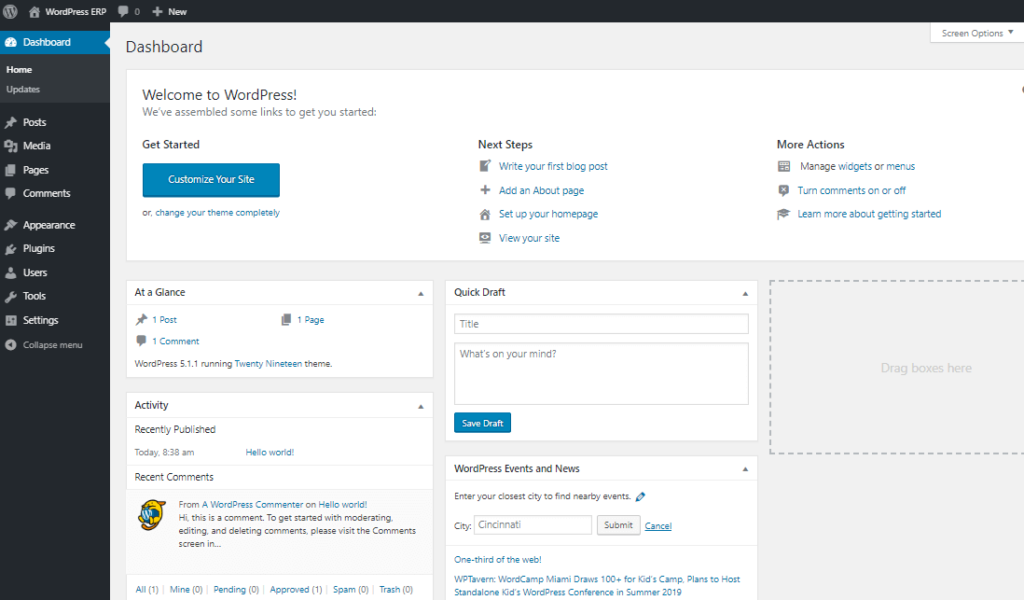
- This is your backend dashboard or admin panel, from where you would control everything.
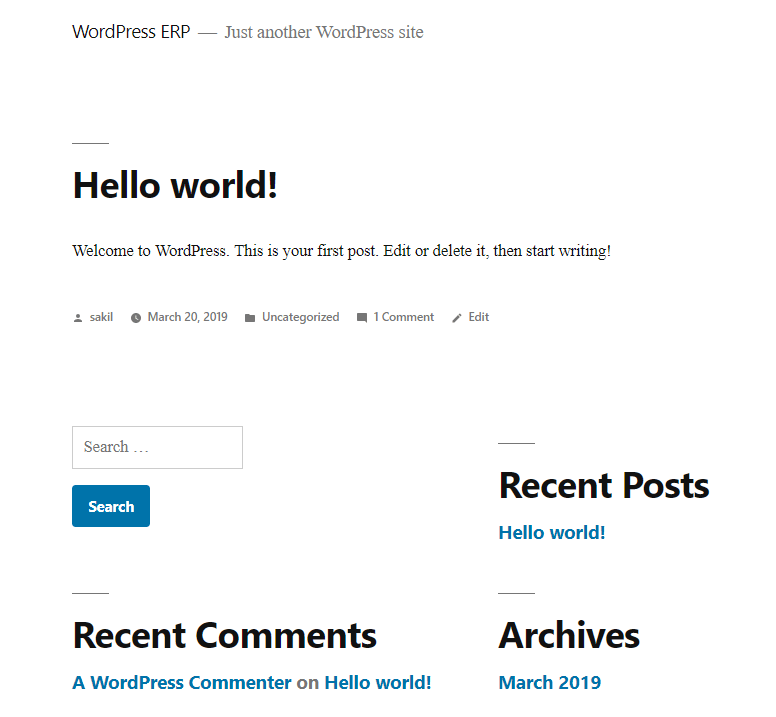
- And this is your front-end dashboard.
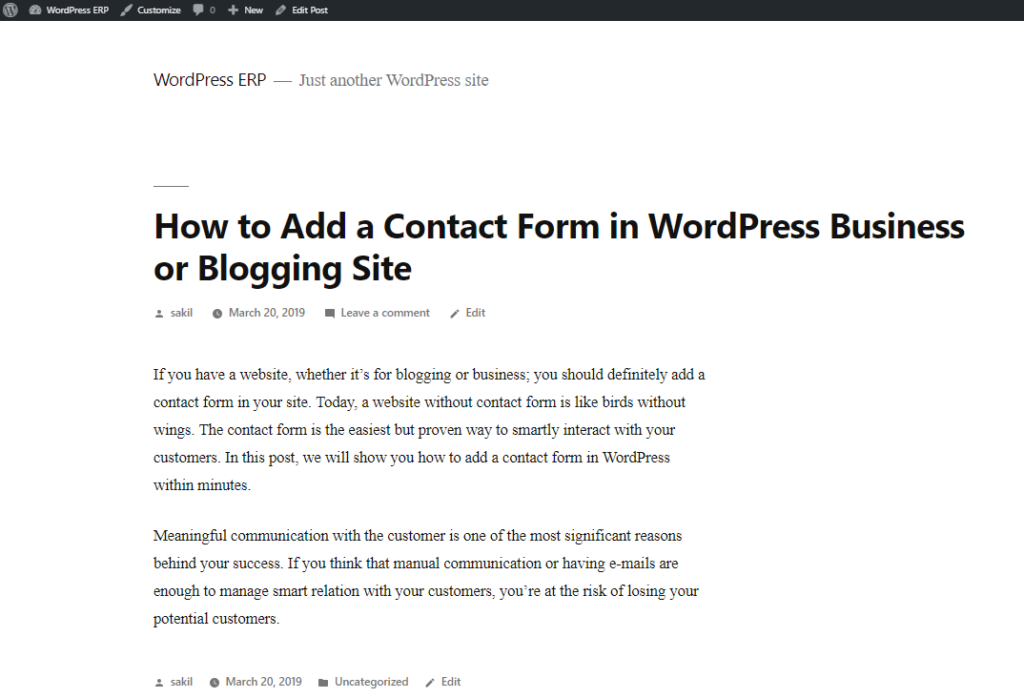
- You can check this by adding a new blog post or installing and activating a plugin/theme etc. We have published a blog post, it looks just like a live site- isn’t it?
So, this was the total process of building a personal testing site in a localhost environment. The process requires 5-10 minutes based on your capability.
Wrapping up on How to Install WordPress on Localhost
As CMS made it easy to build a website for people of any background, you can consider it as fun. Yes, building a website with WordPress is so easy these days. You already know- how to install WordPress on the localhost, so it’s your turn to build a site for learning WordPress or checking/testing any plugin/theme/update, etc.
WordPress started its journey just as a blogging platform, but over time it became the most powerful web platform for all sorts of websites. You can easily build an online shop or even a multi-vendor marketplace completely free of cost!
So, give it a try and let us know in the comment section below if there is any confusion. We are always here to help!
My Path to Becoming a Software Architect
First of all, let’s start with the definition of a software architect. In other posts that I’ve written which are

My Path to Becoming a Software Architect
First of all, let’s start with the definition of a software architect. In other posts that I’ve written which are similar to this, I’ve found it useful to start off with the definition.
According to Wikipedia:
A software architect is a computer programmer or expert who makes high-level design choices and dictates technical standards, including software coding standards, tools, and platforms.
So, as part of this role, you need to make design choices. You also need to be pretty knowledgeable about computer programming. Let’s have a look at some of the steps you need to take to become a software architect.
Yes, This Was My Path
In the past six years, I have worked with PHP, then moved to JavaScript, and became a team lead. I managed various developer teams, including PHP, Node.js, and other Web technologies. Created the architecture of the network layer for several services developed by the company, with sockets and REST API. I became acquainted with the managerial role and the prospect of growing in this direction while in the position of team lead for over two years. In my next role, my goal is to grow as a software architect.
For most developers, the function of the architect on the project is often unclear, so in this article, I will try to find the answers to these related questions. Who is an architect, what is the scope of responsibilities, and how to grow in this direction and outline an action plan for myself and beginners wanting to move along this path?
Who Can Benefit from This?
This article will help you if you belong to one of the following categories:
● IT developer or engineer. You are still growing as a developer, but you are looking ahead and planning your career. Even if the goals are initially vague, a person who consciously sets strategic goals will reach them much quicker than a person who does not plan where she is heading.
● Team leader, lead software engineer. You are at the highest stage of the software development discipline. To grow further, you have a choice to either learn one more stack of technologies, pursue a career outside software engineering, or become a software architect.
● Software architect. You recently took this position, or have been working in this field for a long time. Perhaps one of the main qualities of such a specialist is the understanding that there are always areas that a person does not know and that the learning process is continuous.
● IT manager. Although you are a manager, you understand perfectly well that you should at least approximately understand what your subordinates or colleagues are doing. The acute problem of management is the technical incompetence of the manager in the field in which he or she is managing.
Who is an Architect?
Before moving on to more specific questions, it is necessary to define the software architect’s role and responsibilities.
A software architect is a software expert who makes high-level design choices and dictates technical standards, including software coding standards, tools, and platforms. The leading expert is referred to as the chief architect. (Wikipedia, The Free Encyclopedia, s.v. “Software architect”, https://en.wikipedia.org/wiki/Software_architect
Like most high-level positions, there are no clear criteria that define this role. However, it is possible to identify several responsibilities and qualities that contribute to the career of an architect.
First, let’s consider the characteristics of the architect:
● Communicability. Having talked with many software architects, I heard that it is one of the essential characteristics of this specialist. During the working day, they have to speak with customers in the language of business, managers of all levels, business analysts, and developers. If you have a natural charisma and you know how to convince people, then this will be a huge plus, as it is crucial to explain your actions correctly. Architects are laconic, eloquent, and competent speakers. The software architects with whom I spoke have highly developed skills in communication and persuasion. Another reason why this characteristic is most important is that the architect in this role participates in most discussion-making processes, and often compromises must be reached that are acceptable and beneficial for all involved parties.
● Broad and deep technical knowledge. It should be obvious since one cannot become a software architect with a medical background. Besides, the architect usually has expertise in several technological stacks at a decent level and should have a good understanding of a few other ones. The software architect should also be prepared to compose a large number of technical documentation, reports, and diagrams.
● Responsibility. You should understand that architect decision are usually the most expensive. Therefore, a person in this position should take the most responsible approach to his work and the decisions made. If the developer’s error costs a couple of days of work of one person, then the architect’s mistake can cost person-years on complex projects!
● Stress resistance. You will have to make decisions because in this role, you will be asked to do so, and you will need a response. You will be working with different people from different areas, and you will have to deal with rapidly changing demands or even with changing business environments. Therefore, it is necessary to be ready for stress and to look for some ways to escape negative emotions. Work is always more pleasant when it brings pleasure. So if you choose this role only for the money, then think again.
● Management skills. This includes both organizational and leadership skills. The ability to lead a team, which may be distributed and composed of very different specialists, is essential.
● Analytic skills. Even if a specialist has a broad erudition in technology, he has tried many things on his own or participated in projects of various types. It does not guarantee that he can easily change his style of thinking to an architect. One of the most valuable tasks is the ability to represent an abstract problem in the form of some finite real object of the system, which developers are already evaluating, designing, and developing. Excellent communication skills are essential to represent the abstraction in the form of the final system to the members of the team and the customer. It will be necessary to communicate with both business and development, which is still to be done.
If we talk about the responsibilities of the architect, then here is the perfect example from the 19th century about bridge construction. At that time, the tests of the newly constructed bridge were the following: the key group of engineers, architects, and workers stood under the bridge while the first vehicles were on it. Thus, they staked their lives upon the construction and the strength of the structure. So if there is a question — what is the responsibility of the software architect on the project? The answer is, he is responsible for everything.
If you give up loud and beautiful phrases, then the architect’s work includes:
● Identifying the stakeholders on the project.
● Identifying business requirements and requirements of the stakeholders on the project.
● Designing the entire system based on the received requirements.
● Choosing the system architecture and each component of this system at a high level.
● Choosing the technologies for the implementation of each component and connections between the parts.
● Architectural review. Yes, yes, it exists.
● Code-review.
● Writing project documentation and supporting it.
● Creating unified development standards in the company.
● Controlling the architecture during the next iteration of the system release.
It is only a subset of the software architect’s responsibilities. The most important responsibility is full technical support of the project from the moment of inception, through product release, to the development of enhancements. And supporting the next releases. It will be necessary to switch a lot between different tasks during the working day.
How to Become a Software Architect?
To begin with, it is requisite to define milestone goals that lead to achieving your strategic goal of becoming a software architect. For me, such goals for the next six months are:
● Understand and try several technological stacks. My current knowledge is concentrated in the field of iOS. It is necessary to try Android, several server languages, to start python, and refresh Java EE skills. The architect is a full-stack developer, so it is essential to have broad technical knowledge.
● Reading literature. It is required to determine the most valuable books and articles that will help to grow in this direction. Usually, the most effective way to find such literature is to ask other professionals in this field for their recommendations. In one of the future articles, I plan to give you such a list of literature.
● Find a mentor. It is desirable to find a software architect at your current place of employment. It is always easier to get experience from a trained specialist than to start considering a particular area from scratch. It is requisite to be prepared to ask the right questions from your mentor.
● Study courses/obtain certificates. There are many courses and certifications available, but only a few are worth their money and the higher-level courses cost a lot of money. I have attended the architectural courses in internal certification of my company. It is crucial that the lecturer of the course be a professional in this field and be able to answer questions. As for certificates, before starting, it is best to understand whether there are authoritative certification systems for architects and whether it is worthwhile obtaining the certification.
One of the essential parts is a clear and stable plan review. What has been done, what should be reviewed, and where to accelerate or which goal to remove as useless.
Check Your Readiness Level
If you are interested in this introductory article from the series on how to become a software architect, or if you suddenly have thoughts to try this path, it is worth making sure that you want it.
Firstly, people are afraid of everything new. A new position, a new kind of stress, as opposed to the comfortable status quo. Of course, the choice is not always unambiguous and depends on how much you are willing to change something in your life. At the same time, it can depend not only on you but also on the family, your financial commitments, parents, and other factors.
Secondly, this path takes several years. The process of becoming a software architect does not happen overnight. As a team lead, I realized what to do and how to deal with stress only a year after I was appointed to an official position. At the same time, six months before that, I performed it unofficially. One software architect I know said that he understood what his responsibilities are 18 months after he was promoted to this role. Such intervals of time are reasonable, and you need to know whether you are ready to move in this direction. Even if you do not have a stable plan available, it is better to start taking small steps that move you ahead, rather than remaining in the same place.
Standing in the same place in IT is a synonym for stagnation and personal fetters in life.
Recommended Books
How To Install Linux, Apache, MySQL, PHP (LAMP) stack on Ubuntu
A “LAMP” stack is a group of open-source software that is typically installed together to enable a server to host
How To Install Linux, Apache, MySQL, PHP (LAMP) stack on Ubuntu
A “LAMP” stack is a group of open-source software that is typically installed together to enable a server to host dynamic websites and web apps. This term is actually an acronym that represents the Linux operating system, with the Apache web server. The site data is stored in a MySQL database, and dynamic content is processed by PHP.
In this guide, we will install a LAMP stack on an Ubuntu 18.04 server.
Prerequisites
In order to complete this tutorial, you will need to have an Ubuntu 18.04 server with a non-root sudo-enabled user account and a basic firewall.
Step 1 — Installing Apache and Updating the Firewall
The Apache web server is among the most popular web servers in the world. It’s well-documented and has been in wide use for much of the history of the web, which makes it a great default choice for hosting a website.
Install Apache using Ubuntu’s package manager, apt:
sudo apt update
sudo apt install apache2
Since this is a sudo command, these operations are executed with root privileges. It will ask you for your regular user’s password to verify your intentions.
Once you’ve entered your password, apt will tell you which packages it plans to install and how much extra disk space they’ll take up. Press Y and hit ENTER to continue, and the installation will proceed.
Adjust the Firewall to Allow Web Traffic
Next, assuming that you have followed the initial server setup instructions and enabled the UFW firewall, make sure that your firewall allows HTTP and HTTPS traffic. You can check that UFW has an application profile for Apache like so:
sudo ufw app list
OutputAvailable applications:
  Apache
  Apache Full
  Apache Secure
  OpenSSH
If you look at the Apache Full profile, it should show that it enables traffic to ports 80 and 443:
sudo ufw app info "Apache Full"
OutputProfile: Apache Full
Title: Web Server (HTTP,HTTPS)
Description: Apache v2 is the next generation of the omnipresent Apache web
server.
Ports:
  80,443/tcp
Allow incoming HTTP and HTTPS traffic for this profile:
sudo ufw allow in "Apache Full"
You can do a spot check right away to verify that everything went as planned by visiting your server’s public IP address in your web browser (see the note under the next heading to find out what your public IP address is if you do not have this information already):
http://your_server_ip
You will see the default Ubuntu 18.04 Apache web page, which is there for informational and testing purposes. It should look something like this:
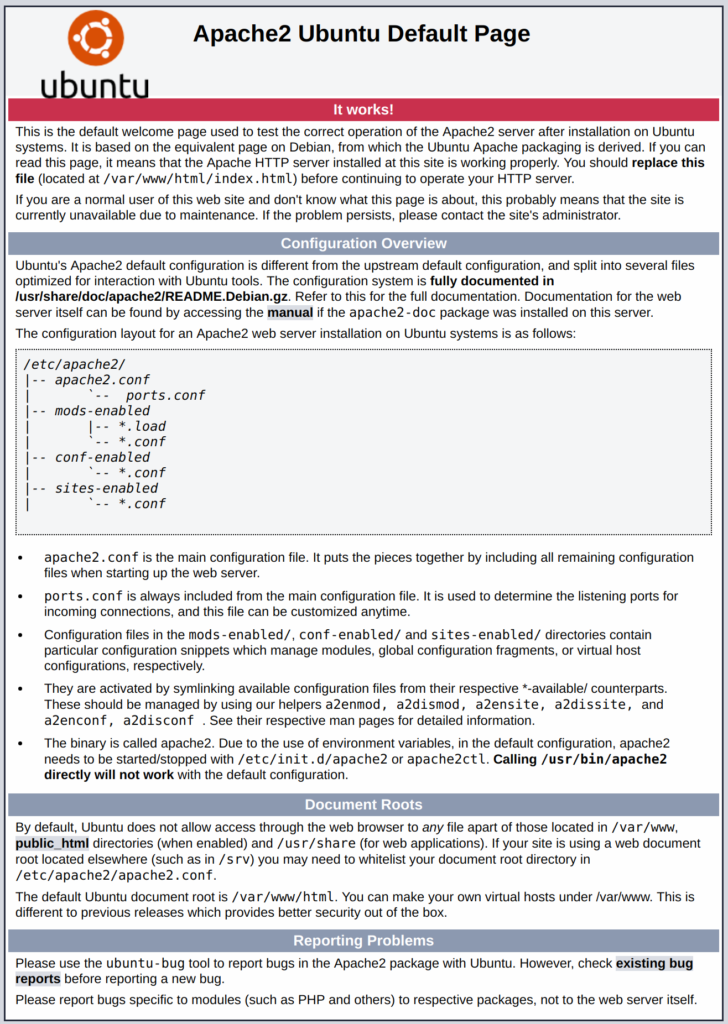
If you see this page, then your web server is now correctly installed and accessible through your firewall.
How To Find your Server’s Public IP Address
If you do not know what your server’s public IP address is, there are a number of ways you can find it. Usually, this is the address you use to connect to your server through SSH.
There are a few different ways to do this from the command line. First, you could use the iproute2 tools to get your IP address by typing this:
ip addr show eth0 | grep inet | awk '{ print $2; }' | sed 's/\/.*$//'
This will give you two or three lines back. They are all correct addresses, but your computer may only be able to use one of them, so feel free to try each one.
An alternative method is to use the curl utility to contact an outside party to tell you how it sees your server. This is done by asking a specific server what your IP address is:
sudo apt install curl
curl http://icanhazip.com
Regardless of the method you use to get your IP address, type it into your web browser’s address bar to view the default Apache page.
Step 2 — Installing MySQL
Now that you have your web server up and running, it is time to install MySQL. MySQL is a database management system. Basically, it will organize and provide access to databases where your site can store information.
Again, use apt to acquire and install this software:
sudo apt install mysql-server
Note: In this case, you do not have to run sudo apt update prior to the command. This is because you recently ran it in the commands above to install Apache. The package index on your computer should already be up-to-date.
This command, too, will show you a list of the packages that will be installed, along with the amount of disk space they’ll take up. Enter Y to continue.
When the installation is complete, run a simple security script that comes pre-installed with MySQL which will remove some dangerous defaults and lock down access to your database system. Start the interactive script by running:
sudo mysql_secure_installation
This will ask if you want to configure the VALIDATE PASSWORD PLUGIN.
Note: Enabling this feature is something of a judgment call. If enabled, passwords which don’t match the specified criteria will be rejected by MySQL with an error. This will cause issues if you use a weak password in conjunction with software which automatically configures MySQL user credentials, such as the Ubuntu packages for phpMyAdmin. It is safe to leave validation disabled, but you should always use strong, unique passwords for database credentials.
Answer Y for yes, or anything else to continue without enabling.
VALIDATE PASSWORD PLUGIN can be used to test passwords
and improve security. It checks the strength of password
and allows the users to set only those passwords which are
secure enough. Would you like to setup VALIDATE PASSWORD plugin?
Press y|Y for Yes, any other key for No:
If you answer “yes”, you’ll be asked to select a level of password validation. Keep in mind that if you enter 2 for the strongest level, you will receive errors when attempting to set any password which does not contain numbers, upper and lowercase letters, and special characters, or which is based on common dictionary words.
There are three levels of password validation policy:
LOW    Length >= 8
MEDIUM Length >= 8, numeric, mixed case, and special characters
STRONG Length >= 8, numeric, mixed case, special characters and dictionary                  file
Please enter 0 = LOW, 1 = MEDIUM and 2 = STRONG: 1
Regardless of whether you chose to set up the VALIDATE PASSWORD PLUGIN, your server will next ask you to select and confirm a password for the MySQL root user. This is an administrative account in MySQL that has increased privileges. Think of it as being similar to the root account for the server itself (although the one you are configuring now is a MySQL-specific account). Make sure this is a strong, unique password, and do not leave it blank.
If you enabled password validation, you’ll be shown the password strength for the root password you just entered and your server will ask if you want to change that password. If you are happy with your current password, enter N for “no” at the prompt:
Using existing password for root.
Estimated strength of the password: 100
Change the password for root ? ((Press y|Y for Yes, any other key for No) : n
For the rest of the questions, press Y and hit the ENTER key at each prompt. This will remove some anonymous users and the test database, disable remote root logins, and load these new rules so that MySQL immediately respects the changes you have made.
Note that in Ubuntu systems running MySQL 5.7 (and later versions), the root MySQL user is set to authenticate using the auth_socket plugin by default rather than with a password. This allows for some greater security and usability in many cases, but it can also complicate things when you need to allow an external program (e.g., phpMyAdmin) to access the user.
If you prefer to use a password when connecting to MySQL as root, you will need to switch its authentication method from auth_socket to mysql_native_password. To do this, open up the MySQL prompt from your terminal:
sudo mysql
Next, check which authentication method each of your MySQL user accounts use with the following command:
SELECT user,authentication_string,plugin,host FROM mysql.user;
Output+------------------+-------------------------------------------+-----------------------+-----------+
| user             | authentication_string                     | plugin                | host      |
+------------------+-------------------------------------------+-----------------------+-----------+
| root             |                                           | auth_socket           | localhost |
| mysql.session    | *THISISNOTAVALIDPASSWORDTHATCANBEUSEDHERE | mysql_native_password | localhost |
| mysql.sys        | *THISISNOTAVALIDPASSWORDTHATCANBEUSEDHERE | mysql_native_password | localhost |
| debian-sys-maint | *CC744277A401A7D25BE1CA89AFF17BF607F876FF | mysql_native_password | localhost |
+------------------+-------------------------------------------+-----------------------+-----------+
4 rows in set (0.00 sec)
In this example, you can see that the root user does in fact authenticate using the auth_socket plugin. To configure the root account to authenticate with a password, run the following ALTER USER command. Be sure to change password to a strong password of your choosing:
ALTER USER 'root'@'localhost' IDENTIFIED WITH mysql_native_password BY 'password';
Then, run FLUSH PRIVILEGES which tells the server to reload the grant tables and put your new changes into effect:
FLUSH PRIVILEGES;
Check the authentication methods employed by each of your users again to confirm that root no longer authenticates using the auth_socket plugin:
SELECT user,authentication_string,plugin,host FROM mysql.user;
Output+------------------+-------------------------------------------+-----------------------+-----------+
| user             | authentication_string                     | plugin                | host      |
+------------------+-------------------------------------------+-----------------------+-----------+
| root             | *3636DACC8616D997782ADD0839F92C1571D6D78F | mysql_native_password | localhost |
| mysql.session    | *THISISNOTAVALIDPASSWORDTHATCANBEUSEDHERE | mysql_native_password | localhost |
| mysql.sys        | *THISISNOTAVALIDPASSWORDTHATCANBEUSEDHERE | mysql_native_password | localhost |
| debian-sys-maint | *CC744277A401A7D25BE1CA89AFF17BF607F876FF | mysql_native_password | localhost |
+------------------+-------------------------------------------+-----------------------+-----------+
4 rows in set (0.00 sec)
You can see in this example output that the root MySQL user now authenticates using a password. Once you confirm this on your own server, you can exit the MySQL shell:
exit
At this point, your database system is now set up and you can move on to installing PHP, the final component of the LAMP stack.
Step 3 — Installing PHP
PHP is the component of your setup that will process code to display dynamic content. It can run scripts, connect to your MySQL databases to get information, and hand the processed content over to your web server to display.
Once again, leverage the apt system to install PHP. In addition, include some helper packages this time so that PHP code can run under the Apache server and talk to your MySQL database:
sudo apt install php libapache2-mod-php php-mysql
This should install PHP without any problems. We’ll test this in a moment.
In most cases, you will want to modify the way that Apache serves files when a directory is requested. Currently, if a user requests a directory from the server, Apache will first look for a file called index.html. We want to tell the web server to prefer PHP files over others, so make Apache look for an index.php file first.
To do this, type this command to open the dir.conf file in a text editor with root privileges:
sudo nano /etc/apache2/mods-enabled/dir.conf
It will look like this:/etc/apache2/mods-enabled/dir.conf
<IfModule mod_dir.c>
    DirectoryIndex index.html index.cgi index.pl index.php index.xhtml index.htm
</IfModule>
Move the PHP index file (highlighted above) to the first position after the DirectoryIndex specification, like this:/etc/apache2/mods-enabled/dir.conf
<IfModule mod_dir.c>
    DirectoryIndex index.php index.html index.cgi index.pl index.xhtml index.htm
</IfModule>
When you are finished, save and close the file by pressing CTRL+X. Confirm the save by typing Y and then hit ENTER to verify the file save location.
After this, restart the Apache web server in order for your changes to be recognized. Do this by typing this:
sudo systemctl restart apache2
You can also check on the status of the apache2 service using systemctl:
sudo systemctl status apache2
Sample Output● apache2.service - LSB: Apache2 web server
   Loaded: loaded (/etc/init.d/apache2; bad; vendor preset: enabled)
  Drop-In: /lib/systemd/system/apache2.service.d
           └─apache2-systemd.conf
   Active: active (running) since Tue 2018-04-23 14:28:43 EDT; 45s ago
     Docs: man:systemd-sysv-generator(8)
  Process: 13581 ExecStop=/etc/init.d/apache2 stop (code=exited, status=0/SUCCESS)
  Process: 13605 ExecStart=/etc/init.d/apache2 start (code=exited, status=0/SUCCESS)
    Tasks: 6 (limit: 512)
   CGroup: /system.slice/apache2.service
           ├─13623 /usr/sbin/apache2 -k start
           ├─13626 /usr/sbin/apache2 -k start
           ├─13627 /usr/sbin/apache2 -k start
           ├─13628 /usr/sbin/apache2 -k start
           ├─13629 /usr/sbin/apache2 -k start
           └─13630 /usr/sbin/apache2 -k start
Press Q to exit this status output.
To enhance the functionality of PHP, you have the option to install some additional modules. To see the available options for PHP modules and libraries, pipe the results of apt search into less, a pager which lets you scroll through the output of other commands:
apt search php- | less
Use the arrow keys to scroll up and down, and press Q to quit.
The results are all optional components that you can install. It will give you a short description for each:
bandwidthd-pgsql/bionic 2.0.1+cvs20090917-10ubuntu1 amd64
  Tracks usage of TCP/IP and builds html files with graphs
bluefish/bionic 2.2.10-1 amd64
  advanced Gtk+ text editor for web and software development
cacti/bionic 1.1.38+ds1-1 all
  web interface for graphing of monitoring systems
ganglia-webfrontend/bionic 3.6.1-3 all
  cluster monitoring toolkit - web front-end
golang-github-unknwon-cae-dev/bionic 0.0~git20160715.0.c6aac99-4 all
  PHP-like Compression and Archive Extensions in Go
haserl/bionic 0.9.35-2 amd64
  CGI scripting program for embedded environments
kdevelop-php-docs/bionic 5.2.1-1ubuntu2 all
  transitional package for kdevelop-php
kdevelop-php-docs-l10n/bionic 5.2.1-1ubuntu2 all
  transitional package for kdevelop-php-l10n
…
:
To learn more about what each module does, you could search the internet for more information about them. Alternatively, look at the long description of the package by typing:
apt show package_name
There will be a lot of output, with one field called Description which will have a longer explanation of the functionality that the module provides.
For example, to find out what the php-cli module does, you could type this:
apt show php-cli
Along with a large amount of other information, you’ll find something that looks like this:
Output…
Description: command-line interpreter for the PHP scripting language (default)
 This package provides the /usr/bin/php command interpreter, useful for
 testing PHP scripts from a shell or performing general shell scripting tasks.
 .
 PHP (recursive acronym for PHP: Hypertext Preprocessor) is a widely-used
 open source general-purpose scripting language that is especially suited
 for web development and can be embedded into HTML.
 .
 This package is a dependency package, which depends on Ubuntu's default
 PHP version (currently 7.2).
…
If, after researching, you decide you would like to install a package, you can do so by using the apt install command like you have been doing for the other software.
If you decided that php-cli is something that you need, you could type:
sudo apt install php-cli
If you want to install more than one module, you can do that by listing each one, separated by a space, following the apt install command, like this:
sudo apt install package1 package2 ...
At this point, your LAMP stack is installed and configured. Before you do anything else, we recommend that you set up an Apache virtual host where you can store your server’s configuration details.
Step 4: Install PhpMyAdmin on Ubuntu 18.04
11. Finally, you can install phpMyAdmin for administrating MySQL/MariaDB databases from the comfort of a web browser, by running following command.
$ sudo apt install phpmyadminThrough the package installation process, you will be asked to choose the web server that should be automatically configured to run phpMyAdmin, select apache by pressing the space bar and press Enter.


12. Next, enter the password for the MySQL/MariaDB administrative user so the installer can create database for phpmyadmin.

13. Once everything installed, you can now restart the apache2 service to effect the recent changes.
$ sudo systemctl restart apache2
Note: If the PhpMyAdmin package has not been enable to work with apache web server automatically, run the following commands to copy the phpmyadmin apache configuration file located under /etc/phpmyadmin/ to apache webserver available configurations directory /etc/apache2/conf-available/ and then activate it using the a2enconf utility, and restart apache service effect the recent changes, as follows.
$ sudo cp /etc/phpmyadmin/apache.conf /etc/apache2/conf-available/phpmyadmin.conf
$ sudo a2enconf phpmyadmin
$ sudo systemctl restart apache2
14. Lastly, from a web browser, and type the following URL to access you phpMyAdmin web frontend.
http://domain_name/phpmyadmin
OR
http://SERVER_IP/phpmyadmin
Use the root credentials to authenticate in the phpMyAdmin, as shown in the following screen shot.
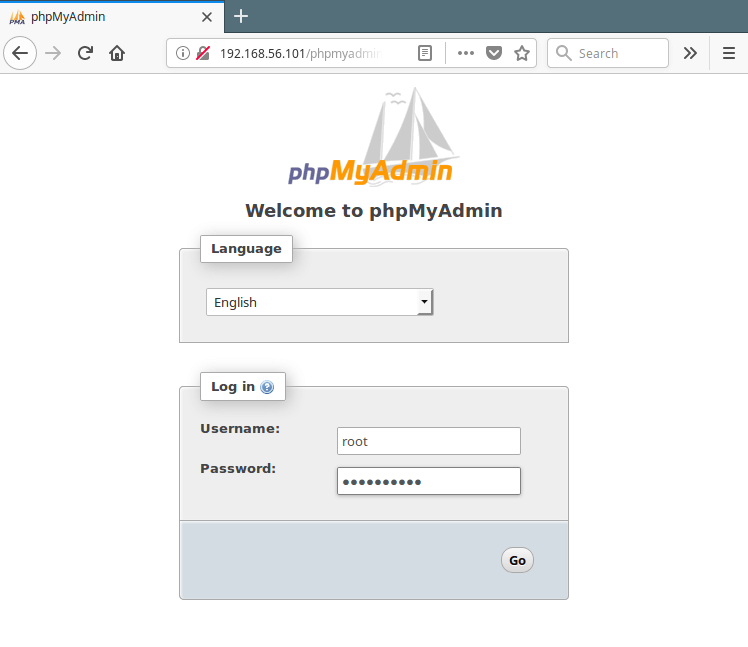
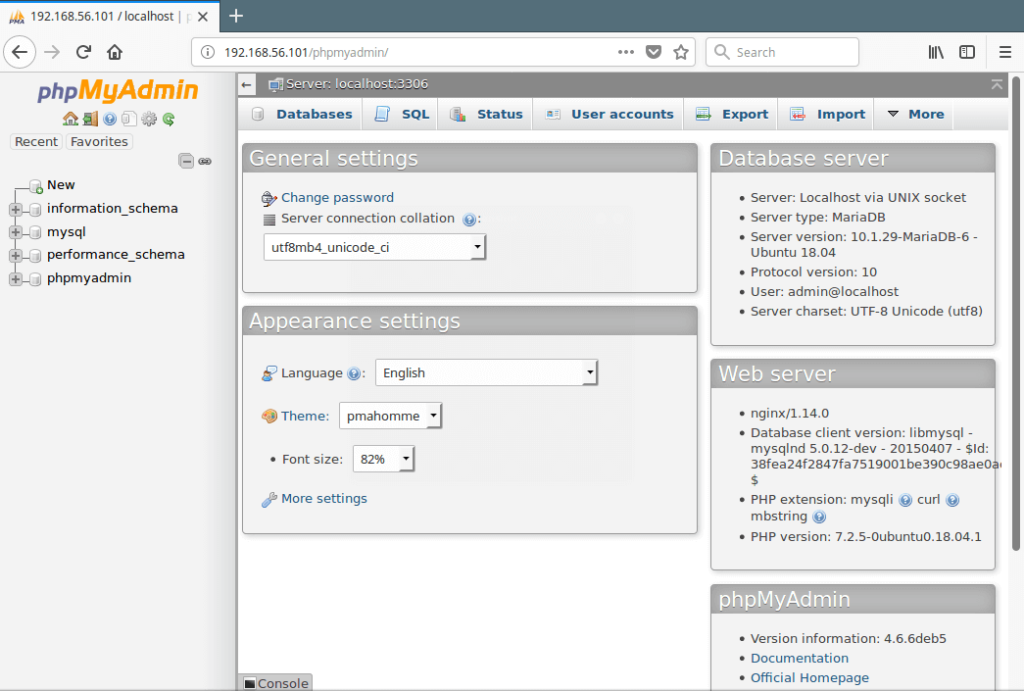
Important: Starting from MySQL 5.7, root login requires sudo command, therefore the root login will fail via phpmyadmin, you may need to create another admin user account. Access the mariadb shell using the root account from a terminal, and run the following commands to create a new user:
$ sudo mysql -u root -p
> CREATE USER 'admin'@'localhost' IDENTIFIED BY '=@!#254tecmint';
> GRANT ALL PRIVILEGES ON *.* TO 'admin'@'localhost' WITH GRANT OPTION;
> FLUSH PRIVILEGES;
Now log into PhpMyAdmin using the new admin credentials to administer your databases.
Step 5 — Setting Up Virtual Hosts (Recommended)
When using the Apache web server, you can use virtual hosts (similar to server blocks in Nginx) to encapsulate configuration details and host more than one domain from a single server. We will set up a domain called your_domain, but you should replace this with your own domain name. To learn more about setting up a domain name with DigitalOcean, see our Introduction to DigitalOcean DNS.
Apache on Ubuntu 18.04 has one server block enabled by default that is configured to serve documents from the /var/www/html directory. While this works well for a single site, it can become unwieldy if you are hosting multiple sites. Instead of modifying /var/www/html, let’s create a directory structure within /var/www for our your_domain site, leaving /var/www/html in place as the default directory to be served if a client request doesn’t match any other sites.
Create the directory for your_domain as follows:
sudo mkdir /var/www/your_domain
Next, assign ownership of the directory with the $USER environment variable:
sudo chown -R $USER:$USER /var/www/your_domain
The permissions of your web roots should be correct if you haven’t modified your unmask value, but you can make sure by typing:
sudo chmod -R 755 /var/www/your_domain
Next, create a sample index.html page using nano or your favorite editor:
nano /var/www/your_domain/index.html
Inside, add the following sample HTML:/var/www/your_domain/index.html
<html>
    <head>
        <title>Welcome to Your_domain!</title>
    </head>
    <body>
        <h1>Success!  The your_domain server block is working!</h1>
    </body>
</html>
Save and close the file when you are finished.
In order for Apache to serve this content, it’s necessary to create a virtual host file with the correct directives. Instead of modifying the default configuration file located at /etc/apache2/sites-available/000-default.conf directly, let’s make a new one at /etc/apache2/sites-available/your_domain.conf:
sudo nano /etc/apache2/sites-available/your_domain.conf
Paste in the following configuration block, which is similar to the default, but updated for our new directory and domain name:/etc/apache2/sites-available/your_domain.conf
<VirtualHost *:80>
    ServerAdmin webmaster@localhost
    ServerName your_domain
    ServerAlias www.your_domain
    DocumentRoot /var/www/your_domain
    ErrorLog ${APACHE_LOG_DIR}/error.log
    CustomLog ${APACHE_LOG_DIR}/access.log combined
</VirtualHost>
Notice that we’ve updated the DocumentRoot to our new directory and ServerAdmin to an email that the your_domain site administrator can access. We’ve also added two directives: ServerName, which establishes the base domain that should match for this virtual host definition, and ServerAlias, which defines further names that should match as if they were the base name.
Save and close the file when you are finished.
Let’s enable the file with the a2ensite tool:
sudo a2ensite your_domain.conf
Disable the default site defined in 000-default.conf:
sudo a2dissite 000-default.conf
Next, let’s test for configuration errors:
sudo apache2ctl configtest
You should see the following output:
OutputSyntax OK
Restart Apache to implement your changes:
sudo systemctl restart apache2
Apache should now be serving your domain name. You can test this by navigating to http://your_domain, where you should see something like this:
With that, you virtual host is fully set up. Before making any more changes or deploying an application, though, it would be helpful to proactively test out your PHP configuration in case there are any issues that should be addressed.
Step 6 — Testing PHP Processing on your Web Server
In order to test that your system is configured properly for PHP, create a very basic PHP script called info.php. In order for Apache to find this file and serve it correctly, it must be saved to your web root directory.
Create the file at the web root you created in the previous step by running:
sudo nano /var/www/your_domain/info.php
This will open a blank file. Add the following text, which is valid PHP code, inside the file:info.php
<?php
phpinfo();
?>
When you are finished, save and close the file.
Now you can test whether your web server is able to correctly display content generated by this PHP script. To try this out, visit this page in your web browser. You’ll need your server’s public IP address again.
The address you will want to visit is:
http://your_domain/info.php
The page that you come to should look something like this:
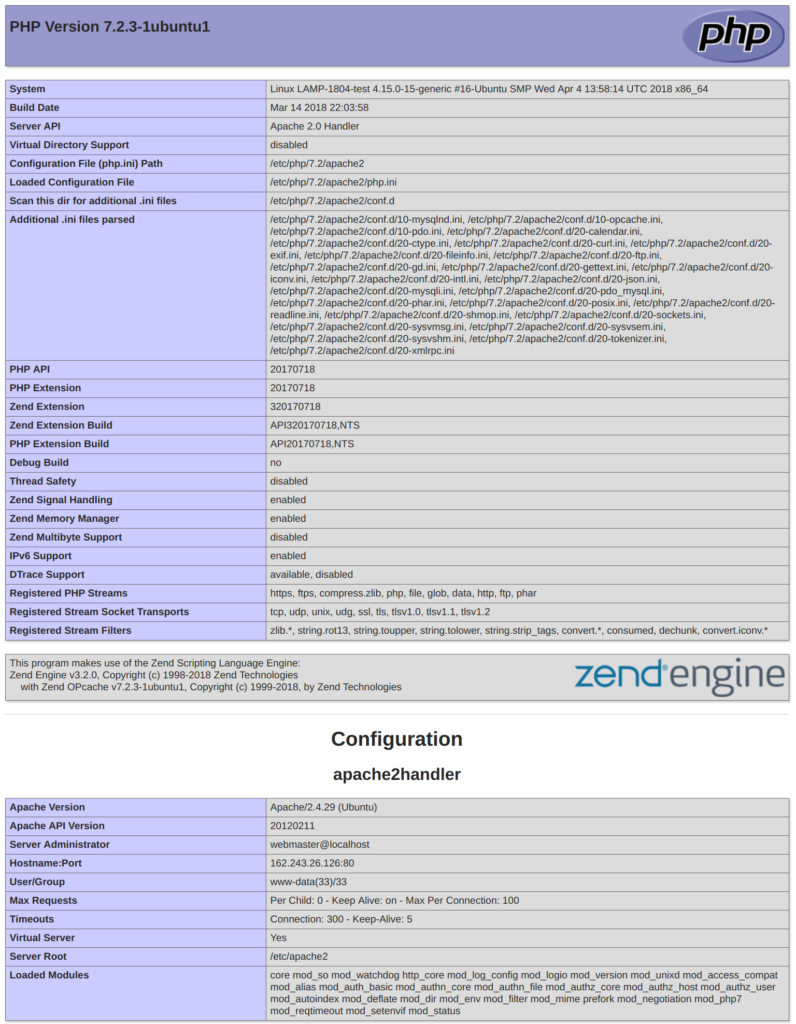
This page provides some basic information about your server from the perspective of PHP. It is useful for debugging and to ensure that your settings are being applied correctly.
If you can see this page in your browser, then your PHP is working as expected.
You probably want to remove this file after this test because it could actually give information about your server to unauthorized users. To do this, run the following command:
sudo rm /var/www/your_domain/info.php
Copy
You can always recreate this page if you need to access the information again later.
Conclusion
Now that you have a LAMP stack installed, you have many choices for what to do next. Basically, you’ve installed a platform that will allow you to install most kinds of websites and web software on your server.
As an immediate next step, you should ensure that connections to your web server are secured, by serving them via HTTPS.
Some other popular options are:
How to use routing in Vue.js to create a better user experience
Multiple CSS classes in React
How to use Vue-Router ?
PayPal Integration in laravel and Vue js
I wanted to share what I’ve learned in the hopes of saving keyboards around the world from abuse. Setting Up
PayPal Integration in laravel and Vue js
I wanted to share what I’ve learned in the hopes of saving keyboards around the world from abuse.
Setting Up PayPal
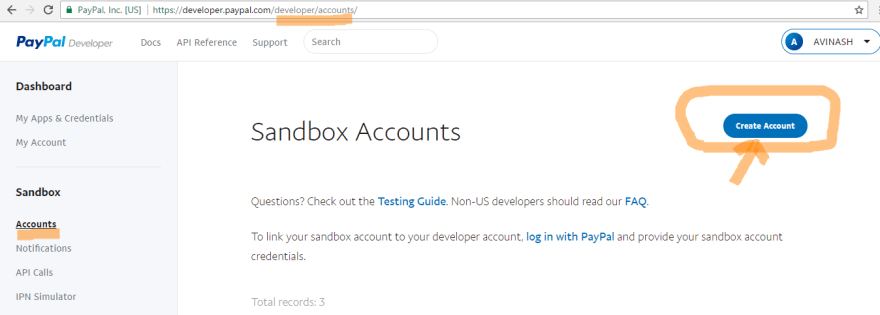
1.The first thing you need to do is set up your PayPal business account and get a sandbox setup, which is a little more confusing than it should be. After you make an account,
2.you need to create a sandbox buyer and seller account to make test transactions.
You also need to make a sandbox app, which will give you an API key and secret, which you should store wherever you like to store your dev configs (.env for Laravel usually)
Making Payments Work
PayPal like almost all payments providers does the great service of handling all the scary personal information of customers for you, and in exchange you have to do alot of back-and-forth with their API to get the info you need. To complete a basic payment it usually goes like this:
1.A fantastic customer clicks a button to buy something on your website
2.PayPal’s client-side JS library then sends a request to some endpoint on your server you have defined which will tell PayPal what they are buying.
3.Your server lets PayPal know a request to buy your great product has occurred, and you ask PayPal for a payment object generated based on what they are buying.
4.You send that payment id back to the user, who then sends it to PayPal’s server which to give the user the chance to affirm what they are buying or realize you lied about the price and then run away.
5.If they agree to the payment, the client-side PayPal will ask PayPal’s server for a payer object.
6.The payer and payment are then sent to your server, where you execute the payment, and do anything else you want to do (like make a record in your database to record it).
Getting a PayPal Button lets work on front-end Vue js
The first thing you need is the ability for a user to actually buy things, and that starts with a PayPal button. I’d very strongly suggest just going with PayPal’s Express Checkout to start. You can read how to get the button to render on a page here and it’s very straightforward.
Along with the checkout.js script, PayPal suggests you to insert the following code:
go to index.html and insert
<script src="https://www.paypalobjects.com/api/checkout.js"></script>Then go to your component.vue where you need to display the paypal checkout button
Along with the checkout.js script, PayPal suggests you to insert the following code in mounted():
paypal.Button.render({
     env: 'sandbox', // Optional: specify 'sandbox'
     environment
     client: {
        sandbox:    'xxxx',
        production: 'xxxx'
       },
     locale: 'en_US',
     style: {
         size: 'large',
         color: 'gold',
         shape: 'pill',
         label: 'checkout',
         tagline: 'true'
        },
     commit: true, // Optional: show a 'Pay Now' button in
     the checkout flow


 payment: function(resolve, reject) {
        // Set up the payment here, when the buyer clicks
           on the button

          let returnUrl = "_YOUR_RETURN_URL";
          let amount = 20

          /Here call your own API server
 return new Promise((resolve, reject) => {
     axios.post('/checkout-paypal', {
            return_url: returnUrl,
            amount:amount
        }, {
                headers: { 'Authorization': 'Bearer ' +
   state.token }
            })
            .then(res => {
                resolve(res.data.id)
            })
            .catch(error => {
                reject(error)
            })
    })

        },

  onAuthorize: function(data) {
   // Execute the payment here, when the buyer approves
   the transaction

    return new Promise((resolve, reject) => {
        axios.post('/execute-paypal',  {
            payer_id: data.payerID,
            payment_id: data.paymentID,
        }, {
                headers: { 'Authorization': 'Bearer ' +
    state.token }
            })
            .then(res => {
                resolve(res)
            })
            .catch(error => {
                reject(error)
            })
    })

 }, '#paypal-button');
Now Lets Go To Laravel
Now we require to install paypal package for paypal integration, that way we can use it’s method. So Open your terminal and run bellow command.
composer require paypal/rest-api-sdk-phplets Set client_id And secret Keys.
in your .env file for security.
 PAYPAL_CLIENT_ID=
 PAYPAL_SECRET=
 PAYPAL_MODE=sandbox
Next, I will create a new file paypal.php, at config directory.
Place the following content in the file
 <?php
 return [
   'client_id' => env('PAYPAL_CLIENT_ID',''),
   'secret' => env('PAYPAL_SECRET',''),
   'settings' => array(
      'mode' => env('PAYPAL_MODE','sandbox'),
      'http.ConnectionTimeOut' => 30,
      'log.LogEnabled' => true,
      'log.FileName' => storage_path() .
      '/logs/paypal.log',
      'log.LogLevel' => 'ERROR'
     ),
    ];
Making a PayPal Controller
The most important part of any payment processing system is security. You want to be protected from pesky customers who want to get your stuff for free, and customers want to make sure their information is safe, and that they are really getting charged the amount you say you will. Your controller helps insulate you from those customers up to no good, because it gives you the chance to set up the properties of a payment behind closed doors.
If you are using the laravel-paypal package, their documentation comes with some solid boilerplate, and I’ll assume you are using Laravel here, but most of this stuff is directly using the PayPal SDK and should transfer languages pretty will. Here is what a skeleton of the contoller should look like:
   <?php

   namespace AppHttpControllers;
   use IlluminateHttpRequest;
   /** Paypal Details classes **/
   use PayPalRestApiContext;
   use PayPalAuthOAuthTokenCredential;
   use PayPalApiAmount;
   use PayPalApiDetails;
   use PayPalApiItem;
   use PayPalApiItemList;
   use PayPalApiPayer;
   use PayPalApiPayment;
   use PayPalApiRedirectUrls;
   use PayPalApiPaymentExecution;
   use PayPalApiTransaction;

   use PayPalExceptionPayPalConnectionException;
   use Exception;

   class PaypalController extends Controller
    {
       private $api_context;

   public function __construct()
    {
       $this->api_context = new ApiContext(
        new
        OAuthTokenCredential(config('paypal.client_id'),
        config('paypal.secret'))
    );
    $this->api_context-
        >setConfig(config('paypal.settings'));
    }

    /** This method sets up the paypal payment.
     **/
   public function createPayment(Request $request)
   {
     //Setup Payer
     $payer = new Payer();
     $payer->setPaymentMethod('paypal');
     //Setup Amount
     $amount = new Amount();
     $amount->setCurrency('USD');
     $amount->setTotal($request->amount);
      //Setup Transaction
     $transaction = new Transaction();
     $transaction->setAmount($amount);
     $transaction->setDescription('Your awesome
      Product!');
      //List redirect URLS
     $redirectUrls = new RedirectUrls();
     $redirectUrls->setReturnUrl($request->return_url);
     $redirectUrls->setCancelUrl($request->return_url);
   //And finally set all the prerequisites and create the
     payment
     $payment = new Payment();

     $payment->setIntent('sale');
     $payment->setPayer($payer);
     $payment->setRedirectUrls($redirectUrls);
     $payment->setTransactions(array($transaction));

     $response = $payment->create($this->api_context);
     //Return our payment info to the user
     return $response;

     }
    /**
     ** This method confirms if payment with paypal was
        processed successful and then execute the payment,
     ** we have 'paymentId, PayerID and token' in query
     string.
     **/

    public function executePaypal(Request $request)
    {
       /** Get the payment ID before session clear **/
       $paymentId = $request->get('payment_id');
       $payerId = $request->get('payer_id');


       $payment = Payment::get($paymentId, $this-
       >api_context);
       $paymentExecution = new PaymentExecution();
       $paymentExecution->setPayerId($payerId);

       $executePayment = $payment-
       >execute($paymentExecution, $this->api_context);
       if ($executePayment->getState() == 'approved') {
       if($executePayment->transactions[0]-
       >related_resources[0]->sale->state == 'completed'){

           /*
      * Here is where you would do your own stuff like add
      a record for the payment, trigger a hasPayed event,
      etc.
      */

      // Do something to signify we succeeded

            return response()->json(
                [
                    'status' => "success",

                ],
                200
            );
        }
       }
       return response()->json('failed', 400);
       }

       }
At this point you hopefully have a working payment processor for PayPal.
50 of the best graphic design blogs for inspiration in 2020
No creative can exist in a vacuum. We all need to keep in touch with the latest trends and check

50 of the best graphic design blogs for inspiration in 2020
No creative can exist in a vacuum. We all need to keep in touch with the latest trends and check out the work our fellow professionals are producing.
It’s not about copying others, of course. Still, it is about understanding common points of reference and the broader culture we all swim in, not to mention getting a blast of inspiration and new ideas along the way. To help you find all that, quickly and easily, I’ve brought together the best blogs around on art, design and creativity.
1. Abduzeedo
Abduzeedo is a collective of individual writers sharing articles about architecture, design, photography and UX. Founded by Brazilian designer Fabio Sasso in 2006, it’s particularly strong on 3D work, which is something that doesn’t get much attention from most design blogs.
2. Design Week
Founded in 1986, Design Week was the UK’s leading design magazine until 2011, when it became online-only. It continues to bring you high quality, well-written news and inspiration across graphics, branding, interiors, digital, product, furniture and more.
3. Creative Boom
Creative Boom (of course) celebrates, inspires and supports the creative community and has an excellent section on graphic design to give you loads of inspiration. The magazine also features insightful interviews with some of the world’s leading designers – Paula Scher being a recent example.
4. Create by Adobe
Create is Adobe’s magazine by creatives, for creatives — available online and as a mobile app. Visit them for inspiration and tutorials on photography, illustration, graphic design, web design, motion graphics, audio/video, branding, and more.
5. Dropbox Design
Most of us have used the file-sharing service Dropbox at some point in our lives, but did you know it has a blog too? It’s a fine one at that, featuring an array of articles on the theme of UX, with topics including user research, project management, and design tooling.
6. Creative Review
Founded in 1980, Creative Review is the world’s leading monthly magazine for advertising, design and visual culture. And the same high-quality journalism that informs it carries through to its website, which features a range of news, reviews and features from the creative world.
7. The Dieline
For anyone working in packaging design, The Dieline has it all wrapped up. It’s basically the Bible of the sector: a place where the community can review, critique and stay informed of the latest industry trends, and check out design projects being created in the field.
8. 99U
99U is a blog from Adobe aimed to help anyone in a creative profession to develop their careers. It’s replete with quality articles on leadership, productivity and marketing, covering topics such as how to overcome your fear of failure, and how to develop good work habits.
9. Eye Magazine
Eye Magazine, the international review of graphic design, is a quarterly print magazine on graphic design and visual culture. It, and its associated blog, features a range of critical, informed writing about design and visual culture.
10. Underpinned
Underpinned is an online platform of tools and services for freelancers, and its associated blog has an array of articles about all aspects of going freelance. Topics range from tips on chasing payments to how to make your photography stand out.
11. Identity Designed
This clean and elegant blog by David Airey is a showcase of the best brand identities from around the world. It’s just one of the many successful design blogs that he runs: also see number 37 on our list.
12. Shillington Design Blog
Shillington is a network of colleges offering an innovative approach to design education based on short, intensive courses and practical, industry-focused learning. And it has its own blog, too, featuring a range of inspiring design work and insightful articles.
13. Under Consideration: Brand New
Under Consideration is a graphic design firm generating its own projects, initiatives and content, while taking on a limited amount of client work. Its Brand New blog is well-known for chronicling, and providing opinions on, corporate and brand identity work. It’s edited and written by Armin Vit.
14. Art of the Menu
Another great blog from Under Consideration (see above), Art of the Menu catalogues the underrated creativity of menus from around the world. They welcome and encourage suggestions and submissions, and readers are free to comment too.
15. Print.pm
The brainchild of Parisian art director Martin Joubert, Print.pm provides a daily burst of inspiration for lovers of editorial print design, mainly based around the latest arty-looking books and magazines.
16. UX Collective
Medium-based blog UX Collective pulls together an array of insightful articles from designers working at the coalface of user experience. There’s some excellent advice on offer here, about everything from empathy mapping to the principles of icon design.
17. The Dsgn Blog
The Dsgn Blog is all about visual inspiration. Founded, designed and curated by Ena Baćanović, a designer based in Zagreb, Croatia, it features the work of designers and design studios from all over the world, putting the main focus on young designers and students.
18. Inspo Finds
Inspo Finds is both a website and limited-edition book that aims to promote and celebrate the latest design work, up and coming designers, and the design community.
19. BP&O
BP&O stands for Branding, Packaging and Opinion, and it delivers on all of these things, with a combination of inspiring imagery and in-depth analysis. It’s the brainchild of Richard Baird, a British freelance designer and writer who specialises in brand identities and packaging.
20. Design Clever
Design Clever is a collaboration started by Jonathan Ring and Bethany Baker, two aspiring graphic designers with a passion for everything design-related. This blog was created to showcase talented designers all over the world, and they encourage creatives everywhere to submit their work to it.
21. Grain Edit
Grain Edit is focused on classic design work from the 1950s to the 1970s, as well as contemporary designers who draw inspiration from that era. It features interviews, articles, designers’ libraries, rare design annuals, type specimens, Ephemera, posters and vintage kids books. Based in California, it’s run by Dave Cuzner, Ethan Davis and Grace Danico.
22. Fonts In Use Blog
Fonts In Use is a public archive of typography indexed by typeface, format, and industry. An independent project led by Sam Berlow, Stephen Coles, and Nick Sherman, it documents and examines graphic design intending to improve typographic literacy and appreciation.
23. Masterpicks
Looking for inspiration from real-world projects? Masterpicks has you covered. This image-led blog presents you with a new, hand-picked design project every day, across UX and UI design, illustration, animation, 3D art, graphic design, branding, industrial design and photography.
24. Frank Chimero
Veteran designer Frank Chimero shares his thoughts regularly on his much-visited blog, and they’re very much worth reading. Jumping between the internet, design, writing, music, film, self-development, and work culture, his posts are beautifully written and always relevant.
25. Creative Bloq
Creative Bloq features advice, interviews and reviews taken from four print magazines: Computer Arts (graphic design and branding), net (web design), 3D World (animation/VFX) and ImagineFX (Art). It also posts daily news from the creative industry, ranging from fun to serious.
26. Digital Arts
Similar to Creative Bloq (above), Digital Arts offers inspiration, advice and tutorials for digital creatives across branding and graphic design, illustration, UX and interactive design, animation, VR and VFX, as well as comprehensive coverage of the latest developments.
27. Wix Creative
Wix is a cloud-based platform for creating your own website, and its blog offers inspiration, tips and resources for creatives everywhere. It includes professional step-by-step guides to walk you through everything from colour theory to make a mood board.
28. Dribbble
Enabling creatives to share their work long before Instagram was even dreamt of, Dribbble is a design industry institution. Its related blog is packed with useful advice to boost your career, such as how to form good habits and how to get out of a bad design feedback loop.
29. Design Made In Japan
Japanese culture is having a huge global influence right now, and Design Made In Japan is the perfect place to stay updated with its design output. There’s a wealth of editorial, product and packaging design on show, and even a design jobs board for those wanting to work in Japan.
30. Mindsparkle
Mindsparkle magazine promotes the “most beautiful and inspiring projects” in the fields of graphic design, web design and video. With a clean and satisfying design of its own, it’ll become a daily inspiration, and you can rely on the founders to only share the very best.
31. Typeroom
Typeroom is a curated portfolio for typography fans, featuring inspiring stories about type and interviewing type designers from across the world. The articles here are first-class, and we love that you get the opportunity to choose the background colour of the page.
32. It’s Nice That
Beautifully designed, industry-led and one of the best resources for keeping abreast of art, illustration and graphic design everywhere, It’s Nice That continues to be one of our favourite online publications.
33. Designer News
Describing itself as “where the design community meets”, Designer News pulls in the latest interesting posts from around the web, from Behance and Medium to individual designers’ websites. The community then upvotes and downvotes them, and adds their own comments.
34. Typeroom
Typeroom calls itself “an online platform for the Typophile Generation”. Showcasing outstanding typographic works, featuring inspiring stories about the letterforms that matter and interviewing type designers from around the globe.
35. Httpster
Just want to browse delicious web design? Httpster is exactly what you need. It’s an inspiration resource showcasing “totally rocking websites” made by designers everywhere. As with all trends, you don’t need to copy them, but it’s useful to know what they are.
36. Site Inspire
siteInspire is another showcase of the latest and greatest web designs. Updated frequently, it’s a great place to keep in touch with the most recent trends in interactive design, and get ideas and inspiration for your own creations.
37. Logo Design Love
Another beautifully designed blog by David Airey, this time focusing on logo designs from around the world. It’s a nicely curated showcase for the latest logos, as well as featuring reviews and commentary around related work, such as logo design books.
38. The Inspiration Grid
The Inspiration Grid is an online magazine celebrating creative talent from around the world, providing a daily fix of art, illustration, typography, photography and…of course, graphic design. It has a clean, appealing design, and everything is easy to find. One of our favourites.
39. Visuelle
David Bennett curates inspiring projects from graphic designers worldwide. There’s no commentary (the images link through to the original site), but it’s compelling visual eye-candy throughout. Add this to your bookmarks for reliable content daily.
40. One Extra Pixel
Getting into web design? This excellent blog strives to share the best web resources for those of you passionate about pixels. It looks at trends, the best fonts, recommended templates for WordPress, and much more.
41. AIGA: Eye on Design
The AIGA, otherwise known as The Professional Association for Design, has a beautiful blog called Eye on Design which is bursting with design inspiration. With contributors from around the world, you’ll never be bored with its varied content.
42. Visual Journal
Curated by Alessandro Scarpellini, a designer and art director from Italy, Visual Journal brings together the best branding and graphic design projects from all over the world. There’s very little in the way text here, but lots and lots of beautiful images to drool over.
43. Webflow Blog
Webflow is a product used to create websites visually without coding. Whether or not you’re using Webflow yourself, its blog is packed with excellent articles on broader subjects around web design and UX and is well worth a visit.
44. Ambalaj
Founded by Swedish designer Kristina de Verdier in 2008, Ambalaj is predominantly a packaging design blog, but it also tends to share the latest design innovations.
45. 8Faces
The official blog of 8 Faces magazine, this blog features inspirational typography, beautiful lettering, reviews, interviews with leading designers and much more. Curated by Jamie Clarke and Elliot Jay Stocks.
46. Swissmiss
Swissmiss is the work of Tina Roth Eisenberg, a Swiss designer in New York who also founded and today runs Tattly, CreativeMornings and TeuxDeux. It’s packed with visual inspiration, some of which can be quite offbeat, but never dull.
47. Wrap magazine
Primarily a print magazine, Wrap is published bi-annually and champions contemporary illustration. It also happens to have an excellent blog on Tumblr, where it shares colourful and quirky work from illustrators and graphic designers everywhere.
48. Design Taxi
With its own section dedicated to graphic design, Design Taxi is a good shout to keep abreast of industry news, trends and updates. Its posts don’t go into a lot of depth but cover a wide breadth of topics. So it’s great for getting an overview of what’s going on in general.
49. SideBar
Want to keep track of everything going on in web design right now, but don’t have time to subscribe to a thousand different blogs? SideBar saves you the bother by curating the best posts daily and delivering you five relevant links a day, which is much more manageable.
50. This is Paper
This is Paper is a beautiful blog, and print magazine focused on creativity, with a section devoted to print design. There’s also a very popular mixtapes section where you can enjoy listening to some beats while working.
Build a web application with Laravel and Vue – Part 5: Creating a simple Trello clone using Laravel and Vue
In previous chapters of this series, we considered a couple of concepts useful for developing modern web applications with Laravel

Build a web application with Laravel and Vue – Part 5: Creating a simple Trello clone using Laravel and Vue
In previous chapters of this series, we considered a couple of concepts useful for developing modern web applications with Laravel and Vue.
In this final part, we are going to combine all the concepts from the previous parts into building a Trello clone using Laravel and Vue.

Here is a screen recording of what the application will look like when complete:
Prerequisites
To follow along in this part of the series you must:
- Have read part all previous parts of the series.
- Have all the requirements from previous parts of the series.
When you have all the requirements, we can continue.
Setting up for development
We have already discussed setting up your environment in previous parts of this series so in case you need help please read the previous parts. If you have also been following up with the other parts, you should have already set up a Laravel project.
If you have not set up a project, then you should go back to the previous parts and read them as they give a detailed guide on how to set all set up for this part of the series.
You can still read them!
Creating API routes
In one of the earlier chapters, we spoke about creating RESTful APIs so the techniques mentioned there will be applied here. Let’s create the endpoints for the API of our Trello clone.
In our routes/api.php file, make sure the file contains the following code:
    <?php

    Route::post('login', 'UserController@login');
    Route::post('register', 'UserController@register');

    Route::group(['middleware' => 'auth:api'], function() {
        Route::get('/category/{category}/tasks', 'CategoryController@tasks');
        Route::resource('/category', 'CategoryController');
        Route::resource('/task', 'TaskController');
    });
? As a good practice, when creating routes, always put more specific routes ahead of less specific ones. For instance, in the code above the
/category/{category}/tasksroute is above the less specific/categoryroute.
In the code above, we defined our API routes. Putting the definitions in the routes/api.php file will tell Laravel that the routes are API routes. Laravel will prefix the routes with a /api in the URL to differentiate these routes from web routes.
Also in the Route group above, we added a middleware auth:api, this makes sure that any calls to the routes in that group must be authenticated.
A thing to note is, using the resource method on the Route class helps us create some additional routes under the hood. Here is a summary of all the routes available when we added the code above to the file:
Routes for the category resource
| Method | URI | Function |
|---|---|---|
| GET | /api/category | To list all the available categories |
| POST | /api/category | To create a new category resource |
| DELETE | /api/category/{category_id} | To delete a particular category resource |
| GET | /api/category/{category_id} | To fetch a particular category resource |
| GET | /api/category/{category}/tasks | To fetch all tasks for particular category |
| PUT | /api/category/{category_id} | To update a particular category resource |
Routes for the task resource
| Method | URI | Function |
|---|---|---|
| GET | /api/task | To list all the available tasks |
| POST | /api/task | To create a new task resource |
| DELETE | /api/task/{task_id} | To delete a particular task |
| GET | /api/task/{task_id} | To fetch a particular task resource |
| PUT | /api/task/{task_id} | To update a particular task resource |
Routes for the user resource
| Method | URI | Function |
|---|---|---|
| POST | /api/register | Create a new user |
| POST | /api/login | Log an existing user in |
? To see the full route list, run the following command:
$ php artisan route:list.
Now that we have a clear understanding of our routes, let’s see how the controllers will work.
Creating the controller logic
We are going to take a deeper look at the implementation of our different controllers now.
User controller
Since we already created and fully implemented this in the second part of the series, we can skip that and move on to the next controller.
Category controller
Next, open the CategoryController and replace the contents with the following code:
    <?php

    namespace App\Http\Controllers;

    use App\Category;
    use Illuminate\Http\Request;

    class CategoryController extends Controller
    {
        public function index()
        {
            return response()->json(Category::all()->toArray());
        }

        public function store(Request $request)
        {
            $category = Category::create($request->only('name'));

            return response()->json([
                'status' => (bool) $category,
                'message'=> $category ? 'Category Created' : 'Error Creating Category'
            ]);
        }

        public function show(Category $category)
        {
            return response()->json($category);
        }

        public function tasks(Category $category)
        {
            return response()->json($category->tasks()->orderBy('order')->get());
        }

        public function update(Request $request, Category $category)
        {
            $status = $category->update($request->only('name'));

            return response()->json([
                'status' => $status,
                'message' => $status ? 'Category Updated!' : 'Error Updating Category'
            ]);
        }

        public function destroy(Category $category)
        {
            $status  = $category->delete();

            return response()->json([
                'status' => $status,
                'message' => $status ? 'Category Deleted' : 'Error Deleting Category'
            ]);
        }

    }
The functions in the controller above handle the basic CRUD operations for the resource. The tasks methods return tasks associated with a category.
Task controller
Next, open the TaskController. In this controller, we will manage tasks. A task is given an order value and is linked to a category. Replace the contents with the following code:
    <?php

    namespace App\Http\Controllers;

    use App\Task;
    use Illuminate\Http\Request;

    class TaskController extends Controller
    {
        public function index()
        {
            return response()->json(Task::all()->toArray());
        }

        public function store(Request $request)
        {
            $task = Task::create([
                'name' => $request->name,
                'category_id' => $request->category_id,
                'user_id' => $request->user_id,
                'order' => $request->order
            ]);

            return response()->json([
                'status' => (bool) $task,
                'data'   => $task,
                'message' => $task ? 'Task Created!' : 'Error Creating Task'
            ]);
        }

        public function show(Task $task)
        {
           return response()->json($task);
        }

        public function update(Request $request, Task $task)
        {
            $status = $task->update(
                $request->only(['name', 'category_id', 'user_id', 'order'])
            );

            return response()->json([
                'status' => $status,
                'message' => $status ? 'Task Updated!' : 'Error Updating Task'
            ]);
        }

        public function destroy(Task $task)
        {
            $status = $task->delete();

            return response()->json([
                'status' => $status,
                'message' => $status ? 'Task Deleted!' : 'Error Deleting Task'
            ]);
        }

    }
That’s all for the controllers. Since we have already created the models in a previous chapter, let’s move on to creating the frontend.
Building the frontend
Since we are done building the backend, let’s make the frontend using VueJS. To work with Vue, we will need the Vue and Vue router packages we installed in a previous chapter. We will also need the [vuedraggable](https://github.com/SortableJS/Vue.Draggable) package. To install it, run the command below:
$ npm install vuedraggable --save
Creating the Vue router routes
Since we are building a Single Page App, we are going to set up our vue-router to handle switching between the different pages of our application. Open the resources/assets/js/app.js file and replace the contents with the following code:
    import Vue          from 'vue'
    import VueRouter    from 'vue-router'

    Vue.use(VueRouter)

    import App          from './views/App'
    import Dashboard    from './views/Board'
    import Login        from './views/Login'
    import Register     from './views/Register'
    import Home         from './views/Welcome'

    const router = new VueRouter({
        mode: 'history',
        routes: [
            {
                path: '/',
                name: 'home',
                component: Home
            },
            {
                path: '/login',
                name: 'login',
                component: Login,
            },
            {
                path: '/register',
                name: 'register',
                component: Register,
            },
            {
                path: '/board',
                name: 'board',
                component: Dashboard,
            },
        ],
    });

    const app = new Vue({
        el: '#app',
        components: { App },
        router,
    });
Next, open the routes/web.php file and replace the contents with the code below:
    <?php

    Route::get('/{any}', 'SinglePageController@index')->where('any', '.*');
This will route incoming traffic to the index method of our SinglePageController which we created in the previous chapter.
Dealing with authentication
Since our API is secure we’d need access tokens to make calls to it. Tokens are generated and issued when we successfully log in or register. We are going to use localStorage to hold the token generated by our application so we can very easily get it when we need to make API calls.
Although this is out of the scope of the article it may be worth knowing that contents in local storage are readable from the browser so you might want to make sure your tokens are short-lived and refreshed often.
Let’s set up register component. Create the file resources/assets/js/views/Register.vue and add the following for the template:
    <template>
        <div class="container">
            <div class="row justify-content-center">
                <div class="col-md-8">
                    <div class="card card-default">
                        <div class="card-header">Register</div>

                        <div class="card-body">
                            <form method="POST" action="/register">
                                <div class="form-group row">
                                    <label for="name" class="col-md-4 col-form-label text-md-right">Name</label>

                                    <div class="col-md-6">
                                        <input id="name" type="text" class="form-control" v-model="name" required autofocus>
                                    </div>
                                </div>

                                <div class="form-group row">
                                    <label for="email" class="col-md-4 col-form-label text-md-right">E-Mail Address</label>

                                    <div class="col-md-6">
                                        <input id="email" type="email" class="form-control" v-model="email" required>
                                    </div>
                                </div>

                                <div class="form-group row">
                                    <label for="password" class="col-md-4 col-form-label text-md-right">Password</label>

                                    <div class="col-md-6">
                                        <input id="password" type="password" class="form-control" v-model="password" required>
                                    </div>
                                </div>

                                <div class="form-group row">
                                    <label for="password-confirm" class="col-md-4 col-form-label text-md-right">Confirm Password</label>

                                    <div class="col-md-6">
                                        <input id="password-confirm" type="password" class="form-control" v-model="password_confirmation" required>
                                    </div>
                                </div>

                                <div class="form-group row mb-0">
                                    <div class="col-md-6 offset-md-4">
                                        <button type="submit" class="btn btn-primary" @click="handleSubmit">
                                            Register
                                        </button>
                                    </div>
                                </div>
                            </form>
                        </div>
                    </div>
                </div>
            </div>
        </div>
    </template>
Then for the script, add the following in the same file below the closing template tag:
    <script>
        export default {
            data(){
                return {
                    name : "",
                    email : "",
                    password : "",
                    password_confirmation : ""
                }
            },
            methods : {
                handleSubmit(e) {
                    e.preventDefault()

                    if (this.password === this.password_confirmation && this.password.length > 0)
                    {
                        axios.post('api/register', {
                            name: this.name,
                            email: this.email,
                            password: this.password,
                            c_password : this.password_confirmation
                          })
                          .then(response => {
                            localStorage.setItem('user',response.data.success.name)
                            localStorage.setItem('jwt',response.data.success.token)

                            if (localStorage.getItem('jwt') != null){
                                this.$router.go('/board')
                            }
                          })
                          .catch(error => {
                            console.error(error);
                          });
                    } else {
                        this.password = ""
                        this.passwordConfirm = ""

                        return alert('Passwords do not match')
                    }
                }
            },
            beforeRouteEnter (to, from, next) {
                if (localStorage.getItem('jwt')) {
                    return next('board');
                }

                next();
            }
        }
    </script>
In the code above, we have a handleSubmit method that is called when a user submits the registration form. It sends all the form data to the API, takes the response and saves the jwt to localStorage.
We also have a beforeRouterEnter method which is called by the vue-router before loading a component. In this callback, we check if the user is already logged in and redirect to the application’s board if the user is.
The login component is setup in a similar manner. Create the file resources/assets/js/views/Login.vue and add the following for the template:
    <template>
        <div class="container">
            <div class="row justify-content-center">
                <div class="col-md-8">
                    <div class="card card-default">
                        <div class="card-header">Login</div>

                        <div class="card-body">
                            <form method="POST" action="/login">
                                <div class="form-group row">
                                    <label for="email" class="col-sm-4 col-form-label text-md-right">E-Mail Address</label>

                                    <div class="col-md-6">
                                        <input id="email" type="email" class="form-control" v-model="email" required autofocus>
                                    </div>
                                </div>

                                <div class="form-group row">
                                    <label for="password" class="col-md-4 col-form-label text-md-right">Password</label>

                                    <div class="col-md-6">
                                        <input id="password" type="password" class="form-control" v-model="password" required>
                                    </div>
                                </div>

                                <div class="form-group row mb-0">
                                    <div class="col-md-8 offset-md-4">
                                        <button type="submit" class="btn btn-primary" @click="handleSubmit">
                                            Login
                                        </button>
                                    </div>
                                </div>
                            </form>
                        </div>
                    </div>
                </div>
            </div>
        </div>
    </template>
And for the script, add the following code to the file below the closing template tag:
    <script>
        export default {
            data(){
                return {
                    email : "",
                    password : ""
                }
            },
            methods : {
                handleSubmit(e){
                    e.preventDefault()

                    if (this.password.length > 0) {
                        axios.post('api/login', {
                            email: this.email,
                            password: this.password
                          })
                          .then(response => {
                            localStorage.setItem('user',response.data.success.name)
                            localStorage.setItem('jwt',response.data.success.token)

                            if (localStorage.getItem('jwt') != null){
                                this.$router.go('/board')
                            }
                          })
                          .catch(function (error) {
                            console.error(error);
                          });
                    }
                }
            },
            beforeRouteEnter (to, from, next) {
                if (localStorage.getItem('jwt')) {
                    return next('board');
                }

                next();
            }
        }
    </script>
That’s all for the Login component.
We need to make a little modification to our application wrapper component. Open the file resources/assets/js/views/App.vue file and update the file with the following code in the template section:
    [...]

    <!-- Right Side Of Navbar -->
    <ul class="navbar-nav ml-auto">
        <!-- Authentication Links -->
        <router-link :to="{ name: 'login' }" class="nav-link" v-if="!isLoggedIn">Login</router-link>
        <router-link :to="{ name: 'register' }" class="nav-link" v-if="!isLoggedIn">Register</router-link>
        <li class="nav-link" v-if="isLoggedIn"> Hi, {{name}}</li>
        <router-link :to="{ name: 'board' }" class="nav-link" v-if="isLoggedIn">Board</router-link>
    </ul>

    [...]
Also, replace the contents of the script tag in the same file with the following:
    export default {
        data(){
            return {
                isLoggedIn : null,
                name : null
            }
        },
        mounted(){
            this.isLoggedIn = localStorage.getItem('jwt')
            this.name = localStorage.getItem('user')
        }
    }
In the code above, we do a check to see if the user is logged in or not and then use this knowledge to can hide or show route links.
Making secure API calls
Next, let’s create the main application board and consume the meat of the API from there. Create a resources/assets/js/views/Board.vue file add the following code to the file:
    <template>
        <div class="container">
            <div class="row justify-content-center">
                <draggable element="div" class="col-md-12" v-model="categories" :options="dragOptions">
                    <transition-group class="row">
                        <div class="col-md-4" v-for="element,index in categories" :key="element.id">
                            <div class="card">
                                <div class="card-header">
                                    <h4 class="card-title">{{element.name}}</h4>
                                </div>
                                <div class="card-body card-body-dark">
                                    <draggable :options="dragOptions" element="div" @end="changeOrder" v-model="element.tasks">
                                        <transition-group :id="element.id">
                                            <div v-for="task,index in element.tasks" :key="task.category_id+','+task.order" class="transit-1" :id="task.id">
                                                <div class="small-card">
                                                    <textarea v-if="task === editingTask" class="text-input" @keyup.enter="endEditing(task)" @blur="endEditing(task)" v-model="task.name"></textarea>
                                                    <label for="checkbox" v-if="task !== editingTask" @dblclick="editTask(task)">{{ task.name }}</label>
                                                </div>
                                            </div>
                                        </transition-group>
                                    </draggable>
                                    <div class="small-card">
                                        <h5 class="text-center" @click="addNew(index)">Add new card</h5>
                                    </div>
                                </div>
                            </div>
                        </div>
                    </transition-group>
                </draggable>
            </div>
        </div>
    </template>
In the template above we have implemented the [vue-draggable](https://github.com/SortableJS/Vue.Draggable) component, we installed earlier. This gives us a draggable div that we can use to mimic how Trello cards can be moved from one board to another. In the draggable tag we passed some options which we will define in the script section of the component soon.
To ensure we can drag across multiple lists using vue draggable, we had to bind our categories attribute to the parent draggable component. The most important part is binding the element.tasks to the child draggable component as a prop using v-model. If we fail to bind this, we would not be able to move items across the various categories we have.
We also define a method to be called when the dragging of an item is done (@end), when we click to edit an item or when we click the Add New Card.
For our style add the following after the closing template tag:
    <style scoped>
    .card {
        border:0;
        border-radius: 0.5rem;
    }
    .transit-1 {
        transition: all 1s;
    }
    .small-card {
        padding: 1rem;
        background: #f5f8fa;
        margin-bottom: 5px;
        border-radius: .25rem;
    }
    .card-body-dark{
        background-color: #ccc;
    }
    textarea {
        overflow: visible;
        outline: 1px dashed black;
        border: 0;
        padding: 6px 0 2px 8px;
        width: 100%;
        height: 100%;
        resize: none;
    }
    </style>
Right after the code above, add the following code:
    <script>
        import draggable from 'vuedraggable'
        export default {
            components: {
                draggable
            },
            data(){
                return {
                    categories : [],
                    editingTask : null
                }
            },
            methods : {
                addNew(id) {
                },
                loadTasks() {
                },
                changeOrder(data){
                },
                endEditing(task) {
                },
                editTask(task){
                    this.editingTask = task
                }
            },
            mounted(){
            },
            computed: {
                dragOptions () {
                  return  {
                    animation: 1,
                    group: 'description',
                    ghostClass: 'ghost'
                  };
                },
            },
            beforeRouteEnter (to, from, next) {
                if ( ! localStorage.getItem('jwt')) {
                    return next('login')
                }

                next()
            }
    }
    </script>
Loading our categories
Let’s load our categories as we mount the Board component. Update the mounted method of the same file to have the following:
    mounted() {
        let token = localStorage.getItem('jwt')

        axios.defaults.headers.common['Content-Type'] = 'application/json'
        axios.defaults.headers.common['Authorization'] = 'Bearer ' + token

        axios.get('api/category').then(response => {
            response.data.forEach((data) => {
                this.categories.push({
                    id : data.id,
                    name : data.name,
                    tasks : []
                })
            })
            this.loadTasks()
        })
    },
In the code above, we set up axios. This is very important because vue will call the mounted method first before the page loads, so it is a convenient way to actually load data we need to use on our page.
? We set up some default
axiosheaders so we no longer need to pass the headers for each call we make.
Loading our tasks
Now we can add the logic to load the tasks from a category. In the methods object of the Board component, update the loadTasks method to the following code:
    [...]

    loadTasks() {
      this.categories.map(category => {
          axios.get(`api/category/${category.id}/tasks`).then(response => {
              category.tasks = response.data
          })
      })
    },

    [...]
Adding new tasks
Let’s add the logic to add new tasks. In the methods object of the Board component, update the addNew method to the following:
    [...]

    addNew(id) {
        let user_id = 1
        let name = "New task"
        let category_id = this.categories[id].id
        let order = this.categories[id].tasks.length

        axios.post('api/task', {user_id, name, order, category_id}).then(response => {
            this.categories[id].tasks.push(response.data.data)
        })
    },

    [...]
When the addNew method is called the id of the category is passed in, which helps us determine where the new task should be added. We create the task for that category and pass in a dummy text as a placeholder so the user can see it come up.
Editing tasks
We will now add the logic to edit tasks. In the methods object of the Board component, update the endEditing method to the following:
    [...]

    endEditing(task) {
        this.editingTask = null

        axios.patch(`api/task/${task.id}`, {name: task.name}).then(response => {
            // You can do anything you wan't here.
        })
    },

    [...]
When a task is edited, we pass it to the endEditing method which sends it over to the API.
Reordering tasks
Now we can get the logic to reorder tasks. In the methods object of the Board component, update the changeOrder method to the following:
    [...]

    changeOrder(data) {
        let toTask = data.to
        let fromTask = data.from
        let task_id = data.item.id
        let category_id = fromTask.id == toTask.id ? null : toTask.id
        let order = data.newIndex == data.oldIndex ? false : data.newIndex

        if (order !== false) {
            axios.patch(`api/task/${task_id}`, {order, category_id}).then(response => {
                // Do anything you want here
            });
        }
    },

    [...]
Draggable returns an object when you drop an element you dragged. The returned object contains information of where the element was moved from and where it was dropped. We use this object to determine which category a task was moved from.
? If you go over the draggable component again, you’d notice we bound
:idwhen we were rendering categories. This is the sameidreferenced above.
Build the application
The next thing we need to do is build the assets. Run the command below to build the application:
$ npm run prod
? Using
prodwill optimize the build. Recommended especially when you want to build for production. The other value available here isdevwhich is used during the development process
When the build is complete, we can now run the application:
$ php artisan serve
Conclusion
In this series, we have seen how to build a simple Trello clone and in the process explained some key concepts you need to know when building modern web applications using Laravel and Vue.
Build a web application with Laravel and Vue – Part 4: Creating Vue applications in Laravel
In the last tutorial, we talked about how you can create API endpoints in a Laravel application. We also explored how

Build a web application with Laravel and Vue – Part 4: Creating Vue applications in Laravel
In the last tutorial, we talked about how you can create API endpoints in a Laravel application. We also explored how you can take it a step further by integrating tests into the application.
In this part 4 of the tutorial series, we are going to change our point of view, slightly overused pun intended, and look at how we can create the frontend of our application using Vue. It is very common nowadays for web applications to have a front and backend in a somewhat separate fashion. So let’s explore different ways we could build a Vue application on Laravel and see how it all ties together.
Prerequisites
To follow this chapter you need:
Different ways to Vue things
There are different ways we can use Vue with Laravel. We can choose to build a standalone Vue application, Single Page Application, and have Laravel provide the API endpoints, or we can integrate the Vue components into Laravel blade templates as Multi Page Applications. Whichever method you choose is up to you and it depends on your situation.
Single Page Applications (SPA)
SPAs work inside a browser and do not need a page to reload. They create a wonderful user experience and can simulate native applications that you can install on your device. The key thing to note is that they load data and markup independently.
This means that for an SPA to change the content on the page, it would never reload, but fetch the data using JavaScript. Although SPAs are fast and require minimal access to the internet after they are loaded, they don’t do too well in search rankings and usually require some extra optimization for SEO.
In our case, the SPA will load on the first call to your application, then swap out the different pages as you continue to use the application with the aid of vue-router. All the data required for each page would be loaded when the components are mounted via calls to your backend API.
Multi Page Applications (MPA)
MPAs are the traditional way web applications have been built for years. They typically reload the browser every time data needs to be changed or a request for a new resource is made. You can certainly use AJAX to simplify some MPA operations and reduce page reloads.
MPAs have an edge when it comes to SEO as they are by default crawlable. Unlike SPAs, you do not need to do anything special to make your MPA crawlable. You just need to serve the pages as they are and it will be crawled by search engines unless they are explicitly told not to.
When using Vue in a Laravel MPA, you’ll embed your Vue components directly in your blade file. You can pass data as props to the component. This won’t disrupt the page and its assets and you can easily your normal CSS and JS in addition to Vue.
Building a standalone Vue application
To get started with Vue, you will need to create a new Vue application. To do so, we would need the Vue-CLI which is a command-line tool we can use to scaffold new Vue applications. To use the vue-cli to set up a standalone project, open your terminal and run the following:
$ npm install --global vue-cli
When vue-cli has been installed, you can create a standalone Vue application anywhere by running the following command:
$ vue init webpack my-new-app
We won’t need to do this though as we are using the built-in Laravel installation.
?
webpackin the command above specifies the template we want to use. Vue projects can be initialized with different templates.
The above command will create a new Vue project using the webpack template. From here you can start building your Vue application.
Vue-Laravel integration
Laravel comes pre-packaged with Vue, which means you don’t need to use the Vue-CLI, especially if you want to build your application with a single codebase. In a new installation of Laravel, you can see the Vue files by going to the resources/assets/js/components directory.
For brevity, we will be developing using the inbuilt Laravel integration since it already comes with the build tools and all.
Setting up vue-router
There are a lot of packages that work with Vue and if you need to add more you can always install them using NPM. Packages installed get saved in a package.json file and this comes with the Laravel installation.
Install predefined modules in package.json file first:
$ npm install
After the modules are installed, we can install the vue-router with the command below:
$ npm install vue-router
When the installation is complete, open your resources/assets/js/app.js file and replace the contents with the following code:
    import Vue from 'vue'
    import VueRouter from 'vue-router'

    Vue.use(VueRouter)

    import App from './views/App'
    import Welcome from './views/Welcome'

    const router = new VueRouter({
        mode: 'history',
        routes: [
            {
                path: '/',
                name: 'home',
                component: Welcome
            },
        ],
    });

    const app = new Vue({
        el: '#app',
        components: { App },
        router,
    });
Above, we have imported the VueRouter and we added it to our Vue application. We defined routes for our application and then registered it to the Vue instance so it is available to all Vue components.
? The
VueRouterconstructor takes an array of routes. In there we define the URL path, the name of the route, and the component used to fulfill requests to the route.
Next, we need to make the route for our Vue app. We’ll use a Laravel web route to load the app, and the vue router will take over the rest from there. Open your routes/web.php file and add the following route before the default route:
Route::get('/{any}', 'SinglePageController@index')->where('any', '.*');
We also need to create the SpaController to handle the requests. Run the following command:
$ php artisan make:controller SinglePageController
After it is created, go to your app/Http/Controller directory and open the SinglePageController.php file, and add the following method to the class:
    [...]

    public function index()
    {
        return view("landing");
    }

    [...]
Next, let’s make the landing view file. Create the file resources/views/landing.blade.php and add the following code:
    <!DOCTYPE html>
    <html>
    <head>
        <meta charset="utf-8">
        <meta http-equiv="X-UA-Compatible" content="IE=edge">
        <meta name="viewport" content="width=device-width, initial-scale=1">
        <meta name="csrf-token" content="{{csrf_token()}}">
        <title>Treclon</title>
        <link href=" {{ mix('css/app.css') }}" rel="stylesheet">
    </head>
    <body>
        <div id="app">
            <app></app>
        </div>
        <script src="{{ mix('js/bootstrap.js') }}"></script>
        <script src="{{ mix('js/app.js') }}"></script>
    </body>
    </html>
In the code above, we just have the HTML for our application. If you look closely, you can see the app tag. This will be the entry point to our Vue application and where the App component will be loaded in.
Next, let’s edit the webpack.mix.js file so it compiles our assets. Update the mix declarations in the file to the following:
    [...]

    mix.js('resources/assets/js/app.js', 'public/js')
       .js('resources/assets/js/bootstrap.js', 'public/js')
       .sass('resources/assets/sass/app.scss', 'public/css');
?
webpack.mix.jsfile holds the configuration files forlaravel-mixwhich provides a wrapper around Webpack. It lets us take advantage of webpack’s amazing asset compilation abilities without having to write Webpack configurations by ourselves. You can learn more about Webpack here.
Now, let us set up a simple welcome page for our Vue application. Create a new file, resources/assets/js/views/Welcome.vue, and add the following code to the file:
    <template>
        <div class="flex-center position-ref full-height">
            <div class="content">
                <div  class="m-b-md">
                    <h2 class="title m-b-md">
                        Treclon
                    </h2>
                    <h3>
                        Your efficent task planner
                    </h3>
                </div>
            </div>
        </div>
    </template>
The code above within the template tags defines the HTML of our Vue component. In the same file, append the code below the closing template tag:
    <style scoped>
    .full-height {
        height: 100vh;
    }
    .flex-center {
        align-items: center;
        display: flex;
        justify-content: center;
    }
    .position-ref {
        position: relative;
    }
    .top-right {
        position: absolute;
        right: 10px;
        top: 18px;
    }
    .content {
        text-align: center;
    }
    .title {
        font-size: 60px;
    }
    .links > a {
        color: #636b6f;
        padding: 0 25px;
        font-size: 12px;
        font-weight: 600;
        letter-spacing: .1rem;
        text-decoration: none;
        text-transform: uppercase;
    }
    .m-b-md {
        margin-bottom: 30px;
        color: #000000;
    }
    </style>
In the code above, we have defined the style to use with the welcome component.
? When a
<style>tag has thescopedattribute, its CSS will apply to elements of the current component only. This is similar to the style encapsulation found in Shadow DOM. It comes with some caveats but doesn’t require any polyfills. – Vue documentation.
Next, append the code below to the file:
    <script>
    export default {}
    </script>
Because our component does not need scripting logic, we leave it empty.
Next create another file, resources/assets/js/views/App.vue. This will be the application
container and all other components will be loaded into this container using the vue-router. In this file, add the following code:
    <template>
        <div>
            <nav class="navbar navbar-expand-md navbar-light navbar-laravel">
                <div class="container">
                    <router-link :to="{name: 'home'}" class="navbar-brand">Treclon</router-link>
                    <button class="navbar-toggler" type="button" data-toggle="collapse" data-target="#navbarSupportedContent" aria-controls="navbarSupportedContent" aria-expanded="false" aria-label="Toggle navigation">
                        <span class="navbar-toggler-icon"></span>
                    </button>

                    <div class="collapse navbar-collapse" id="navbarSupportedContent">
                        <!-- Left Side Of Navbar -->
                        <ul class="navbar-nav mr-auto"></ul>
                        <!-- Right Side Of Navbar -->
                        <ul class="navbar-nav ml-auto">
                            <li class="nav-link"> Hi, There</li>
                        </ul>
                    </div>
                </div>
            </nav>
            <main class="py-4">
                <router-view></router-view>
            </main>
        </div>
    </template>
As we said earlier, the template tag holds the HTML for our component. However, we used some Vue specific tags in the code above like router-link, which helps us generate links for routing to pages defined in our router. We also have the router-view, which is where all the child component pages will be loaded.
Since we don’t need scripting on this page also, append the following to the file:
    <script>
    export default {}
    </script>
Now, build the Vue application with the command below:
$ npm run dev
This will compile all our js assets and put them inside the public/js folder. To test the application and see what we have been able to achieve, run the php artisan serve command as we have done before.
$ php artisan serve
When you visit the page you should see something like this:
Authentication
As with most web applications, authentication is important. We had, in the previous parts, discussed authentication and set up endpoints for authenticating users. In the next and final part, we will see how to protect pages we do not want unauthenticated users to see and how to make authenticated requests to the API.
Conclusion
In this chapter, we have looked at the basics of building a simple standalone application with Vue-CLI and also how we can build the same using the built-in Laravel integration. In the next chapter, we will continue building our Treclon app and see how everything ties in together.
Build a web application with Laravel and Vue – Part 3: Testing your application’s API endpoints
In the last chapter, we looked at how to make RESTful API Endpoints. The next thing we will consider is how

Build a web application with Laravel and Vue – Part 3: Testing your application’s API endpoints
In the last chapter, we looked at how to make RESTful API Endpoints. The next thing we will consider is how to test the application’s endpoints before releasing it for public consumption. This is useful because it makes sure that throughout the lifetime of the application, you can be sure that the API works as expected.
Prerequisites
This part of the series requires that you have:
- Postman installed on your machine.
- Completed part 2 of the series.
When you have met all the requirements above, let’s continue.
Using Postman for testing endpoints
To test our API endpoints, we are going to use Postman. Postman is a complete tool-chain for API developers and is available on all desktop platforms.
Download and installation
To download Postman, head over here. Once you have successfully downloaded and installed Postman, run it and when you get the interface below, you’re good to go.
Now that we have Postman successfully installed, we can start making our requests to the API. Let’s start by making a GET request to fetch the resources from our API Server.
? For brevity, we will show examples for a few endpoints and you can repeat the rest for other endpoints.
For all requests made using Postman, remember to set the header Accept: application/json in the headers tab of Postman to make sure we get the right response from our API.
? Postman collections help you organize and save all your requests. This makes it easier to go back to an existing request without having to retype it.
Fetching resources in Postman
To fetch resources, you need to provide the HTTP method, usually GET, and the URL to fetch the resources from. In the case of our application, we will test a simple endpoint.
Start your Laravel server, if it’s not already running, using the php artisan serve command and hit the following endpoint:
Because we have added an authorization middleware to the routes, calling these endpoints without authentication will fail with a “401 Unauthorized” response. We will consider how to make authorized requests later in this article.
URL: http://127.0.0.1:8000/api/category/
Method: GET
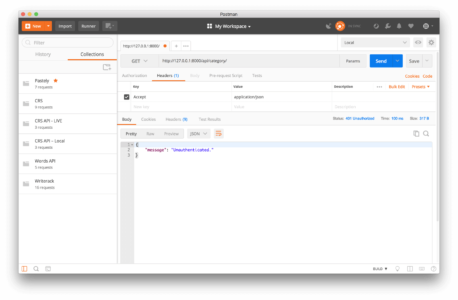
Creating resources using Postman
To create resources, you need to provide the HTTP method, usually POST, and the URL to post the data to be created too. In the case of our application, we will test a simple endpoint.
Start your Laravel server, if it’s not already running, using the php artisan serve command and hit the following endpoint:
URL: http://127.0.0.1:8000/api/category
Method: POST
Body: name
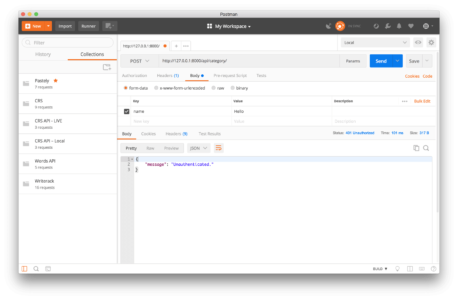
Updating resources using Postman
To update a resource, you need to provide the HTTP method, usually PUT (or PATCH, depending on your preference), and the URL to post the data to be updated too. In the case of our application, we will test a simple endpoint.
Start your Laravel server, if it’s not already running, using the php artisan serve command and hit the following endpoint:
Good Read: Difference between PUT and PATCH.
URL: http://127.0.0.1:8000/api/category/{category_id}
Method: PUT
Body: name
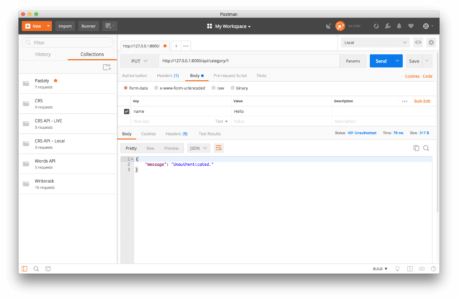
Deleting resources using Postman
To delete a resource, you need to provide the HTTP method, usually DELETE, and the URL to the resource to be deleted. In the case of our application, we will test a simple endpoint.
Start your Laravel server, if it’s not already running, using the php artisan serve command and hit the following endpoint:
URL: http://127.0.0.1:8000/api/category/{category_id}
Method: DELETE
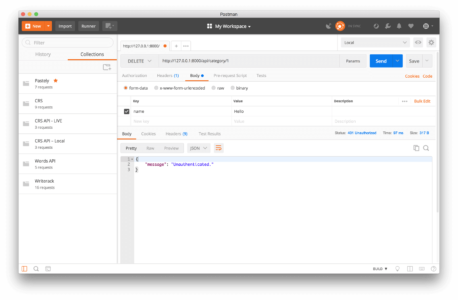
Making authorized requests using access tokens
Certain parts of our application can only be accessed by authenticated users. For this, in the previous article, we added a few endpoints for authentication. When a user hits these endpoints, they will be authenticated and provided with an access token. Attaching this access token to a request on a protected route will grant the user access to the resource.
To create tokens on the backend for the API, we will be using Laravel Passport we setup earlier. Now we will be looking at how to use our access tokens with Postman. First of all, you need to get the token by logging the user in. If the user doesn’t have an account, we create one and then log in.
Creating a new user account
To create a new user, make a POST request using Postman as shown below:
URL: http://127.0.0.1:8000/api/register
Method: POST
Body: name, email, password
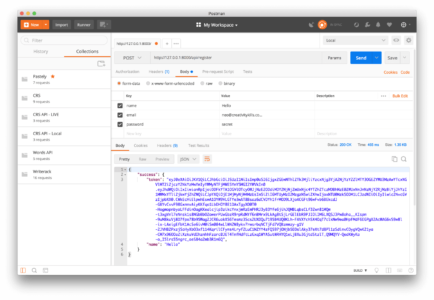
As seen from the response above, there is a token that is returned with the response. The client can make requests using the token obtained from the API as the access_token for further request.
? You will need to copy this
tokenfor use on other API endpoints except for the/api/loginendpoint.
Logging into a user account
To log into a user account, send a request to the endpoint using Postman as seen below:
URL: http://127.0.0.1:8000/api/login
Method: POST
Body: email, password
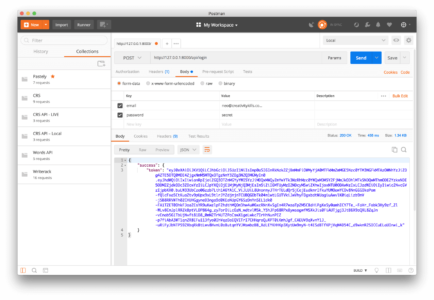
Applying access tokens to authenticate requests
Now that we have obtained the token from the previous requests, the next we want to do is to now use the access tokens to make our next request. We are going to make a request to fetch all the categories.
Before doing this, go to the CategoryController.php and update the index method as seen below:
    [...]

    public function index()
    {
        return response()->json(Category::all()->toArray());
    }

    [...]
Now we can make our request in Postman.
? Making a request without specifying the mode of authentication and the token will fail. To authenticate the request, go to the
Authorizationtab and then paste the token obtained from the lastlogin/registerrequest.
URL: http://127.0.0.1:8000/api/category
Method: GET
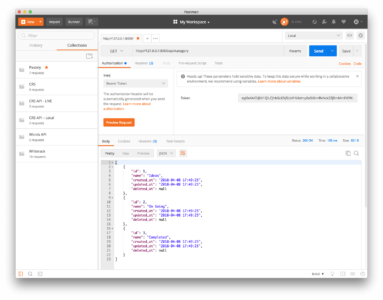
As seen from the screenshot above, the categories are displayed in the response section. If you remove or change the token and make a new request you will get an “Unauthorised” response.
Automatically generating access tokens for Postman requests
Now that we know how to use access tokens to make requests with Postman, you’ll notice how manual the process is. Since we know we will be making a lot of requests using Postman, let’s get Postman to generate our access tokens automatically.
To get started, we need to create a Postman environment. In the environment, we are going to create some variables. To create a new environment, click the Environment quick look button on the top right and then enter the name of the environment you want to create.

Next, add the environment variables. We’ll create a variable for the url and also one for the token.
? We will leave the value for the
tokenfield blank as that is what we are going to generate so we don’t need to put a value.
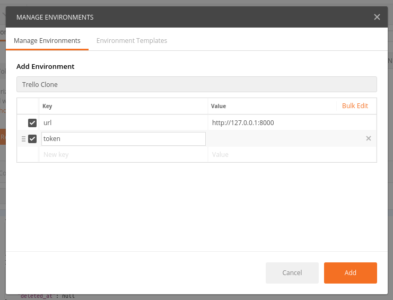
Save your new environment. Next, on the top right of the panel where the url is usually entered, you need to change the environment from No Environment to the name of the environment you want to use – in this case, Trello Clone.
Let’s modify the login request we made earlier. Now in the Tests tab, add the following code:
postman.setEnvironmentVariable("token", JSON.parse(responseBody).success.token);
What this script does is that it fetches the token from the response and then sets the value to our token environment variable. It’s a bit hacky but it will solve the issue of having to copy the data manually.

After doing this, make the request to the login endpoint. Next, go to any endpoint that requires an access token and add {{token}} to the Authorization tab. After that, the token will be automatically added there and you won’t need to copy the access token to make other requests.
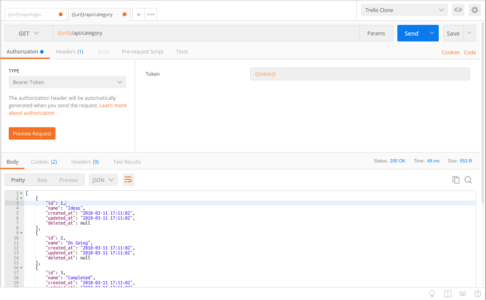
Quick dive into unit tests for your endpoints
By now you have probably heard of Test Driven Development and writing tests for your application. Some developers shy away from writing tests but writing tests is a good way to make sure that you can update your code confidently without worrying about introducing bugs.
What are the unit tests?
In computer programming, unit testing is a software testing method by which individual units of source code, sets of one or more computer program modules together with associated control data, usage procedures, and operating procedures, are tested to determine whether they are fit for use. – Wikipedia.
Writing unit tests in Laravel
Let’s take a look at how to write unit tests. We are going to write tests for the Trello Clone application. We are not going to have 100% coverage, it’s just a few to show you how you can write your own tests.
Laravel comes built with some starter code for unit tests and we will be building on top of that in the following examples. To make a new test in Laravel, you run the following artisan command:
$ php artisan make:test APITest --unit
Test registering a new user
Let’s write a test to check if our register endpoint works. Open the APITest.php file in the tests/Unit directory and paste this into the file:
    <?php

    namespace Tests\Unit;

    use Tests\TestCase;

    class APITest extends TestCase
    {
        public function testUserCreation()
        {
            $response = $this->json('POST', '/api/register', [
                'name' => 'Demo User',
                'email' => str_random(10) . '@demo.com',
                'password' => '12345',
            ]);

            $response->assertStatus(200)->assertJsonStructure([
                'success' => ['token', 'name']
            ]);
        }
    }
In the code above, we created a mock request using the json method that comes with Laravel’s TestCase class and then checked the response to see if the status code is 200 and if the returned structure matches what we expect.
Test logging in a new user
To test if the login endpoint works, let’s add a new method to the APITest class:
    public function testUserLogin()
    {
        $response = $this->json('POST', '/api/login', [
            'email' => 'demo@demo.com',
            'password' => 'secret'
        ]);

        $response->assertStatus(200)->assertJsonStructure([
            'success' => ['token']
        ]);
    }
Test fetching all categories
Next, let’s test fetching categories. Add the following method to the class:
    public function testCategoryFetch()
    {
        $user = \App\User::find(1);

        $response = $this->actingAs($user, 'api')
            ->json('GET', '/api/category')
            ->assertStatus(200)->assertJsonStructure([
                '*' => [
                    'id',
                    'name',
                    'created_at',
                    'updated_at',
                    'deleted_at'
                ]
            ]
        );
    }
The above structure assertion is indicated by the * that the key can be any string.
Since we don’t have any logic for some methods in our category controller, let’s add some make-believe logic for now. We will update it in one of the next parts. Open the CategoryController and update the following methods as seen below:
    public function store(Request $request)
    {
        return response()->json(['status' => true, 'message' => 'Category Created']);
    }

    public function destroy(Category $category)
    {
        return response()->json(['status' => true, 'message' => 'Category Deleted']);
    }
Now let’s test these endpoints.
Test creating a new category resource
To test adding a new category, add the following method to the APITest class:
    public function testCategoryCreation()
    {
        $this->withoutMiddleware();

        $response = $this->json('POST', '/api/category', [
            'name' => str_random(10),
        ]);

        $response->assertStatus(200)->assertJson([
            'status' => true,
            'message' => 'Category Created'
        ]);
    }
In the above, we make a call to $this->withoutMiddleware(). This leaves out the middleware(s) registered to this endpoint. Because the auth:api is a middleware registered to this endpoint, it is left put and we can call without authentication. This is not a recommended method but it’s good to know it exists.
Test deleting a category resource
Let’s write a test to test deleting a resource. In the test class, add the following method:
    public function testCategoryDeletion()
    {
        $user = \App\User::find(1);

        $category = \App\Category::create(['name' => 'To be deleted']);

        $response = $this->actingAs($user, 'api')
            ->json('DELETE', "/api/category/{$category->id}")
            ->assertStatus(200)->assertJson([
                'status' => true,
                'message' => 'Category Deleted'
            ]);
    }
Running the unit tests
Now that you have written your tests, you can run them using the command below in the root of your project:
$ ./vendor/bin/phpunit

From the output above, can see that all our tests passed and we are good to continue writing more test cases or maybe release our API for public consumption!
Bonus: using a separate database for unit tests
On a side note, when running tests, we will definitely want to use a different database from our current one so it does not become cluttered. Laravel helps us handle this effectively.
If you want to do this in any other project you are working with, open the phpunit.xml file in the root of your project and look for the <php> tag. Replace the children of this tag with the following:
    [...]
    <env name="APP_ENV" value="testing"/>
    <env name="APP_URL" value="http://127.0.0.1:8000"/>
    <env name="DB_CONNECTION" value="sqlite"/>
    <env name="DB_DATABASE" value=":memory:"/>
    <env name="CACHE_DRIVER" value="array"/>
    <env name="SESSION_DRIVER" value="array"/>
    <env name="QUEUE_DRIVER" value="sync"/>
    [...]
This forces PHPUnit to use in-memory SQLite as its database. Next, in the test class, add the following:
    <?php

    [...]
    use Illuminate\Foundation\Testing\DatabaseMigrations;

    class SomeTest extends TestCase
    {
        use DatabaseMigrations;

        [...]
    }

    [...]
You don’t need to do this in the current project’s tests though as the project was not set up for that. It’s just a good to know.
? The
DatabaseMigrationstrait makes sure that a migration is run before the test is run. This ensures the tables exist before the tests are run so we do not get database errors.
Conclusion
In this part of the series, we have seen how to use Postman to test API endpoints. We also automate the token generation process for requests. We have also seen how to unit test our API Endpoints.
In the next chapter we will diverge from PHP a little and look at how to create our front facing Vue Application.
Build a web application with Laravel and Vue – Part 2 : Creating our endpoints with REST in mind
In the last tutorial, we looked at how to successfully set up a development environment preparing us for PHP Development. Through the

Build a web application with Laravel and Vue – Part 2 : Creating our endpoints with REST in mind
In the last tutorial, we looked at how to successfully set up a development environment preparing us for PHP Development. Through the rest of the series, we will be building a simple “Trello Clone”.
In this tutorial, we will take a closer look at how setting up out application “RESTully” will play a role in us building modern apps using Vue and Laravel.
At the end of the series, what we’ll have will look like this:
Prerequisites
This part of the series requires that you have:
- Completed the first part of the series and have setup your development environment properly.
Creating the application
To get started, we need to create our application. Since we have already set up our development environment in part one, all we need to is run the following command to create a new Laravel application:
$ laravel new trello-clone
To give your application a test run, cd into the trello-clone directory and then run the command:
$ php artisan serve
This runs your Laravel application on 127.0.0.1:8000. To kill the server press ctrl+c on your machine. If you have Laravel valet installed and configured on your machine then you can cd to the trello-clone directory, run the command below:
$ valet link trello-clone
Then head over to http://trello-clone.test. You should see the Laravel welcome page as seen below:
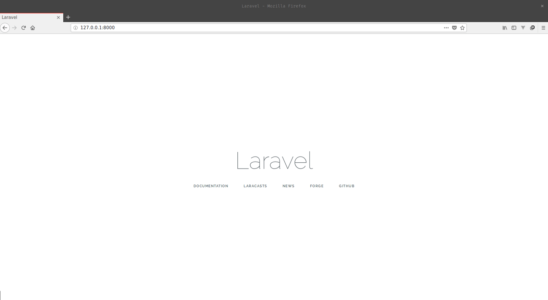
Building the models
For our simple trello clone, we are going to have the following models:
- User.
- Task.
- Category.
To build a model, run the following below. Since we already have the User model, we need models for the Task and Category resources. You can go ahead and create the models now.
$ php artisan make:model ModelName -mr
? The
-mrflag creates an accompanying migration file and resource controller for the model.
The User model
Laravel comes bundled with a default User model so you do not need to create one. The User model will have the following fields:
id– the unique auto-incrementing ID of the user.name– the name of the user.email– the email of the user.password– used in authentication.
Open the User model which is in the app directory and update it as below:
    <?php

    namespace App;

    use Illuminate\Notifications\Notifiable;
    use Illuminate\Foundation\Auth\User as Authenticatable;
    use Illuminate\Database\Eloquent\SoftDeletes;

    class User extends Authenticatable
    {
        use SoftDeletes, Notifiable;

        protected $fillable = ['name', 'email', 'password'];

        protected $hidden = [
            'password', 'remember_token',
        ];

        public function tasks(){
            return $this->hasMany(Task::class);
        }
    }
? A fillable column in Laravel is a database column that is mass assignable. This means you can just pass an array to the
createfunction of the model with the data you want to get assigned.?
SoftDeletesis a way of deleting resources without actually deleting the data from the database. What happens is that when the table is created, there will be a field called ‘deleted_at’ and when a user tries to delete a task, the ‘deleted_at’ field will be populated with the current date time. And so when fetches are made for resources, the ‘deleted’ resource will not be part of the response
Task model
The task model will have the following fields:
id– a unique identifier for the task.name– the name of the task.category_id– ID of the category the task belongs to.user_id– ID of the user the task belongs to.order– the order of the task in its respective category.
Create a Task model using the artisan command. Then open it from the app directory and replace the contents with the following:
    <?php

    namespace App;

    use Illuminate\Database\Eloquent\Model;
    use Illuminate\Database\Eloquent\SoftDeletes;

    class Task extends Model
    {
        use SoftDeletes;

        protected $fillable = ['name', 'category_id', 'user_id', 'order'];

        public function category() {
            return $this->hasOne(Category::class);
        }

        public function user() {
            return $this->belongsTo(User::class);
        }
    }
Category model
The category model will have the following fields:
id– this will uniquely identify every category.name– represents the name of the category.
Create a Category model using the artisan command. Then open it from the app directory and replace the contents with the following:
    <?php

    namespace App;

    use Illuminate\Database\Eloquent\Model;
    use Illuminate\Database\Eloquent\SoftDeletes;

    class Category extends Model
    {
        use SoftDeletes;

        protected $fillable = ['name'];

        public function tasks() {
            return $this->hasMany(Task::class);
        }
    }
Here, the tasks() function is to help define relationships between the Category model and the Task model as a one-to-many relationship. What this means is one category has many tasks.
Writing our migrations
For this application to work, we need to create the database. To keep track of changes going on in our database, we make use of migrations, which is an inbuilt feature of Laravel.
As part of the prerequisites mentioned in the first part of this series, you need SQLite installed on your machine. To create an SQLite database that Laravel can connect to create an empty new file in the database directory called database.sqlite.
Next, open your .env file in the root of your project and replace the following lines:
    DB_CONNECTION=mysql
    DB_DATABASE=homestead
    DB_USERNAME=username
    DB_PASSWORD=password
with
    DB_CONNECTION=sqlite
    DB_DATABASE=/full/path/to/database/database.sqlite
That is all for our database setup. However, while you’re in the .env file, change the APP_URL value from http://localhost to http://127.0.0.1:8000 as this will be the application URL.
If you wanted to create migrations, the artisan command is:
$ php artisan make:migration create_tablename_table
You can name your migration file whatever you like, but it is always good to name it like verb_tablename_table as shown above. The file will be created in the database/migrations directory.
However since we have already used the -mr flag earlier while creating our models, the migrations should have been created for us already.
Migrations are runtime-based. So you need to consider this when making migrations for tables that are dependent on each other.
Updating our user migration
Open the create users migration file in the database/migrations directory and replace the content with the code below:
    <?php

    use Illuminate\Support\Facades\Schema;
    use Illuminate\Database\Schema\Blueprint;
    use Illuminate\Database\Migrations\Migration;

    class CreateUsersTable extends Migration
    {
        public function up()
        {
            Schema::create('users', function (Blueprint $table) {
                $table->increments('id');
                $table->string('name');
                $table->string('email')->unique();
                $table->string('password');
                $table->rememberToken();
                $table->timestamps();
                $table->softDeletes();
            });
        }

        public function down()
        {
            Schema::dropIfExists('users');
        }
    }
Updating our category migration
Since we had created the category migration earlier, open the file and replace the content with the code below:
    <?php

    use Illuminate\Support\Facades\Schema;
    use Illuminate\Database\Schema\Blueprint;
    use Illuminate\Database\Migrations\Migration;

    class CreateCategoriesTable extends Migration
    {
        public function up()
        {
            Schema::create('categories', function (Blueprint $table) {
                $table->increments('id');
                $table->string('name');
                $table->timestamps();
                $table->softDeletes();
            });
        }

        public function down()
        {
            Schema::dropIfExists('categories');
        }
    }
Creating our task migration
Since we created the task migration file earlier, open the file and replace the content with the code below:
    <?php

    use Illuminate\Support\Facades\Schema;
    use Illuminate\Database\Schema\Blueprint;
    use Illuminate\Database\Migrations\Migration;

    class CreateTasksTable extends Migration
    {
        public function up()
        {
            Schema::create('tasks', function (Blueprint $table) {
                $table->increments('id');
                $table->string('name');
                $table->unsignedInteger('category_id');
                $table->unsignedInteger('user_id');
                $table->integer('order');
                $table->timestamps();
                $table->softDeletes();

                $table->foreign('user_id')->references('id')->on('users');
                $table->foreign('category_id')->references('id')->on('categories');
            });
        }

        public function down()
        {
            Schema::dropIfExists('tasks');
        }
    }
Now that we have our migration files, let’s run the artisan command to execute the migrations and write to the database:
$ php artisan migrate
? Migrations are like version control for your database. It allows you to create, modify or tear down your database as your application evolves, without having to manually write SQL queries (or whatever queries your database of choice uses). It also makes it easy for you and your team to easily modify and share the application’s database schema. Learn more.
Database seeders
Now that we have created our database migrations, let’s see how to put in dummy data for when we are testing our applications. In Laravel, we have something called seeders.
? Seeders allow you automatically insert dummy data into your database.
This is the command to make a seeder:
$ php artisan make:seeder TableNameSeeder
Creating our users table seeder
To create our database seeder type the following command:
$ php artisan make:seeder UsersTableSeeder
This creates a UsersTableSeeder.php file in the database/seeds directory. Open the file and replace the contents with the following code:
    <?php

    use App\User;
    use Illuminate\Database\Seeder;

    class UsersTableSeeder extends Seeder
    {
        public function run()
        {
            User::create([
                'name' => 'John Doe',
                'email' => 'demo@demo.com',
                'password' => bcrypt('secret'),
            ]);
        }
    }
The run function contains the database query we want to be executed when the seeders are run.
? You can use model factories to create better-seeded data.
? We use the
bcryptto hash the password before storing it because this is the default hashing algorithm Laravel uses to hash passwords.
Creating our categories table seeder
To create our database seeder type the following command:
$ php artisan make:seeder CategoriesTableSeeder
This creates a CategoriesTableSeeder.php file in the database/seeds directory. Open the file and replace the contents with the following code:
    <?php

    use App\Category;
    use Illuminate\Database\Seeder;

    class CategoriesTableSeeder extends Seeder
    {
        public function run()
        {
            $categories = ['Ideas', 'On Going', 'Completed'];

            foreach ($categories as $category) {
                Category::create(['name' => $category]);
            }
        }
    }
Running our database seeders
To run the database seeders, open the database/DatabaseSeeder.php file and replace the run method with the code below:
    public function run()
    {
        $this->call([
            UsersTableSeeder::class,
            CategoriesTableSeeder::class,
        ]);
    }
Next, run the command below on your terminal:
$ php artisan db:seed
This should update the databases with data. If at some point you want to refresh and seed your data again, run the command below:
$ php artisan migrate:fresh --seed
This will delete the database tables, add them back and run the seeder.
REST in a nutshell
In technical terms, REST stands for REpresentational State Transfer (elsewhere, it just means “to relax”). In order for you get a good grasp of this article, there are a couple of terms that need to be broken down into bite-sized nuggets.
Clients, statelessness, resources – what’s the relationship?
Clients are the devices that interact with your application. For any given application, the number of clients that interact with it can range from one to billions. When you go to a website (e.g. https://pusher.com) your client sends a request to the server. The server then processes your request and then sends a response back to your client for interaction.
Statelessness in the simplest of terms means building your application in such a way that the client has all it needs to complete every request. When the client makes subsequent requests, the server won’t store or retrieve any data relating to the client. When your application starts having more active concurrent users, it will be an unnecessary burden on your server managing states for the client. Being stateless also simplifies your application design so unless you have specific reasons not to be, then why not?
Resources are a representation of real-life instances in your code. Take for example you are building an application that allows students to check their grades, a good example of resources in such an application will be your students, courses etc. These resources are linked with the data that will be stored in the database.
Now when we are building RESTful applications, our server gives the client access to the resources. The client is then able to make requests to fetch, change, or delete resources. Resources are usually represented in JSON or XML formats but there are many more formats and it’s up to you during your implementation to decide the format.
Creating your first few REST endpoints
Before we start creating the endpoints, make sure you get familiar with best practices for naming REST resources.
We currently have the following HTTP Verbs which we are going to apply:
GET– this is usually used to fetch a resourcePOST– this is used to create a new resourcePUT/PATCH– used to replace/update an existing resourceDELETE– used to delete a resource
Here is a tabular representation of how our REST endpoints for our tasks resource will look:
| METHOD | ROUTE | FUNCTION |
|---|---|---|
| POST | /api/task | Creates a new task |
| GET | /api/task | Fetches all tasks |
| GET | /api/task/{task_id} | Fetches a specific task |
| PUT | PATCH | /api/task/{task_id} | Update a specific task |
| DELETE | /api/task/{task_id} | Delete a specific task |
Let’s start creating the routes in our application. Open the routes/api.php file and updated:
    <?php

    Route::resource('/task', 'TaskController');
    Route::get('/category/{category}/tasks', 'CategoryController@tasks');
    Route::resource('/category', 'CategoryController');
Above, we defined our routes. We have two route resources that register all the other routes for us without having to create them manually. Read about resource controllers and routes here.
Formatting responses and handling API errors
Earlier in the article, we spoke about making requests from the client. Now let’s look at how to create and format our responses when a request has been handled.
Creating our controllers
Now that we have our routes, we need to add some controller logic that will handle all our requests. To create a controller, you need to run the following command on the terminal:
$ php artisan make:controller NameController
However since we have created our requests when we used the -mr earlier, let’s edit them.
Open the controller file TaskController.php in the app/Http/Controller/ directory. In there, we will define a few basic methods that’ll handle the routes we created above.
In the file update the store method as seen below:
    public function store(Request $request)
    {
        $task = Task::create([
            'name' => $request->name,
            'category_id' => $request->category_id,
            'user_id' => $request->user_id,
            'order' => $request->order
        ]);

        $data = [
            'data' => $task,
            'status' => (bool) $task,
            'message' => $task ? 'Task Created!' : 'Error Creating Task',
        ];

        return response()->json($data);
    }
? On line 16 we can see that the response is set to be in the JSON format. You can specify what response format you want the data to be returned in, but we will be using JSON.
We are not focusing on creating the meat of the application just yet. We are explaining how you can create RESTful endpoints. In later parts, we will create the controllers fully.
Securing our endpoints with Passport
Now that we have our routes, we have to secure them. As they are now, anyone can access them without having to verify that they should be able to.
Laravel, by default, has support for web and api routes. Web routes handle routing for dynamically generated pages accessed from a web browser, while, API routes handle requests from clients that require a response in either JSON or XML format.
Authentication and authorization (JWT) to secure the APIs
In the first part of this series, we talked about API authentication using Laravel Passport. If you read this guide, you would already have the idea of how to make this work. For that reason, we would go over a lot of things fairly quickly in this section.
First, install Laravel Passport:
$ composer require laravel/passport
Laravel Passport comes with the migration files for the database table it needs to work, so you just need to run them:
$ php artisan migrate
Next, you should run the passport installation command so it can create the necessary keys for securing your application:
php artisan passport:install
The command will create encryption keys needed to generate secure access tokens plus “personal access” and “password grant” clients which will be used to generate access tokens.
After the installation, you need to use the Laravel Passport HasApiToken trait in the User model. This trait will provide a few helper methods to your model which allow you to inspect the authenticated user’s token and scopes.
File: app/User.php
    <?php

    [...]

    use Laravel\Passport\HasApiTokens;

    class User extends Authenticatable
    {
        use HasApiTokens, SoftDeletes, Notifiable;

        [...]
    }
Next, call the Passport::routes method within the boot method of your AuthServiceProvider. This method will register the routes necessary to issue the tokens your app will need:
File: app/Providers/AuthServiceProvider.php
    <?php

    [...]

    use Laravel\Passport\Passport;

    class AuthServiceProvider extends ServiceProvider
    {
        [...]

        public function boot()
        {
            $this->registerPolicies();

            Passport::routes();
        }

        [...]
    }
Finally, in your config/auth.php configuration file, you should set the driver option of the api authentication guard to passport.
File: config/auth.php
    [...]

    'guards' => [
        [...]

        'api' => [
            'driver' => 'passport',
            'provider' => 'users',
        ],
    ],

    [...]
Log in and register using the API
Now that you have set up the API authentication for this application using Laravel Passport, we will need to make the login and registration endpoints.
Add the following routes in routes/api.php file:
    Route::post('login', 'UserController@login');
    Route::post('register', 'UserController@register');
You also need to create the UserController to handle authentication requests for the API. Create a new file UserController.php in app/Http/Controllers and place the following code in it:
    <?php

    namespace App\Http\Controllers;

    use App\User;
    use Validator;
    use Illuminate\Http\Request;
    use App\Http\Controllers\Controller;
    use Illuminate\Support\Facades\Auth;

    class UserController extends Controller
    {
        public function login()
        {
            $credentials = [
                'email' => request('email'),
                'password' => request('password')
            ];

            if (Auth::attempt($credentials)) {
                $success['token'] = Auth::user()->createToken('MyApp')->accessToken;

                return response()->json(['success' => $success]);
            }

            return response()->json(['error' => 'Unauthorised'], 401);
        }

        public function register(Request $request)
        {
            $validator = Validator::make($request->all(), [
                'name' => 'required',
                'email' => 'required|email',
                'password' => 'required',
            ]);

            if ($validator->fails()) {
                return response()->json(['error' => $validator->errors()], 401);
            }

            $input = $request->all();
            $input['password'] = bcrypt($input['password']);

            $user = User::create($input);
            $success['token'] = $user->createToken('MyApp')->accessToken;
            $success['name'] = $user->name;

            return response()->json(['success' => $success]);
        }

        public function getDetails()
        {
            return response()->json(['success' => Auth::user()]);
        }
    }
In the code above we have the:
Login Method: in here we call Auth::attempt with the credentials the user supplied. If authentication is successful, we create access tokens and return them to the user. This access token is what the user would always send along with all API calls to have access to the APIs.
Register Method: like the login method, we validated the user information, created an account for the user and generated an access token for the user.
Grouping routes under a common middleware
For our routes, we can group the routes we need authentication for under common middleware. Laravel comes with the auth:api middleware in-built and we can just use that to secure some routes as seen below in the routes/api.php file:
    <?php

    Route::post('login', 'UserController@login');
    Route::post('register', 'UserController@register');

    Route::group(['middleware' => 'auth:api'], function(){
        Route::resource('/task', 'TasksController');
        Route::resource('/category', 'CategoryController');
        Route::get('/category/{category}/tasks', 'CategoryController@tasks');
    });
Handling API errors
In the event that our server encountered errors while serving or manipulating our resources, we have to implement a way to communicate to the client that something went wrong. For this, we have to serve the responses with specific HTTP status codes.
If you look at the UserControlle``r.php file you can see us implementing HTTP status code 401 which signifies that the client is not authorized to view the resource:
    public function login(Request $request)
    {
        $status = 401;
        $response = ['error' => 'Unauthorised'];

        [...]

        return response()->json($response, $status);
    }
Conclusion
In this part of the series, we have considered how you can create RESTful endpoints for your application. We also considered how you can handle errors and serve the correct HTTP status code to the client.
In the next chapter, we will address how to test your API endpoints using Postman. We will set up some unit tests, which will be useful for our own testing from the command-line.
Build a web application with Laravel and Vue – Part 1: Setting up your environment
In this series, we are going to walk through building modern web applications with Laravel and Vue. We will go

Build a web application with Laravel and Vue – Part 1: Setting up your environment
In this series, we are going to walk through building modern web applications with Laravel and Vue. We will go from the basics, setting up your environment, to more technical concepts like building endpoints RESTfully and even testing your endpoints.
In this chapter, we will be setting up an environment for PHP development, Laravel to be specific. We will also be installing NodeJS and NPM as we will need them to manage and build our JavaScript and Vue files.
Development environments differ a lot so it may be impossible to have a perfect setup guide that will be applicable to everyone. Therefore some of the setup guides contained in this article may not apply directly to your own OS or environment but there will be alternatives and I will try to mention any if I know of them. I am building on a Mac so other Mac users will be able to follow along 100%.
Prerequisites
To follow along in this series you will need the following:
- Knowledge of PHP.
- Very basic knowledge of the Laravel framework.
- Knowledge of JavaScript and the Vue framework.
- Basic knowledge of Node.js **and NPM.
- SQLite installed on your machine. Installation guide.
Setting up for PHP development: installing composer

Composer is a package manager for PHP applications. It allows you install libraries and packages that are publicly available and make use of it in your own applications. This makes it easy to share reusable code among other PHP developers.
Laravel uses Composer to pull in the dependent libraries and so we need to install Composer on our machine so we can pull in these packages.
Installing Composer on Windows
Download and run Composer-Setup.exe. It will install the latest Composer version and set up your PATH so that you can just call composer from any directory in your terminal.
Installing on Linux/macOS
To install Composer, run the following script in your terminal:
$ curl -sS https://getcomposer.org/installer | sudo php -- --install-dir=/usr/local/bin --filename=composer
This will download the composer installer and then move it to your /usr/local/bin directory so you can call the composer command from anywhere on your terminal.
To test your installation, run:
$ composer
And you should get output similar to this:
       ______
      / ____/___  ____ ___  ____  ____  ________  _____
     / /   / __ \/ __ `__ \/ __ \/ __ \/ ___/ _ \/ ___/
    / /___/ /_/ / / / / / / /_/ / /_/ (__  )  __/ /
    \____/\____/_/ /_/ /_/ .___/\____/____/\___/_/
                        /_/
    Composer version 1.6.3 2018-01-31 16:28:17

    Usage:
     command [options] [arguments]

    Options:
     --help (-h)           Display this help message
     --quiet (-q)          Do not output any message
     --verbose (-v|vv|vvv) Increase the verbosity of messages: 1 for normal output, 2 for more verbose output and 3 for debug
     --version (-V)        Display this application version
     --ansi                Force ANSI output
     --no-ansi             Disable ANSI output
     --no-interaction (-n) Do not ask any interactive question
     --profile             Display timing and memory usage information
     --working-dir (-d)    If specified, use the given directory as working directory.
    ...
This means Composer was successfully installed on your system.
Setting up for PHP development: installing Valet (optional)
Although Valet is only, officially, available to Mac users, there is a Linux port available here.
Valet is a Laravel development environment for Mac users. Laravel Valet configures your Mac to always run Nginx in the background when your machine starts. Valet also proxies all requests on the *.test domain to point to sites installed on your local machine. – Laravel Valet Documentation
Valet is not essential to follow along in this tutorial but is a good to have. With Valet you can quickly set up development environments for Laravel applications.
Before installation, you should make sure that no other programs such as Apache or Nginx are binding to your local machine’s port 80.
To install Valet, run the command below:
$ composer global require laravel/valet
When composer is done, run the valet install command. This will configure and install Valet and DnsMasq, and register Valet’s daemon to launch when your system starts.
Once Valet is installed, you can check if it is installed correctly by pinging any *.test domain on your terminal using a command:
ping -c 1 foo.test
If Valet is installed correctly you should see this domain responding on 127.0.0.1. You can read more about Laravel Valet in the documentation.
Setting up for PHP development: installing the Laravel CLI
Laravel makes building and managing applications easy. It bootstraps a lot of components that work together to create the perfect framework that would let you focus on what is core and important to your application. If this is your first time using Laravel, you may never go back to the old ways again.
The Laravel CLI can be installed easily with Composer. Run the following command to install it:
$ composer global require "laravel/installer"
This command will install the Laravel CLI globally for you. So whenever you want to start a new project with Laravel, you’ll just need to run the following command:
$ laravel new appname
When creation of the sample application is complete, you just need to cd appname and then if you are not using Laravel Valet, run the command below to start a PHP server on port 8000:
$ php artisan serve
? You’ll need to press
ctrl + cto exit the running Laravel application.
If you are using Laravel valet, you can link the project to a .test domain by running the command below in the root of the project:
$ valet link appname
Then you can visit appname.test on your browser to see your new Laravel application. It’s that easy.
To see all the available Laravel CLI commands, run:
$ php artisan list
Useful Laravel CLI commands
The make command is the one you’ll use the most. It lets you create different kinds of components for your application. You can use it to create models, controllers, database migrations, and other things which we will not cover in this series.
To make a new model class, that will be created in the app/ directory, run the command:
$ php artisan make:model SampleModel
To make a new controller class, that will be created in the app/Http/Controller/directory, run the command:
$ php artisan make:controller SampleController
To make a new database migration class, that will be created in the database/migrations/ directory, run the command:
$ php artisan make:migration create_sample_table
To migrate changes to your database using the migrations you generated earlier, run the following command:
$ php artisan migrate
For a really simple Laravel application, these are the commands you may likely use all through. We will learn more about them as we progress through the application. You can also check out the console documentation.
Should I use Lumen or Laravel
Lumen is a scaled down version of the Laravel framework. It removes a lot of components that it deems not as useful for lightweight development. Because it is made from Laravel, applications built in Lumen can easily be upgraded to Laravel.
It is mainly designed for building apps with microservice architecture or building APIs. In Lumen, sessions, cookies, and templating are not needed so they are taken away, keeping what’s essential – routing, logging, caching, queues, validation, error handling and a few more.
The choice between Lumen and Laravel comes when you are deciding how you want your application to function. If you want to build a single page application using Vue or React, you may decide to use Lumen to power your business logic.
If you want to integrate them into the application so that a few components are embedded directly in your templates, Laravel is the way to go. With Lumen you will not get the full functionality Laravel has to offer. So if you decide you need the full functionality, choose Laravel over Lumen.
For this series, we will be using Laravel in its full glory.
Installing and configuring dependencies (Passport)
Our application is going to be API based, so we need a way to secure our APIs so only recognized users can get into it.
Installing Laravel Passport
Laravel Passport is the tool for API Authentication. Passport makes authentication a breeze and provides a full OAuth2 server implementation for your Laravel application in a matter of minutes.
To install passport, run the following command:
$ composer require laravel/passport
API Auth using Laravel Passport
There is an extensive article on authentication with Laravel Passport available here. You should give it a read before moving to the next part of this series as it will help you get familiar with Laravel Passport.
Conclusion
In this part, we considered how you can set up your development environment for building modern web applications. In the next parts, we will build a Laravel application and while building, we will explain some concepts you need to know.
As we progress with building our application, you will see how we can bring all the tools together to build modern applications using Vue and Laravel. See you in the next part.
How to use routing in Vue.js to create a better user experience
Vue.js is a great JavaScript Framework created by Evan You. It’s used to build single web page apps and flexible components,

How to use routing in Vue.js to create a better user experience
Vue.js is a great JavaScript Framework created by Evan You. It’s used to build single web page apps and flexible components, and it’s one of the most required skills in Front End Web development. You can learn more about Vue.js here.
Vue.js provides a bunch of features that allow you to build reusable web components. Routing is one of those methods. It allows the user to switch between pages without refreshing the page. This is what makes navigation easy and really nice in your web applications.
So in this article, I’ll explain how Vue.js routers work by building a Vue template as an example.
Getting started
So, let’s get started with our Vue.js Router project by installing and creating a new Vue.js project. We need to have Node.js installed. We will be using vue-cli to generate a new Vue.js project. Follow the steps given below:
Type the following code in your terminal and run:
vue init webpack vue-router//cd vue-router//npm run devBrowse to http://localhost:8080

Open the app in your text editor. Inside the components folder, open the HellowWorld.vue file and follow these steps:
- Rename
HellowWorld.vuetohome.vue. Remove all the code and replace it with this:
<template> <div class="home"> <h1>Home</h1> </div></template><script>
export default {
name: 'home',
data() {
return {
msg: 'Welcome to Your Vue.js App'
}
}
}
</script><!-- Add "scoped" attribute to limit CSS to this component only -->
<style scoped>
</style>- Go to
index.jsinside the router folder and replaceHelloWorldwithhome:
import Vue from 'vue'import Router from 'vue-router'import home from '@/components/home'Vue.use(Router)export default new Router({
routes: [{
path: '/',
name: 'home',
component: home
}]
})The App.vue file should look like this:
<template>
<div id="app">
      <router-view/>
</div>
</template>
<script>export default { name: 'App'}</script><style>#app { }</style>And now let’s write our code!
We are now going to add a Bootswatch template. You can choose any template you like. I’ll choose Cosmo. Click Ctrl + U to view the code source and just copy the Navbar (we just need the navbar). Paste this code into App.vuecomponent.
Here we are ?

Next, we’re gonna create three other components: Blog,Services and Contact.
Inside the components folder, create new file, name it blog.vue, and push this code into it:
<template>
 <div class="blog">
  <h1>{{blog}}</h1>
 </div>
</template>

<script>
export default{
  name:'blog',
  data (){
   return{    title:'Blog'   }
  }
 }
</script>
<style scoped> </style>If you want to do the same thing for the service and contact component, you must have these files in your component folder:
- home.vue
- blog.vue
- services.vue
- contact.vue
Routers config
Now after creating these four components, we need to configure the routers so that we can navigate between the components.
So how we can navigate to each components using the routers?
We need to learn the rules of routing. Now, we have to do some modifications inside the router folder, so open index.js

Follow these steps:
- First import your components into index.js. Import all the components using the
importmethod.
import home from '@/components/home'import blog from '@/components/blog'import services from '@/components/services'import contact from '@/components/contact'- Second import Vue and router module from vue-router module:
import Vue from 'vue'import Router from 'vue-router'// use routerVue.use(Router)If you have installed Vue with vue-cli, you will have the vue-router module imported by default.
- Finally, inside the router folder, we have to configure the routers to make them work. The router method takes an Array of objects which in turn takes each component’s properties:
export default new Router({
	routes: [{
		path: '/',
		name: 'home',
		component: home
	}, {
		path: '/blog',
		name: 'blog',
		component: blog
	}, {
		path: '/services',
		name: 'services',
		component: services
	}, {
		path: '/contact',
		name: 'contact',
		component: contact
	}]
})path: the path of the componentname: the name of the componentcomponent: the view of the component
To make any component the default component, set slash(‘/’) to the path property:
path:'/'In our example, we set the home page as the default page. Now, when you open the the project in the browser, the first page that will appear is the home page.
{path:'/',name:'home',component:home}The vue-router has more advanced parameters and methods, but we are not jumping into this section at this point.
This is the list of properties and methods that you can use with vue-router:
Now you can browse to any components by typing the name of the component!
router-link
Now we are going to set up the navigation through the Navbar that we created usingthe router-link element.
To do that, we should replace the </a> element by <router-link></router/link> like this:
<li class="nav-item">
   <router-link class="nav-link" to="/blog">Blog</router-link>
</li>
<li class="nav-item">
   <router-link class="nav-link" to="/services">Services</router-link>
</li>
<li class="nav-item">
   <router-link class="nav-link" to="/contact">contact</router-link>
</li>
The router-link takes the to='path' attribute that takes the path of the component as a value.
Router-view
You will find the <router-view> tag in the App.vue file. It’s basically the view where the components are rendered. It’s like the main div that contains all the components, and it returns the component that match the current route. We will discuss route-view in the next part when we use the animation transition .
Using the parameters inside the routers
At this point, we will use parameters to navigate to specific components. The parameters make the routing dynamic.
To work with parameters, we are gonna create a list of products and an array of data. When you click on the link of any product, it will take us to the page details through a parameter.
In this situation, we are not going to use a database or API to retrieve the products’ data. So what we have to do is create an Array of products that will act as a database.
Inside the home.vue component, put the Array within the data() method just like this:
export default {
	name: 'home',
	data() {
		return {
			title: 'Home',
			products: [{
				productTitle: "ABCN",
				image: require('../assets/images/product1.png'),
				productId: 1
			}, {
				productTitle: "KARMA",
				image: require('../assets/images/product2.png'),
				productId: 2
			}, {
				productTitle: "Tino",
				image: require('../assets/images/product3.png'),
				productId: 3
			}, {
				productTitle: "EFG",
				image: require('../assets/images/product4.png'),
				productId: 4
			}, {
				productTitle: "MLI",
				image: require('../assets/images/product5.png'),
				productId: 5
			}, {
				productTitle: "Banans",
				image: require('../assets/images/product6.png'),
				productId: 6
			}]
		}
	}
}
Then fetch and loop into the Products Array using the v-for directive .
<div class="row">
   <div class="col-md-4 col-lg4" v-for="(data,index) in products" :key="index">
      <img :src="data.image" class="img-fluid">
      <h3>{{data.productTitle}}</h3>
   </div>
</div>
The result:

To navigate to the details component, we first have to add a click event:
<h3 @click="goTodetail()" >{{data.productTitle}}</h3>Then add methods:
methods:{ goTodetail() { this.$router.push({name:'details'}) }If you click the title, it will return undefined because we haven’t created the details component yet. So let’s create one:
details.vue
<template>
   <div class="details">
      <div class="container">
         <h1 class="text-primary text-center">{{title}}</h1>
      </div>
   </div>
</template>
<script>
export default{  name:'details',  data(){   return{    title:"details"   }  } }
</script>
Now we can navigate without getting an error ?
Now how can we browse to the details page and get the matched data if we don’t have a database?
We are going to use the same products array in the details component. So we can mach the id that comes from the URL:
products: [{
	productTitle: "ABCN",
	image: require('../assets/images/product1.png'),
	productId: 1
}, {
	productTitle: "KARMA",
	image: require('../assets/images/product2.png'),
	productId: 2
}, {
	productTitle: "Tino",
	image: require('../asproducts: [{
	productTitle: "ABCN",
	image: require('../assets/images/product1.png'),
	productId: 1
}, {
	productTitle: "KARMA",
	image: require('../assets/images/product2.png'),
	productId: 2
}, {
	productTitle: "Tino",
	image: require('../assets/images/product3.png'),
	productId: 3
}, {
	productTitle: "EFG",
	image: require('../assets/images/product4.png'),
	productId: 4
}, {
	productTitle: "MLI",
	image: require('../assets/images/product5.png'),
	productId: 5
}, {
	productTitle: "Banans",
	image: require('../assets/images/product6.png'),
	productId: 6
}]sets/images/product3.png'),
	productId: 3
}, {
	productTitle: "EFG",
	image: require('../assets/images/product4.png'),
	productId: 4
}, {
	productTitle: "MLI",
	image: require('../assets/images/product5.png'),
	productId: 5
}, {
	productTitle: "Banans",
	image: require('../assets/images/product6.png'),
	productId: 6
}]
First we have to set the id to the goTodetail() method as a parameter:
<h3 @click="goTodetail(data.productId)" >{{data.productTitle}}</h3>Then add a second parameter to the router method.
The $router method takes two parameters: first, the name of the component we want to navigate to, and second, the id parameter (or any other parameter).
this.$router.push({name:'details',params:{Pid:proId}})Add Pid as the parameter in index.js inside the router folder:
{ path: '/details/:Pid', name: 'details', component: details }home.vue
methods:{ goTodetail(prodId) { this.$router.push({name:'details',params:{Pid:proId}}) } }
To get the matched parameter, use this line of code:
this.$route.params.Piddetails.vue
<h2>the product id is :{{this.$route.params.Pid}}</h2>Then loop through the products array indetalils.vue and check the object that matchs the parameter Pid and return its data:
<div class="col-md-12" v-for="(product,index) in products" :key="index">
   <div v-if="proId == product.productId">
      <h1>{{product.productTitle}}</h1>
      <img :src="product.image" class="img-fluid">
   </div>
</div>
///export default{ name:'details', data(){ return{ proId:this.$route.params.Pid, title:"details" }}You see now that when we click any product’s link it get us to that product!
detail.vue component:
<template>
   <div class="details">
      <div class="container">
         <div class="row">
            <div class="col-md-12" v-for="(product,index) in products" :key="index">
               <div v-if="proId == product.productId">
                  <h1>{{product.productTitle}}</h1>
                  <img :src="product.image" class="img-fluid">
               </div>
            </div>
         </div>
      </div>
   </div>
</template>
< script >
	export default {
		name: 'details',
		data() {
			return {
				proId: this.$route.params.Pid,
				title: "details",
				products: [{
					productTitle: "ABCN",
					image: require('../assets/images/product1.png'),
					productId: 1
				}, {
					productTitle: "KARMA",
					image: require('../assets/images/product2.png'),
					productId: 2
				}, {
					productTitle: "Tino",
					image: require('../assets/images/product3.png'),
					productId: 3
				}, {
					productTitle: "EFG",
					image: require('../assets/images/product4.png'),
					productId: 4
				}, {
					productTitle: "MLI",
					image: require('../assets/images/product5.png'),
					productId: 5
				}, {
					productTitle: "Banans",
					image: require('../assets/images/product6.png'),
					productId: 6
				}]
			}
		}
	} < /script>
The transition

In this part, we are going to add an animation transition to the animated component. We will animate the transition of the components. It makes the navigation awesome, and it creates a better UX and UI.
To make an animation transition, put the “<router-view>” inside the “<transition/>” tag and give it a name of class.
App.vue
<transition name="moveInUp"> <router-view/> </transition>To animate the transition of the component when it enters the view, add enter-activeto the name given to the transition tag. Then addleave-activeand then give it the CSS transition properties just like this:
.moveInUp-enter-active{ opacity: 0; transition: opacity 1s ease-in;}Using CSS3 animation
Now we are gonna animate using @keyframes in CSS3.
When the component enters the view, add a fade effect to the view.
.moveInUp-enter-active{ animation: fadeIn 1s ease-in;}@keyframes fadeIn{ 0%{ opacity: 0; } 50%{ opacity: 0.5; } 100%{ opacity: 1; }}
Add another fade effect when the component leaves the view.
Now we’re going to make the component move in and up when it leaves the view.
.moveInUp-leave-active{ animation: moveInUp .3s ease-in;}@keyframes moveInUp{ 0%{ transform: translateY(0); } 100%{ transform: translateY(-400px); }}
Now you can create you own animations and transitions for your components.
Wrapping up
Routing in Vue.js makes your app pretty awesome when it come to navigation. It give it that energy of the single page web application, and it creates a better user experience.
Multiple CSS classes in React
After learning how to import CSS files in React and style your components, probably the most common question which springs

Multiple CSS classes in React
After learning how to import CSS files in React and style your components, probably the most common question which springs to mind is: How can I deal with multiple CSS classes in React? Or even something a bit more complex, such as: How can I apply one or more CSS classes conditionally to a given element in React? Well, this article will answer these questions, so, don’t blink, because it gets straight to the point! Have a good read.
Defining multiple classes statically
If you just want to apply multiple classes to some element and this class set never changes, there’s no need to complicate things:
const App = () => (
  <button className="btn btn--large btn--main" />
);
As you can see, the className attribute usage is pretty much identical to how we do in pure HTML, by using the class attribute. In simple words, a string with a list of classes separated by spaces. And that’s it.
Defining multiples classes dynamically
The previous example illustrates a simple scenario, where the applied class list doesn’t change, independently of the application’s state. But what if you wanted that one or more classes were applied based on certain condition? For instance, let’s say you have a component whose wrapper div should be styled with a given class if the loading state variable is set to true. Or if you have a three-step wizard and want to set a specific class depending on which step is active. There are multiple techniques to get this result in React. Let’s take a look at some of them.
Technique #1: Template literals
The first way to implement dynamic CSS classes in React is by using ES2015 template literals:
class Post extends Component {
  state = { loading: false };

  render() {
    return (
      <div className={`post-wrapper ${this.state.loading ? 'post-wrapper--loading' : ''}`}></div>
    );
  }
}
As you can see, this technique relies on ternary operator–based expressions.
To make it easier to see if it works properly, add the following piece of code to your component:
componentDidMount() {
  setInterval(() => this.setState({ loading: !this.state.loading }), 3000);
}
The above snippet toggles the loading state variable’s value each 3 seconds.
Now, let’s use the React Developer Tools extension to visualize what happens under the hood:
That’s cool! The value of the className attribute is dynamically updated every time the loading state variable changes.
Technique #2: The classList helper function
The previous technique works perfectly and is easy to read in simpler scenarios. However, when you’re dealing with a bigger class set, it can become a bit hard to understand at first glance:
class Wizard extends Component {
  state = { step: 0 };

  render() {
    const step = this.state.step;

    return (
      <div className={`
        wizard__step
        ${step === 0 ? 'wizard__step--personal-data' : ''}
        ${step === 1 ? 'wizard__step--shipping-address' : ''}
        ${step === 2 ? 'wizard__step--payment' : ''}
      `}></div>
    );
  }
}
For these cases, there are better alternatives. One of them consists in adding a simple utility function to your application, which handles the toggling logic for our set of classes. Before analyzing the function itself, let’s see its usage:
class Wizard extends Component {
  state = { step: 0 };

  render() {
    const step = this.state.step;

    return (
      <div className={classList({
        'wizard__step': true,
        'wizard__step--personal-data': step === 0,
        'wizard__step--shipping-address': step === 1,
        'wizard__step--payment': step === 2
      })}></div>
    );
  }
}
No ternary operators, no string interpolation, no empty strings for each class… I think you’ll agree it’s clearer than the previous version. =)
Now, here’s this classList function:
function classList(classes) {
  return Object
    .entries(classes)
    .filter(entry => entry[1])
    .map(entry => entry[0])
    .join(' ');
}
Simple, isn’t it? Its logic is equally easy to understand:
- First, it transforms our input object in an array of key-value pairs (one pair for each property).
- Then, it filters the resulting array to eliminate items whose toggling criteria evaluate to false.
- After that, it maps each item of the filtered array to its respective class name, outputting a new array with a list of classes.
- Last, but not least, it joins all classes using a space as separator. The function returns the resulting string.
Technique #3: classList function V2
You may have noticed that the example used to illustrate the previous technique has a class which is fixed: wizard__step. This is not only possible, but very common. Combining classes which should always be rendered with others that render according to certain criteria.
The classList function has a little drawback: it forces us to define a boolean value for fixed classes, like this:
classList({ 'wizard__step': true, [...] })If this bothers you in some way, here’s another version of the classList utility function which simplifies the definition of fixed classes:
function classList(...classes) {
  return classes
    .filter(item => !!item)
    .join(' ');
}
Its logic is even simpler:
- By using rest parameters, it transforms the arguments list in an array.
- Then, it filters the resulting array, removing every entry which evaluates to false.
- Finally, it joins the remaining items using a space to separate them and returns this string. That’s it!
This new approach has a totally different usage:
class Wizard extends Component {
  state = { step: 0 };

  render() {
    const step = this.state.step;

    return (
      <div className={classList(
        'wizard__step',
        step === 0 && 'wizard__step--personal-data',
        step === 1 && 'wizard__step--shipping-address',
        step === 2 && 'wizard__step--payment'
      )}></div>
    );
  }
}
By filtering falsy values, this function allow us to use simpler expressions, without those ternary operators that we saw in the Technique #1. Besides, if you want to define a fixed class, just include its name in the arguments list. Simple like that!
Technique #4: The classNames package
The last approach we’ll see is to use classNames, a third-party package that consists of a simple function (much like classList). Its biggest advantage is to support multiple usages, like:
classNames('app', 'app--active')
classNames('app', { 'app--loading': true })
classNames('app', { 'app--loading': false, 'app--offline': true })
classNames('app', { 'app--loading': false }, { 'app--offline': true })
classNames('app', { 'app--loading': false }, 'app--active', { 'app--offline': false })
classNames('app', this.state.loading && 'app--loading')
If you need this type of flexibility, go ahead and install it:
npm install classnames –save
Or, for Yarn-lovers:
yarn add classnames
And here’s our wizard example rewritten to use classNames:
[...]
import classNames from 'classnames';

[...]
  render() {
    const step = this.state.step;

    return (
      <div className={classNames(
        'wizard__step',
        {
          'wizard__step--personal-data': step === 0,
          'wizard__step--shipping-address': step === 1,
          'wizard__step--payment': step === 2
        }
      )}></div>
    );
  }
[...]
Conclusion
- Defining multiple CSS classes statically in JSX is identical to how it’s done in pure HTML
- When it comes to defining classes dynamically, there are multiple possible ways.
- The classNames package is a popular and versatile approach to handle multiple classes dynamically.
How to use Vue-Router ?
Introduction In a JavaScript web application, a router is the part that syncs the currently displayed view with the browser

How to use Vue-Router ?
Introduction
In a JavaScript web application, a router is the part that syncs the currently displayed view with the browser address bar content.
In other words, it’s the part that makes the URL change when you click something in the page, and helps to show the correct view when you hit a specific URL.
Traditionally the Web is built around URLs. When you hit a certain URL, a specific page is displayed.
With the introduction of applications that run inside the browser and change what the user sees, many applications broke this interaction, and you had to manually update the URL with the browser’s History API.
You need a router when you need to sync URLs to views in your app. It’s a very common need, and all the major modern frameworks now allow you to manage routing.
The Vue Router library is the way to go for Vue.js applications. Vue does not enforce the use of this library. You can use whatever generic routing library you want, or also create your own History API integration, but the benefit of using Vue Router is that it’s official.
This means it’s maintained by the same people who maintain Vue, so you get a more consistent integration in the framework, and the guarantee that it’s always going to be compatible in the future, no matter what.
Installation
Vue Router is available via npm with the package named vue-router.
If you use Vue via a script tag, you can include Vue Router using
<script src="https://unpkg.com/vue-router"></script>If you use the Vue CLI, install it using
npm install vue-routerOnce you install vue-router and make it available either using a script tag or via Vue CLI, you can now import it in your app.
You import it after vue, and you call Vue.use(VueRouter) to install it inside the app:
import Vue from 'vue'
import VueRouter from 'vue-router'

Vue.use(VueRouter)
After you call Vue.use() passing the router object, in any component of the app you have access to these objects:
this.$routeris the router objectthis.$routeis the current route object
The router object
The router object, accessed using this.$router from any component when the Vue Router is installed in the root Vue component, offers many nice features.
We can make the app navigate to a new route using
this.$router.push()this.$router.replace()this.$router.go()
which resemble the pushState, replaceState and go methods of the History API.
push() is used to go to a new route, adding a new item to the browser history. replace() is the same, except it does not push a new state to the history.
Usage samples:
this.$router.push('about') //named route, see later
this.$router.push({ path: 'about' })
this.$router.push({ path: 'post', query: { post_slug: 'hello-world' } }) //using query parameters (post?post_slug=hello-world)
this.$router.replace({ path: 'about' })
go() goes back and forth, accepting a number that can be positive or negative to go back in the history:
this.$router.go(-1) //go back 1 step
this.$router.go(1) //go forward 1 step
Defining the routes
I’m using a Vue Single File Component in this example.
In the template I use a nav tag that has 3 router-link components, which have a label (Home/Login/About) and a URL assigned through the to attribute.
The router-view component is where the Vue Router will put the content that matches the current URL.
<template>
  <div id="app">
    <nav>
      <router-link to="/">Home</router-link>
      <router-link to="/login">Login</router-link>
      <router-link to="/about">About</router-link>
    </nav>
    <router-view></router-view>
  </div>
</template>
A router-link component renders an a tag by default (you can change that). Every time the route changes, either by clicking a link or by changing the URL, a router-link-active class is added to the element that refers to the active route, allowing you to style it.
In the JavaScript part we first include and install the router, then we define 3 route components.
We pass them to the initialization of the router object, and we pass this object to the Vue root instance.
Here’s the code:
<script>
import Vue from 'vue'
import VueRouter from 'vue-router'

Vue.use(VueRouter)

const Home  = {
  template: '<div>Home</div>'
}

const Login = {
  template: '<div>Login</div>'
}

const About = {
  template: '<div>About</div>'
}

const router = new VueRouter({
  routes: [
    { path: '/', component: Home },
    { path: '/login', component: Login },
    { path: '/about', component: About }
  ]
})

new Vue({
  router
}).$mount('#app')
</script>
Usually, in a Vue app you instantiate and mount the root app using:
new Vue({
  render: h => h(App)
}).$mount('#app')
When using the Vue Router, you don’t pass a render property but instead, you use router.
The syntax used in the above example:
new Vue({
  router
}).$mount('#app')
is a shorthand for
new Vue({
  router: router
}).$mount('#app')
See in the example, we pass a routes array to the VueRouter constructor. Each route in this array has a path and component params.
If you pass a name param too, you have a named route.
Using named routes to pass parameters to the router push and replace methods
Remember how we used the Router object to push a new state before?
this.$router.push({ path: 'about' })With a named route we can pass parameters to the new route:
this.$router.push({ name: 'post', params: { post_slug: 'hello-world' } })the same goes for replace():
this.$router.replace({ name: 'post', params: { post_slug: 'hello-world' } })What happens when a user clicks a router-link
The application will render the route component that matches the URL passed to the link.
The new route component that handles the URL is instantiated and its guards called, and the old route component will be destroyed.
Route guards
Since we mentioned guards, let’s introduce them.
You can think of them of life cycle hooks or middleware, those are functions called at specific times during the execution of the application. You can jump in and alter the execution of a route, redirecting or cancelling the request.
You can have global guards by adding a callback to the beforeEach() and afterEach() property of the router.
beforeEach()is called before the navigation is confirmedbeforeResolve()is called when beforeEach is executed and all the componentsbeforeRouterEnterandbeforeRouteUpdateguards are called, but before the navigation is confirmed. The final check, if you wantafterEach()is called after the navigation is confirmed
What does “the navigation is confirmed” mean? We’ll see it in a second. In the meantime think of it as “the app can go to that route”.
The usage is:
this.$router.beforeEach((to, from, next) => {
  // ...
})
this.$router.afterEach((to, from) => {
// ...
})to and from represent the route objects that we go to and from. beforeEach has an additional parameter next which if we call with false as the parameter, will block the navigation, and cause it to be unconfirmed. Like in Node middleware, if you’re familiar, next() should always be called otherwise execution will get stuck.
Single route components also have guards:
beforeRouteEnter(from, to, next)is called before the current route is confirmedbeforeRouteUpdate(from, to, next)is called when the route changes but the component that manages it is still the same (with dynamic routing, see next)beforeRouteLeave(from, to, next)is called when we move away from here
We mentioned navigation. To determine if the navigation to a route is confirmed, Vue Router performs some checks:
- it calls
beforeRouteLeaveguard in the current component(s) - it calls the router
beforeEach()guard - it calls the
beforeRouteUpdate()in any component that needs to be reused, if any exist - it calls the
beforeEnter()guard on the route object - it calls the
beforeRouterEnter()in the component that we should enter into - it calls the router
beforeResolve()guard - if all was fine, the navigation is confirmed!
- it calls the router
afterEach()guard
You can use the route-specific guards (beforeRouteEnter and beforeRouteUpdate in case of dynamic routing) as life cycle hooks, so you can start data fetching requests for example.
Dynamic routing
The example above shows a different view based on the URL, handling the /, /login and /about routes.
A very common need is to handle dynamic routes, like having all posts under /post/, each with the slug name:
/post/first/post/another-post/post/hello-world
You can achieve this using a dynamic segment.
Those were static segments:
const router = new VueRouter({
  routes: [
    { path: '/', component: Home },
    { path: '/login', component: Login },
    { path: '/about', component: About }
  ]
})
we add in a dynamic segment to handle blog posts:
const router = new VueRouter({
  routes: [
    { path: '/', component: Home },
    { path: '/post/:post_slug', component: Post },
    { path: '/login', component: Login },
    { path: '/about', component: About }
  ]
})
Notice the :post_slug syntax. This means that you can use any string, and that will be mapped to the post_slug placeholder.
You’re not limited to this kind of syntax. Vue relies on this library to parse dynamic routes, and you can go wild with Regular Expressions.
Now inside the Post route component we can reference the route using $route, and the post slug using $route.params.post_slug:
const Post = {
  template: '<div>Post: {{ $route.params.post_slug }}</div>'
}
We can use this parameter to load the contents from the backend.
You can have as many dynamic segments as you want, in the same URL:
/post/:author/:post_slug
Remember when before we talked about what happens when a user navigates to a new route?
In the case of dynamic routes, what happens is a little different.
Vue to be more efficient instead of destroying the current route component and re-instantiating it, it reuses the current instance.
When this happens, Vue calls the beforeRouteUpdate life cycle event. There you can perform any operation you need:
const Post = {
  template: '<div>Post: {{ $route.params.post_slug }}</div>'
  beforeRouteUpdate(to, from, next) {
    console.log(`Updating slug from ${from} to ${to}`)
    next() //make sure you always call next()
  }
}
Using props
In the examples, I used $route.params.* to access the route data. A component should not be so tightly coupled with the router, and instead, we can use props:
const Post = {
  props: ['post_slug'],
  template: '<div>Post: {{ post_slug }}</div>'
}

const router = new VueRouter({
  routes: [
    { path: '/post/:post_slug', component: Post, props: true }
  ]
})
Notice the props: true passed to the route object to enable this functionality.
Nested routes
Before I mentioned that you can have as many dynamic segments as you want, in the same URL, like:
/post/:author/:post_slug
So, say we have an Author component taking care of the first dynamic segment:
<template>
  <div id="app">
    <router-view></router-view>
  </div>
</template>

<script>
import Vue from 'vue'
import VueRouter from 'vue-router'

Vue.use(VueRouter)

const Author  = {
  template: '<div>Author: {{ $route.params.author}}</div>'
}

const router = new VueRouter({
  routes: [
    { path: '/post/:author', component: Author }
  ]
})

new Vue({
  router
}).$mount('#app')
</script>
We can insert a second router-view component instance inside the Author template:
const Author  = {
  template: '<div>Author: {{ $route.params.author}}<router-view></router-view></div>'
}
we add the Post component:
const Post = {
  template: '<div>Post: {{ $route.params.post_slug }}</div>'
}
and then we’ll inject the inner dynamic route in the VueRouter configuration:
const router = new VueRouter({
  routes: [{
    path: '/post/:author',
    component: Author,
    children: [
      path: ':post_slug',
      component: Post
    ]
  }]
})Getting Started with Flutter
In this post, we will cover the step-by-step guide to getting started with Flutter. Flutter has been emerging as a

Getting Started with Flutter
In this post, we will cover the step-by-step guide to getting started with Flutter. Flutter has been emerging as a great option for developing cross-platform mobile apps since Google announced the first stable version at Flutter Live. But where to start?
What is Flutter
Simply put, Flutter is a framework which allows developers to create cross-platform apps using a single programming language. Flutter can be considered an alternative to the React Native framework. The Flutter framework is being developed at Google but it’s open to all external contributors. Flutter has been around for a long time, but it started getting more attention when Google announced the release preview of Flutter. At Flutter Live on 4 December 2018, with loads of new features. After this, the popularity of Flutter apps grew drastically.
Flutter uses the Dart programming language which was introduced by Google in 2011 and is rarely used by developers. Dart syntax is easy to understand as it supports most of the object-oriented concepts. Flutter apps are a collection of widgets, everything in the Flutter is a widget. Basically, this information is enough for anyone to get their hands dirty with Flutter. To learn more about the technical details of Flutter, refer to the technical overview in the official cookbook.
Installing Software
In order to get started with Flutter, we have to install some software on your local machine. You can either use macOS, Windows or Linux to get started with Flutter, however, macOS has the benefit of getting both the iOS and Android environment on the same machine. We will assume that you are using macOS for Flutter development, but you can always follow the similar instructions for Windows and Linux as well.
Install Flutter
Flutter installation needs some command line tools installed on macOS. Most of the tools come with Xcode. You can download Flutter SDK either from Github or the official download page. Once we have the Flutter SDK, we have to add it into the PATH so that we can access Flutter binary globally. The first step is to download Flutter SDK and unzip it to a suitable location on our disk. We can do this by using the following command:
$ cd ~/development
$ unzip ~/Downloads/flutter_macos_v1.5.4-hotfix.2-stable.zip

$ unzip flutter_macos_v0.7.3-beta.zip
Now that we have downloaded the Flutter SDK, we need to add Flutter to our $PATH so that we can access Flutter globally. This varies from shell to shell, bash, we can simply run this command:
$ export PATH=[PATH_TO_FLUTTER__DIRECTORY]/flutter/bin:$PATHYou can find the instructions to update the Flutter PATH here. Once you set up the PATH, you should then be able to confirm installation by running:
$ flutter --helpThis command will print all available commands of Flutter.
Install Xcode
You can develop both iOS and Android apps with Flutter. If you are developing an iOS app with Flutter, you need to install Xcode on your macOS. You can not install on other platforms like Windows or Linux. On macOS, it’s very easy to install Xcode, you simply need to use your Apple developer account and download it from the App Store. Xcode is a large piece of software so it will take some time to download. Once you have Xcode installed, you will get most of the command line tools along with Xcode. We might need to configure the Xcode command line tools to use the newly-installed version of Xcode by using the command:
$ sudo xcode-select --switch /Applications/Xcode.app/Contents/DeveloperOnce the command line tools install, you need to agree on the Xcode terms and conditions. You can do so by opening Xcode and clicking on the Agree button or by confirming or running sudo xcodebuild - license from the command line.
With Xcode, you’ll be able to run Flutter apps on an iOS device or on the simulator. The complete guide for the iOS setup is available in the Flutter documentation, here.
Install Android SDK Studio
If you are developing apps for Android, you also need to complete Android setup. If you download and install Android Studio then most of the basic setup is covered. Once you start Android Studio, go through the ‘Android Studio Setup Wizard’. This installs the latest Android SDK, Android SDK Platform-Tools and Android SDK Build-Tools, which are required by Flutter when developing for Android. You can also set up a device or emulator for the Android development as mentioned in the Flutter documentation, here.
Use Flutter Doctor
Flutter comes up with an awesome command line utility to check if your machine is set up for local development. Flutter has Flutter Doctor command which guides developers through setting up the local development environment for both iOS and Android. Flutter Doctor inspects which tools are installed on the local machine and which tools need to be configured. Once the Flutter Doctor command is happy, we can carry on creating a new Flutter app.

Setting up Editors
Flutter development can be done on any editor or IDE of your choice. The getting started guide for Flutter contains detailed information on IDE setup for Android Studio, IntelliJ and Visual Studio Code. However, you can use lightweight editors like Sublime Text for Flutter development as well. The choice of editor/IDE is completely up to the developer. Once we have finished the setup for our favourite editor, we can start developing Flutter apps.
Know Pub Package Manager
Flutter uses the Pub Package Manager to manage the Dart packages inside the Flutter project. You will find the pubspec.yaml file in the Flutter project which imports Dart dependencies inside the Flutter project. You can mention all the dependencies in the file and install using the command:
$ flutter packages getThis will install all the dependencies and create a locked version of the file, which is pubspec.lock, so that we will always lock dependencies. We can upgrade the dependencies using the command:
$ flutter package upgradeThis will upgrade all packages to the latest version, or you can update individual packages.
It’s good to know the concept of Pub Package Manager well in advance in order to understand the Flutter project better.
Write Your First Flutter App
At this point, you will be able to start developing your first Flutter app. There are multiple ways to create a template app, such as using the command line, using Android Studio or using IntelliJ. However, we will use the command line way in order to understand the entire Flutter project. Flutter can generate a boilerplate for the sample app by running the following commands:
$ flutter create name_of_your_appYou can give any name to your app e.g flutter_testing or hello_world. Let’s say “flutter_test” for now.
$ flutter create flutter_testThis command will create the boilerplate of the Flutter app inside the flutter_test directory. You can run your first ever Flutter app using the commands. However, you need to have a device/simulator running to see the app.
$ cd flutter_test

$ flutter run
You can see the app running in the emulator/simulator or devices. This would be the default Flutter app which counts how many times you pressed the + button. The app looks like this in the simulator:

Congratulations! You have successfully run your first Flutter app in the simulator.
Understand the Directory Structure
Now that we have Flutter app up and running, it’s very important to understand the directory structure of the Flutter app. At the moment, we see the directory structure as follows:

We have a dedicated directory for the iOS and Android app. Some configuration files like pubspec.yaml, .gitignore, etc are there at the root of the project. We have two main directories where most of our Flutter code will live, i.e. lib and test. In the “lib” directory we have main.dart where our app code lives, and we can write the tests in the “test” directory. In the main.dart file, you can create widgets and develop Flutter apps as per your needs. You can refer to the great documentation of Flutter.
Write Your First Test
As you develop the Flutter app, it’s great practice to test the app with a solid set of automated tests. Flutter has a richer set of testing features than any other cross-platform mobile app development framework. Flutter provides a solid testing framework which allows developers to write tests at the unit, functional and UI level. Widget testing is one cool feature that Flutter provides to run UI tests as fast as unit tests. Flutter also has UI tests, known as integration tests, that run on the simulator or on real devices. Flutter has great documentation on how to test Flutter apps at different levels. You can read our post on Full Stack testing of the Flutter apps to gain a practical insight on Flutter testing.
Now let’s add Widget tests for the demo app, which check the initial state of the app, tap the + button and assert that the state has been and counter incremented. The test will look something like this.
import 'package:flutter/material.dart';
import 'package:flutter_test/flutter_test.dart';
import 'package:flutter_testing/main.dart';
void main() {
testWidgets('Counter increments smoke test', (WidgetTester tester) async {
// Build our app and trigger a frame.
await tester.pumpWidget(MyApp());
// Verify that our counter starts at 0.
expect(find.text('0'), findsOneWidget);
expect(find.text('1'), findsNothing);
// Tap the '+' icon and trigger a frame.
await tester.tap(find.byIcon(Icons.add));
await tester.pump();
// Verify that our counter has incremented.
expect(find.text('0'), findsNothing);
expect(find.text('1'), findsOneWidget);
});
}
Let’s name this test widget_test.dart and keep it inside the test directory. We can run the test from the command line using the flutter test command which will execute all tests from the test directory. However, we can execute a single test using the command
$ flutter test test/widget_test.dartThis command will execute the widget test only.
Conclusion
Flutter is booming as a cross-platform mobile application development framework, and developers are keen to get started with Flutter. We hope this guide acts a great kick-off point for your first Flutter project.
Getting Started with Nuxt.js
In this article, we’ll be taking a look at Nuxt framework and will discuss how to getting started with nuxt.js

Getting Started with Nuxt.js
In this article, we’ll be taking a look at Nuxt framework and will discuss how to getting started with nuxt.js
Introduction
Nuxt.js is a universal framework for creating Vue.js applications. The goal behind having a universal framework is so that it is flexible enough to be used as both a server-side rendered app, a static generated site or a single page application.
Nuxt.js main focus is on the UI Rendering aspect of development while abstracting away the client/server distribution. In this article, We’ll be taking a look at Nuxt framework, how to set it up and also how it is structured in building Vue powered applications.
Why Use Nuxt?
Nuxt.js comes bundled with features that are hard to miss and all these features are available out of the box for you to utilize in building web applications. Some of these features include:
- Automatic Code Splitting
- Vue Powered
- Static File Rendering
- Hot Module Replacement
- Pre-processors: Sass, Stylus, Less
- Server-Side Rendering
- HTTP/2 Support
Scaffolding a Nuxt App
Nuxt.js is really easy to get started with. The Nuxt team has created a scaffolding tool that will enable you to create a nuxt app in seconds called create-nuxt-app. You can either use npx or yarn to create a Nuxt project with the following commands.
npx create-nuxt-app <project-name> or
yarn create nuxt-app <project-name>
The options available when using the create-nuxt-app command is diverse, you can either choose between having an integrated server-side frameworks, UI frameworks, testing frameworks and other tools needed like PWA and linting and it’ll be automatically generated and setup for you. But for this tutorial, we’ll be doing the bare minimum so I opted out of some of the features.
Run the Project
Once the dependencies are installed, the command available to run the project is the following command:
yarn run devThere are other commands available to either build the app, lint the entire project or generate a static site using the generate script.
After running the command to start the app, If we navigate to http://localhost:3000, you should now be able to see our application running on the screen like the one below.

Folder Structure
The folder structure for a nuxt app comprises of the following files and folder directory and we’ll be taking a look at each one of them to determine what they represent.

Assets: The files contained in this folder consists of assets such as images, fonts, and stylesheets that will be used in the Nuxt app.
Components: The components directory consists of reusable Vue.js components that will be used in building the application such as (Input, Button, and Card), etc.
Layouts: The layouts directory includes your application layouts. Layouts are used to change the look and feel of your page (for example by including a homepage). The layouts directory defines all of the various layouts that your application can use. This is a great place to add common global components that are used across your app like the header and footer. You should include components in this file that you don’t want to redefine for each new page over and over again.
Middleware: The middleware directory contains your application middleware. Middleware lets you define custom functions that can be run before rendering either a page or a group of pages.
Pages: The pages directory contains your application views and routes. The framework reads all the .vue files inside this directory and creates the application router. For example if you have an index.vue that will become the / route and about.vue will become /about route.
Plugins: The plugins directory contains your Javascript plugins that you want to run before instantiating the root Vue.js Application. This is the place to register components globally and to inject functions or constants.
Static: The static directory is similar to assets but it is directly mapped to the server root (/static/robots.txt is accessible under http://localhost:3000/robots.txt) and contains files that likely won’t be changed (i.e. the favicon).
Store: The store directory houses your Vuex Store files. The Vuex Store comes with Nuxt.js out of the box but is disabled by default. Creating an index.js file in this directory enables the store.
nuxt.config.js: This file contains Nuxt.js custom configurations. Note that the file cannot be renamed without extra configurations.
package.json: This file is where all dependencies and scripts lives and the file cannot be renamed.
Routing
The way routing works with Nuxt.js is it automatically generates the vue-router configuration based on your file tree of .vue files inside the pages directory. It looks at the structure and automatically generates the route configurations based off that structure. Nuxt and vue-router do all the work under the hood.
An example of such structure is the following, the file tree will look exactly like the structure below
pages/
--|index.vue
--|product.vue
 --|index.vue
 --|one.vue
and that will generate routes like the following:
router: {
  routes: [
    {
      name: 'index',
      path: '/',
      component: 'pages/index.vue'
    },
    {
      name: 'product',
      path: '/product',
      component: 'pages/product/index.vue'
    },
    {
      name: 'product-one',
      path: '/product/one',
      component: 'pages/product/one.vue'
    }
  ]
}
Dynamic Routes
You might be wondering how this will work in cases when we are dealing with dynamic routes. In order to define a dynamic route with a parameter, you need to define a .vue file OR a directory prefixed by an underscore, let’s take a look at an example.
pages/
--| _slug/
-----| comments.vue
-----| index.vue
--| users/
-----| _id.vue
--| index.vue
and that will generate the following routes:
router: {
  routes: [
    {
      name: 'index',
      path: '/',
      component: 'pages/index.vue'
    },
    {
      name: 'users-id',
      path: '/users/:id?',
      component: 'pages/users/_id.vue'
    },
    {
      name: 'slug',
      path: '/:slug',
      component: 'pages/_slug/index.vue'
    },
    {
      name: 'slug-comments',
      path: '/:slug/comments',
      component: 'pages/_slug/comments.vue'
    }
  ]
}
Nested Routes
Nuxt.js lets you create a nested route by using the children routes of vue-router.
To define the parent component of a nested route, you need to create a Vue file with the same name as the directory which contains your children views.
pages/
--| products/
-----| _id.vue
-----| index.vue
--| products.vue
will become:
router: {
  routes: [
    {
      path: '/products',
      component: 'pages/products.vue',
      children: [
        {
          path: '',
          component: 'pages/products/index.vue',
          name: 'products'
        },
        {
          path: ':id',
          component: 'pages/products/_id.vue',
          name: 'products-id'
        }
      ]
    }
  ]
}
When navigating between pages, Nuxt recommends we use nuxt-link component that is built in as opposed to using router-link that is used by vue-router.
Deploying A Nuxt.js App
Nuxt.js comes with a set of useful commands, both for development and production purpose.
We will have a look at all the scripts used in running a nuxt app and delve dipper into the script for deploying a Nuxt app.
| Command | Description |
|---|---|
| dev | Launch a development server on localhost:3000 with hot-reloading. |
| build | Build your application with webpack and minify the JS & CSS (for production). |
| start | Start the server in production mode (after running nuxt build). |
| generate | Build the application and generate every route as an HTML file (used for static hosting). |
The commands outlined above are scripts we can run using either yarn or npm on the terminal. For production, we’ll need to deploy the application. Nuxt.js lets you choose between three modes to deploy your application: Server-Side Rendering, Static Generated, or Single Page Applications.
Depending on your choice for deployment the following are ways you can build your Nuxt application for production.
Server Rendering
To run your application, you will need to run the command below:
$ yarn build or npm run buildStatic Generated
To generate our application into static files, we would have to run the command below:
$ yarn generate or npm run generateSingle Page Applications
SPA’s in Nuxt can be generated using two modes:
- Adding
mode: 'spa'tonuxt.config.jsfile
export default {
  mode: 'spa'
}- Adding
--spaflag to every script command
 "scripts": {
     "dev": "nuxt --spa",
     "build": "nuxt build --spa",
     "start": "nuxt start --spa",
     "generate": "nuxt generate --spa",
   },
With the following steps outlined above, we have the option of deploying our Nuxt app in three different modes.
Conclusion
Nuxt.js as an application can be either used for generating Static sites, Server rendered and Single page applications using Vue.js and this is what makes it universal. In this article, We have seen how to get started with Nuxt.js from setting up the project to understanding the features of Nuxt.js and also we looked at the directory structure. Now you can go ahead and build web applications using Nuxt.js.
Top 5 Vue.js boilerplates for 2020
Boilerplates & Reusable Components Boilerplates are a great way to quickly jump start your project and keep focus on the

Top 5 Vue.js boilerplates for 2020
Boilerplates & Reusable Components
Boilerplates are a great way to quickly jump start your project and keep focus on the things that matter most to you. The combination of boilerplates together with reusable shared components boosts development and, in many cases, makes for a better, more maintainable code.
These are my 5 top boilerplate picks for Vue applications for desktop, web apps, large teams, and web sites.
1) Vue Enterprise Boilerplate

With 5.4k GitHub Stars, this is one of the most used boilerplates for Vuejs. Created by Vue Core team member Chris Fritz, it is mostly used by larger teams. It better suits enterprise-level applications due to the following reasons:
- It contains well-defined layers for a large application.
- It includes testing practices and is customizable.
- It has an in-built generator to speed up development tasks.
- It is well documented for new developers. The documentation describes the setup and development details of Vue Enterprise Boilerplates. The architecture and routing details, state management, mock-ups, and tests for TDD are explained in the document.
- It supports linters for Vuejs that helps to keep the code clean.
- It supports TDD, Unit tests and end-to-end tests with Jest and Cypress and details the core concepts and best practices in the documentation.
- It supports speedy development by allowing you to configure the generators, global base components, and handy aliases.
- It describes the troubleshooting tips for common issues during development clearly in the documentation.
2) Electron-nuxt

Building a desktop application can be tedious. You need to pay attention to the application architecture along with the installation, packaging, and versioning. Electron-nuxt is a boilerplate to create an Electron app with Vue / Nuxt. Electron is a framework used to create web-like desktop applications with web-like features.
This feature is seen in applications like Slack, the chat application Discord, and even in Microsoft Visual Studio. Electron-nuxt includes features like:
- An auto-updating boilerplate for easy development.
- Support for typescript but only in the rendering process of the application.
- Support for parallel code compilation
- Support for unit-testing and end-to-end testing and is configurable during vue-cli scaffolding.
- Supports pre-installing UI components and icons like Font Awesome and Material design icon for a quick start and offline usage of the project.
- Configuring ESLint.
- Installing the latest vue-devtools
- Support for CSS preprocessors like Sass, LESS, and Stylus.
- Support for light-weight UI components like Buefy, Vuetify, and Element.
3) Mevn-CLI

Mevn-CLI works with the MEVN stack. MEVN stands for MongoDB, Express.js, VueJS, and Node.js. This boilerplate provides a quick start for MEVN stack-based web apps and automatically installs a local environment.
It has 407 Github Stars and the project is licensed under the MIT Licence. These are its main benefits:
- Consists of a set of commands and additional utilities to build the MEVN stack.
- It allows you to choose the template from a basic Progressive Web App, Nuxt-js and GraphQL templates. These servers are a platform to build your project.
- Allows configuration with multiple DBs such as MongoDB / MySQL and mongoose ODM and sequelize ORM.
- It allows the application to run within a Docker environment with a single command. Using Mevn-cli you can pull the external docker image to create a local Docker-based environment and launch a local app.
- It adds additional packages related to Vue on the go allowing automatic integration with your project.
- Uses developer-friendly ES6 syntax, making the code clean and simple.
- Modules and component-driven and keep the code clean, readable and compact.
- It generates boilerplate code and automates redundant tasks.
4) Vuesion

Progressive Web Apps (PWA) are widely used to create comprehensive sites or apps. They are web pages with an app-like appearance. PWA is quick in responding to instructions, loads instantly, and engages users with a natural experience. Vuesion is a boilerplate for production-ready PWA’s. It installs quickly through npx or npm and focuses on best practices and performance during the development and production phases. This MIT licensed project with 2k GitHub Stars displays a live demo on Heroku. Here are some salient features of Vuesion:
- Enables scaffolding: Creating components and connecting them to modules is done without much effort. It enables mock APIs and tests for individual components.
- Instant display of UI changes: Speedy development occurs when the UX and UI changes are displayed instantly. Vuesion reflects the changes of CSS and typescript instantly without refreshing the page or restarting the servers.
- The application state is preserved when updating code.
- Documentation: Documents the use-cases in all scenarios, creates SEO documents with hashtags and follows best practices for coding.
5) Vue.js Starter

Vue.js Starter transpiles all javascript files using babel and enables easy debugging using sourcemaps during the development process. It mainly works on server-side rendering which is not seen in other boilerplates. Though the Vue.js starter lacks documentation, it provides a demo application of server-side rendering using vue.js. Below are the advantages of using the Vue.js starter:
- Web applications built with server-side rendering have an advantage on SEO. Search engine crawlers have better visibility of pages.
- Vue.js starter boilerplates are good for sites working on slow internet or slow devices as it takes less time to load the content that has been updated on the server.
- Support for both SCSS or CSS files.
- Built-in plugins to speed up the development process.
This can be used where the time-to-content is critical as it gives the best possible initial load performance.
Conclusion
Boilerplates give you a head start and solid foundation by installing a template for your project. They create a local environment by automatically installing the entire framework needed for the project.
While it is a good idea to take a hint from the GitHub Stars when selecting a boilerplate, it is more important to look at the functionality offered by each of them as no one boilerplate suits all projects. Another vital factor to consider is the type of application they support.
Different ways to define a component in Vue.js
There are plenty of choices to defining component templates in Vue. There are at least seven different ways to define

Different ways to define a component in Vue.js
There are plenty of choices to defining component templates in Vue. There are at least seven different ways to define a component in Vue.js. In this article, we’ll go through examples of each and address the pros and cons so you know which one is the best to use in any particular situation.
In this article, we’ll go through examples of each and address the pros and cons so you know which one is the best to use in any particular situation.
- Plain strings
- Template literals
- X-templates
- Inline templates
- Render functions
- JSX
- Single-file components
Plain strings
The quickest and easiest way to define a Vue component template is to add a template property to the component definition and assign a regular string containing your markup.
This method is really only used in code examples or quick prototypes, though, as it’s very difficult to work with anything beyond the simplest template.
//App.js

Vue.component('my-checkbox', {
  template: '<div class="checkbox-wrapper" @click="check"><div :class="{ checkbox: true, checked: checked }"></div><div class="title">{{ title }}</div></div>',
  data() {
    return { checked: false, title: 'Check me' }
  },
  methods: {
    check() { this.checked = !this.checked; }
  }
});
Details
- In HTML or JS? JS
- Needs polyfill or transpile? No
- Needs runtime template compiler? Yes
Runtime template compiler: Vue comes with an internal module that is used to compile HTML templates to JavaScript at runtime. If you use a template option that does not use HTML markup at runtime you can use a special build of Vue.js that does not include this module (and is, therefore, smaller and faster).
Template literals
As of ES2015, a special kind of string called a template literal can be declared using backticks. Unlike regular strings, these allow embedded expressions and can be multi-line.
The multi-line feature makes these much more useful for defining component templates compared to regular strings, as they make markup more readable.
//app.js
Vue.component('my-checkbox', {
  template: `
    <div class="checkbox-wrapper" @click="check">
      <div :class="{ checkbox: true, checked: checked }"></div>
      <div class="title">{{ title }}</div>
    </div>
  `,
  data() {
    return { checked: false, title: 'Check me' }
  },
  methods: {
    check() { this.checked = !this.checked; }
  }
});
Details
- In HTML or JS? JS
- Needs polyfill or transpile? Yes
- Needs runtime template compiler? Yes
Older browsers may not support this ES2015 feature, so though you should probably transpile your code to be safe.
X-templates
With this method, your template is defined inside a script tag in the index.html file. The script tag is given the type text/x-template and referenced by id in your component definition.
On the plus side, this method allows you to write your template markup in an HTML file. The downside is that it separates the template from the rest of the component definition so it can be a little hard to reason about.
//app.js
Vue.component('my-checkbox', {
  template: '#checkbox-template',
  data() {
    return { checked: false, title: 'Check me' }
  },
  methods: {
    check() { this.checked = !this.checked; }
  }
});
//index.html
<div id="app">...</div>
<script type="text/x-template" id="checkbox-template">
<div class="checkbox-wrapper" @click="check">
<div :class="{ checkbox: true, checked: checked }"></div>
<div class="title">{{ title }}</div>
</div>
</script>Details
- In HTML or JS? HTML
- Needs polyfill or transpile? No
- Needs runtime template compiler? Yes
Inline templates
With this method, you define the component’s template within the parent template when it gets used. Just be sure to add the attribute inline-template so Vue knows where to find it.
The method has roughly the same upsides and downsides as x-templates. One interesting difference is that, since the template can be defined in the document body, the content could be crawled for SEO.
//app.js
Vue.component('my-checkbox', {
  data() {
    return { checked: false, title: 'Check me' }
  },
  methods: {
    check() { this.checked = !this.checked; }
  }
});
//index.html
<div id="app">
...
<my-checkbox inline-template>
<div class="checkbox-wrapper" @click="check">
<div :class="{ checkbox: true, checked: checked }"></div>
<div class="title">{{ title }}</div>
</div>
</my-checkbox>
</div>Details
- In HTML or JS? HTML
- Needs polyfill or transpile? No
- Needs runtime template compiler? Yes
Inline templates and x-templates can work in conjuntion with a templating engine from a backend framework, for example, Laravel Blade.
Render functions
Render functions require you to define your template using pure JavaScript. You’ll need to read the Vue docs for the exact syntax, but the rough idea is that you define template nodes by calling createElement(tag, options, childElements).
The advantage of doing this is that it requires no compilation of any sort, and gives you full access to JavaScript functionality rather than what’s offered by directives. For example, to iterate within a markup template you can only use v-for, but in JavaScript, you can use any array method.
However, render functions are far more verbose and abstract than other template options and I don’t expect many people would be comfortable writing a whole application like this.
//app.js

Vue.component('my-checkbox', {
  data() {
    return { checked: false, title: 'Check me' }
  },
  methods: {
    check() { this.checked = !this.checked; }
  },
  render(createElement) {
    return createElement(
      'div', {
        attrs: {
          'class': 'checkbox-wrapper'
        },
        on: {
          click: this.check
        }
      },
      [
        createElement(
          'div', {
            'class': {
              checkbox: true,
              checked: this.checked
            }
          }
        ),
        createElement(
          'div', {
            attrs: {
              'class': 'title'
            }
          },
          [this.title]
        )
      ]
    );
  }
});
Details
- In HTML or JS? JS
- Needs polyfill or transpile? No
- Needs runtime template compiler? No
JSX
JSX is an extension of JavaScript that allows you to use a special template syntax in your JavaScript code.
Popularized by React, this is the most controversial template option in Vue, as some developers see it as ugly, unintuitive and as a betrayal to the Vue ethos.
However, JSX can be used to write a Vue render function in a far more readable and less abstract way. It does require you to transpile, though, as JSX is not readable by browsers
//app.js

Vue.component('my-checkbox', {
  data() {
    return { checked: false, title: 'Check me' }
  },
  methods: {
    check() { this.checked = !this.checked; }
  },
  render() {
    return <div class="checkbox-wrapper" onClick={ this.check }>
            <div class={{ checkbox: true, checked: this.checked }}></div>
            <div class="title">{ this.title }</div>
          </div>
  }
});
Details
- In HTML or JS? JS
- Needs polyfill or transpile? Yes
- Needs runtime template compiler? No
Single-file components
One of the most popular features of Vue.js is the Single-File Component (SFC). These allow you to write markup while keeping your component defintion in one file. They’re compiled by vue-loader into render functions so you get the best runtime performance, too.
To create a SFC you first create a .vue file, e.g. Checkbox.vue, then define your template in a template tag and define the component in a script tag. This file then gets imported into your main Vue app.
So long as you are comfortable using Vue CLI or setting up your own build tool in your project, SFCs are the way to go.
//checkbox.vue

<template>
  <div class="checkbox-wrapper" @click="check">
    <div :class="{ checkbox: true, checked: checked }"></div>
    <div class="title">{{ title }}</div>
  </div>
</template>
<script>
export default {
  data() {
    return { checked: false, title: 'Check me' }
  },
  methods: {
    check() { this.checked = !this.checked; }
  }
};
</script>
Details
- In HTML or JS? HTML
- Needs polyfill or transpile? Yes
- Needs runtime template compiler? No
Why you should use Vue.js for front-end develovpment?
Well, for developing web UI frontend there are several JavaScript frameworks and many of them are in use for quite

Why you should use Vue.js for front-end develovpment?
Well, for developing web UI frontend there are several JavaScript frameworks and many of them are in use for quite some time. But, in recent times VueJS has emerged as the most efficient JavaScript framework for web UI development. This is simply because the framework is more equipped and efficient with respect to incorporating the design elements than any other JavaScript frameworks. But before you hire a Vuejs development company, it would be great to know the key strengths of the framework.
What is Vue.js
VueJS is an open-source JavaScript framework that follows MVVM (Model-View-View-Model) architecture. According to the Stack Overflow Developer Survey conducted in 2019, it stands as the most popular JavaScript framework as of now. If you need to hire a front-end developer for your app or web UI project, VueJS comes as the obvious winning option. The framework is now available with the 2.6 version update.
Characteristics of Vue.js
To understand the popularity of the VueJS framework it is important to have a comprehensive view of all the key characteristics that it comes loaded with. Let’s have a quick look at the key characteristics of VueJS.
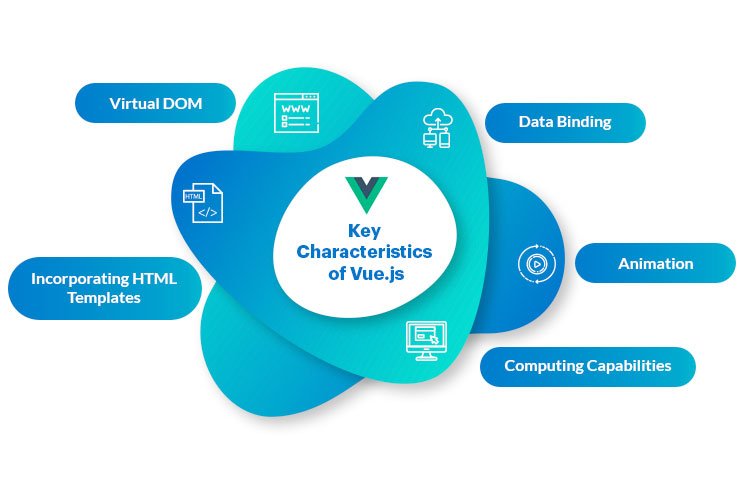
1. Virtual DOM
Vue.js works with Virtual DOM and thanks to this any change in the code instead of being directly reflected on the DOM, a replica of the DOM is created with a JavaScript data structure. Thanks to the use of this replicated JavaScript structure, designers have a bigger scope of experimenting with UI design.
2. Data Binding
Thanks to the data binding feature it becomes easier for the developers to create specific values for HTML attributes, change the style, and use binding direction referred to as v-bind.
3. Using Animation
Vue.js helps developers with a multitude of ways to implement transition and animation elements to HTML at the time of updating anything from the DOM. Thanks to this feature, adding it also becomes easier to add third-party animation libraries.
4. Computing capabilities
Thanks to the VueJS framework, computing capabilities can easily be utilized to evaluate the changes in the UI design. Thanks to this feature, additional computed features can easily be incorporated without any line of extra coding.
5. Computing capabilities
Vue.js comes with an HTML-based template that can bring together DOM with the Vue instance data. It helps to compile into the virtual DOM functions HTML templates. This helps make the process of UI development easier.
Now that the key features and the corresponding value proposition of the VueJS framework are explained, let us explain the most important reasons to choose VueJS for web UI development.
Most Important Reasons To Choose VueJS
6. Future-Ready Solution
After building and deploying an app, bug fixing, new feature integration, and continuous enhancements are necessary as part of the app maintenance. Vue.js when building and updating an app helps with optimum backward compatibility.
VueJS app projects do not need refactoring also quite often and this further helps in freeing a good chunk of resources.
7. Flexibility
Vue.js is a highly flexible and scalable framework compared to most other JavaScript frameworks. This allows the framework to be utilized for building large and modular
Single Page Apps (SPA) apart from building small application parts for reusing them in a different project.
8. Useful Conventions
As writing boilerplate code consumes a lot of time and resources, Vue.js can offer an ideal solution to get rid of this. The framework coming loaded with a lot of built-in solutions and helpful conventions saves a lot of development efforts. It also offers great support for an array of native development tasks such as animation, state management and using ready components.
9. Developer Friendly Framework
Developers find Vue.js a great framework for not only the features but also for the unparalleled ease of development the framework ensures. It comes with a CLI (command-line interface) that makes starting an app project extremely easier. This CLI is a lot more flexible and user-friendly than that of other frameworks.
It also comes with a fully-fledged graphical interface that doesn’t require using cryptic commands into the terminal. There are also several other tools for the Vue developers such as nuxt.js which are meta-framework for universal applications, Vue Storefront, an advanced PWA for e-commerce and Vuetify, a Material Design component framework for Vue.
10. Performance Boosting
In case you have an app project that requires a performance boost, rewriting the app with VueJS can just be the ideal solution. It is a progressive framework that can be incorporated into your codebase gradually over a period of time. Instead of reworking on the app project at one go, you can build the app with an approach of taking care of one component at one time.
11. Tested and Tried By the Best In Industries
VueJS has a robust developer community and several high-performance apps and web UIs have been built using VueJS. Some of the leading brands that find VueJS highly useful include media company NBC and Massachusetts Institute of Technology (MIT). So, when it comes to popular examples across niches, VueJS really stands way ahead of most other JavaScript frameworks.
Conclusion
As a JavaScript framework VueJS us here to stay and prosper through a variety of JavaScript projects. No wonder, within just a few years of its launch, Vue became one of the most loved frameworks in the world.
React Native vs Flutter: What to choose for Mobile Development?
Flutter and React Native are the two most popular Cross-platform Mobile App Development Frameworks that are enabling developers to create

React Native vs Flutter: What to choose for Mobile Development?
Flutter and React Native are the two most popular Cross-platform Mobile App Development Frameworks that are enabling developers to create cross-platform mobile applications that work seamlessly across various platforms and devices. From simplifying the app development process to making them efficient, these frameworks are helping reduce the complexity of mobile application development and are hence trending among developers. Moreover, these two frameworks are competing against each other to prove their worth, making Flutter Vs React Native the most trending topics of the year. Except these two Vue Native is also a mobile framework to build truly native mobile app using Vue.js.
Flutter
Flutter is a reactive cross-platform mobile development framework that uses the Dart language. Dart and Flutter have been created by Google who’s using the framework for some of its biggest applications and is constantly pushing the framework towards being the ultimate solution for creating cross-platform apps. Its initial alpha release was back in May 2017 so it’s much younger than React Native.
Reactive Programming with Flutter
So flutter is a reactive framework, what does that mean? Well, let’s talk a little about reactive programming and why it’s really powerful and useful especially in the case of app development. Let’s say you want to send a request to a server and do something depending on the response. If you take an action before a response is back i.e before you have an object you’d be taking an action that will result in the famous billion-dollar mistake, a null reference. If you come from the Android and Java world you’d know that one of the main motives behind Kotlin was eliminating the null reference.
Things go out of control if you’re data is coming asynchronously, and it’s not one request being sent, but instead, a stream of user clicks for example, and there are many parts of your program that need to respond to the incoming data.
This problem gave birth to a paradigm in programming known as reactive programming, which lays at the heart of the Dart language.
Development
The main building block of a Flutter application is a widget. Widgets are analogous to components in React Native. Flutter comes with a large number of ready-to-use widgets, most of which implement the material design concepts. There are two types of widgets, stateless widgets, and stateful widgets, just like class and functional components in React.
Unfortunately, Flutter’s widgets are not adaptive, so you have to make the platform-specific adaptation manually.
It’s fairly easy to get started with Flutter, all you need to do is to download the flutter package, unzip it, and then create an environment variable pointing to a folder inside of the that unzipped folder. And you’d be pretty much ready to go, however, you might need to download Android Studio and set up and emulator if you don’t want to use your phone.
Flutter supports the Hot Reload feature, which enables you to rerun your application with the adjustments you make while developing and speeds up development. Flutter is currently officially supported on Android Studio, IntelliJ Idea, and Visual Studio Code.
Ecosystem
Flutter is certainly behind React Native when it comes to the Ecosystem, as React Native is already been there for two years before Flutter was released, and is well established with tons of packages already. However, Flutter is catching up with a tremendous pace, and many-core packages for mobile development are available for public use and the Flutter Ecosystem is driving a crazy momentum with the dedication of the community. Right now, there are over 1450 packages available for Flutter on the official dartlang.org.
Performance
When it comes to performance, Flutter’s approach is quite different than that of React Native, or even NativeScript. Flutter’s application is compiled using arm C/C++ library so that it’s closer to machine language and gives better native performance. Not just the UI components are compiled, but the whole thing.
Dart is quite a performant language on its own, and many people believe that in terms of performance, Flutter has got the upper hand, although it’s hard to definitely judge as there are many factors involved in the performance.
Documentation
Flutter’s documentation is insanely good. The documentation is quite helpful and very thorough. It might be a little difficult to read if you have no programming experience, but once you get used to it you’d find pretty much everything you need, written in the documentation
Architecture
Flutter is very young, which makes everybody uncertain about the best architecture to implement for your application. However, there are a few architectures that are popular among the Flutter community.
You can use the BLoC architecture, which stands for Business Logic Component. The architecture was depicted by Google in the DartConf2018 and it states that the business logic should be taken out of the presentation layer and placed in the business logic components. The BLoC pattern heavily relies on streams and RxDart ( Reactive Dart), a good tool to better understand streams is RxMarbles.
There are other architectures present in the realm of flutter, for instance, if you’re more comfortable using Redux/Flux, you can use these patterns instead, and there are packages in Flutter that make this possible. For small applications and trying out the framework, storing state inside of the components would suffice.
React Native
React Native is perhaps the renowned world champion of cross-platform mobile development. React Native is a javascript framework built upon the React library, both created by Facebook, and it allows you to ship IOS and Android apps with a single code base. It’s used primarily by Facebook, Instagram, Airbnb, and many others. React Native started out as an internal hackathon project at Facebook back in 2013, and in 2015 it was released to the public.
Development
React Native uses component, but instead of using the web components that you have in the web like Div and H1, you use the set of components provided by the react-native library for mobile development. React Native also uses a virtual DOM, but not to manipulate a DOM since there isn’t one, but instead, it is used to communicate with native UI elements.
The number of widgets provided by React-Native is not as big as Flutter’s yet it’s quite inclusive, in addition, some of these components are adaptive, so they can figure out which platform they’re running on, whether IOS or Android and render the compositions suitable for that platform.
Getting started with React Native is also pretty easy, you can get started by installing the create-react-native-app package with npm install create-react-native-package and then using it to create a new React Native application. There’s a cool thing about development with React Native, is that the create react native provides an Expo integration. Expo lets you run your code on your mobile device without having to wire it up, by just scanning a QR code that appears on the console.
Ecosystem
React Native has been there for a long time, so it’s supported by most if not all editors you’d want to use and it also supports hot reload. When it comes to packages, React Native is the clear winner, with over 5 times the number of packages available for a flutter, by nature of being there for more than three years. It’s a mature framework now and much more stable than flutter.
Documentation
React Native’s documentation is pretty good, and is more user-friendly, in that it explains what the props are, what they stand for and how to use them. The official documentation also includes guides and popular topics in cross-platform development with React Native like how to install and use native modules or create platform-specific components
Performance
React Native’s approach is different than Flutter’s. The entire application isn’t compiled to C/C++ or a native language, instead, the UI components are compiled to their native equivalents, and the JS runs in a separate thread and communicates with native modules for any action needed through a bridge. This allows React Native to be much faster and more performant than hybrid alternatives like Ionic/Cordova but puts it in a tough spot when compared to Flutter who’s one step closer to the native applications.
Of course, to have a definitive winner in the performance game is quite tricky, as there are many factors involved like the device the application is running on, and for some people, React Native outperformed Flutter, though in general cases flutter should have the upper hand.
The development team benchmarked the Facebook Events app made to React Native to learn more about React to Native’s performance. You’d notice that for all tasks performed, initializing Javascript and requiring the modules is the most draining task. There are many optimization areas for React Native to increase its performance like lazy requiring and lazy native modules loading and incremental cache read, so it’s not really that bad as you might think it is.
Architecture
There are two main patterns in building React/React to native applications, which are Flux and Redux. Flux is the one created by the framework creators, Facebook, while Redux is the community’s most popular option. These frameworks are about unidirectional data flow and storing your application’s state in one central place called Store, and make your app components as stateless as possible. You can also use the Context API which is a new feature of React for managing state.
React Native vs Flutter Summary
| Technology | React Native | Flutter |
| Programming Language | Javascript | Dart |
| Components Library | Very large inclusive library | Smaller, non-inclusive |
| Adaptive Components | Some are adaptive automatically | Components aren’t adaptive. Need to be configured manually. |
| Learning Curve | Easy to pick up, especially if you used React or Javascript before | Quite steep, you need to pick up Dart, and reactive programming isn’t all intuitive |
| Created By | ||
| Main Architecture | Flux and Redux | BLoC |
| EcoSystem | Quite Mature, used in production in many big companies around the world, many packages available | Not yet mature, a fewer number of packages |
| Hot Reload | Supported | Supported |
| Github Stars | 68,690 | 37,200 |
| First Release | Jan 2015 | May 2017 |


