


As the most popular web platform, WordPress is already powering up over one-third of the entire website.
Hundreds of people are entering the community every day. If you too are one of them, we are welcoming you with this easy and beginner-friendly tutorial- “How to Install WordPress on Localhost” in five easy steps.
Learning WordPress is just fun. Nowadays, anyone can build a website for his/her blogging, business, or any other purpose within minutes. Yes, CMS (Content Management System) made it such easy for all of us. And WordPress is leading the CMS industry with a surprising market share of more than 64.2%!
In this post, we have shown how to install WordPress on localhost in 5 easy steps.
- Download XAMPP
- Install & Run the XAMPP on Your PC
- Download WordPress Latest Version
- Create a Database
- Install WordPress on Localhost
We have also added an a-z video tutorial at the end to make your journey easier! So, nothing to worry about.
Now, let’s start with this basic question.
Why Install WordPress on Localhost?
A site in a localhost environment is basically for personal purposes, not for users or audiences. The only person who can see the site is you! So, why does anyone need to create a site in localhost?
The answer is already given in the above paragraph. Before going live with our site or making a visual presence, we should learn the basics and test the output of our developed solution. A localhost site lets us check and experience the updates, changes, settings, etc. to be sure about the final outputs.
Basically, developers use these sites to check their works for being sure about the quality and issues on it. But as a user, you too should create and use one or more localhost sites before making any update or adding a new feature.
So, a localhost site actually supports you to prepare for your next final move. Technology is going ahead rapidly so is the software industry. There is no chance to ignore the updating-upgrading process. Here comes the local host site to the rescue.
WordPress made it easy to install the solution with ease both in a c-panel or local host. Most of the famous hosting provider companies offer one-click installation for WordPress. But, you need to depend on a localhost webserver solution to create a database and save your files when you are creating a local site.
And there is a number of popular solution out there to set up your WordPress on Localhost. To make your job easy, we are mentioning four of the most popular localhost service providers.
In this post, we will show you how to install WordPress on localhost using XAMPP. This localhost server is famous for its overall support and quick response. You can install WordPress using WAMP, LAMP or MAMP, following the same way.
These are the software that creates localhost on your PC by utilizing web server software Apache, PHP, and MySQL. You may know-
PHP is a programming language and MySQL is a database management software. Both of them are required to run a WordPress site.
Installing each of this software separately is difficult and time-consuming for beginners. That’s why you need to depend on solutions like XAMPP/WAMP/LAMP/MAMP.
XAMPP vs WAMP vs MAMP vs LAMP: Which One is Perfect for Your Device
Among these solutions, XMAPP and WAMP are open-source and provide a free solution.
XAMPP is better than WAMP because it’s compatible with all the available operating systems like Windows, OS-X, and Linux. On the other hand, WAMP is limited only to the Windows operating system.
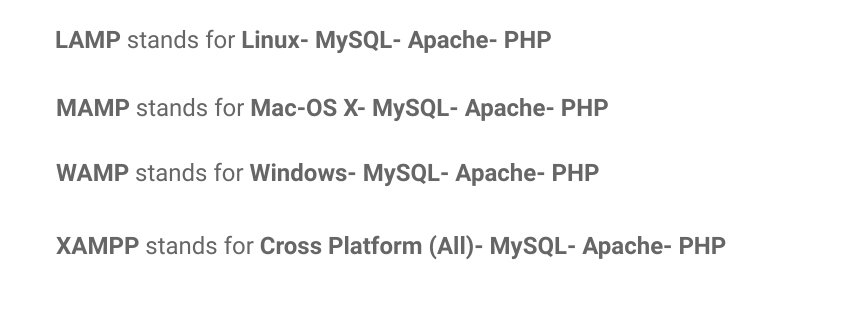
LAMP and MAMP are also open-source-based free localhost solutions and provide good support. But the problem is LAMP stands basically for Linux operating system and MAMP is limited only to Mac operating system.
And there are more localhost platforms like AMPPS.
So, which one is better compared to the others? You could find XAMPP as the best suite for any of the operating systems with its lots of features.
Now, let’s start with the first step.
Step 1- Download XAMPP
- Simply go to the XAMPP’s official website. Select your operating system and click on the download button.
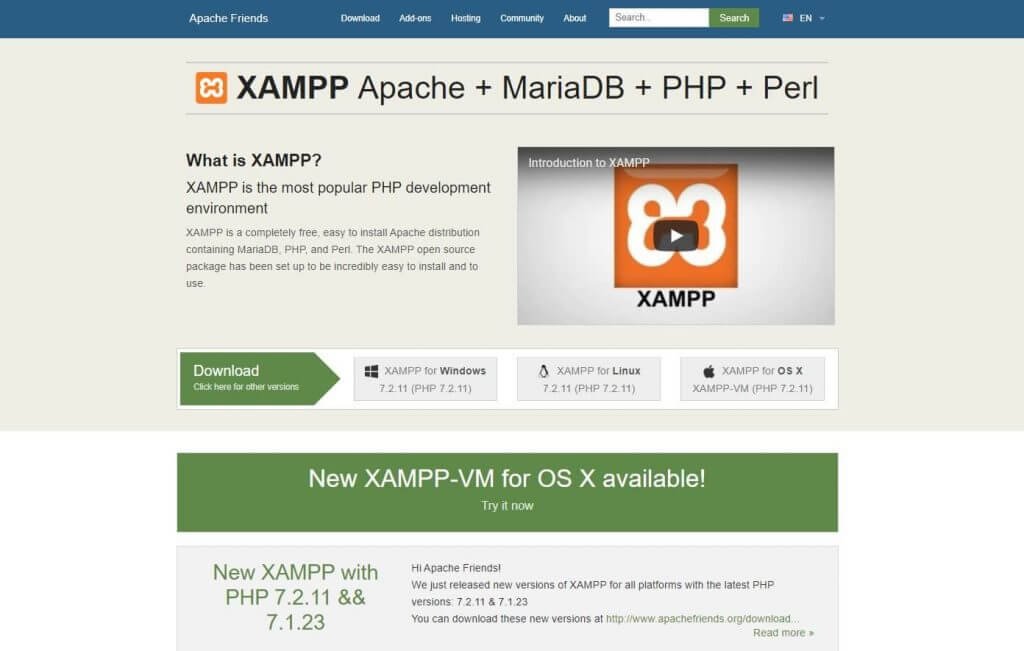
- There are different versions for different operating systems. Choose the perfect one for your device.
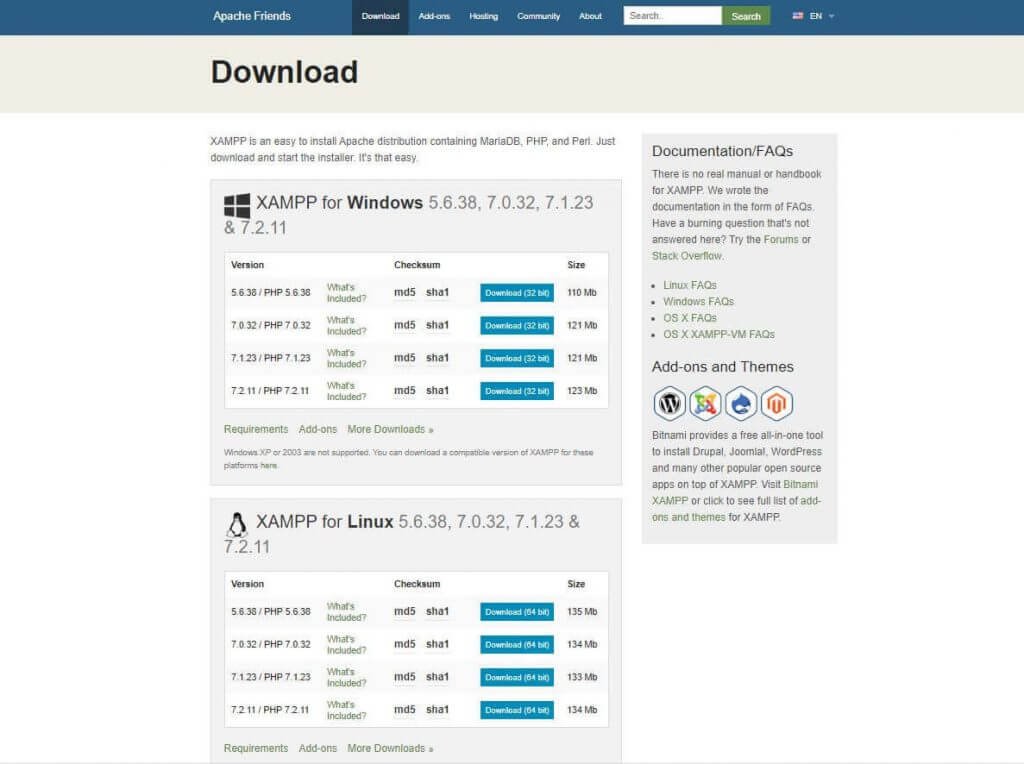
After clicking on the download button, wait for a few moments. It’s around 150 MB file, so you should give some time for it to get downloaded.
Step 2- Install & Run the XAMPP on Your PC
This is the second step. After downloading the software, you need to unzip it. When the file is ready, just select the Install button or click on it twice. Soon you will discover that the installation process has begun.
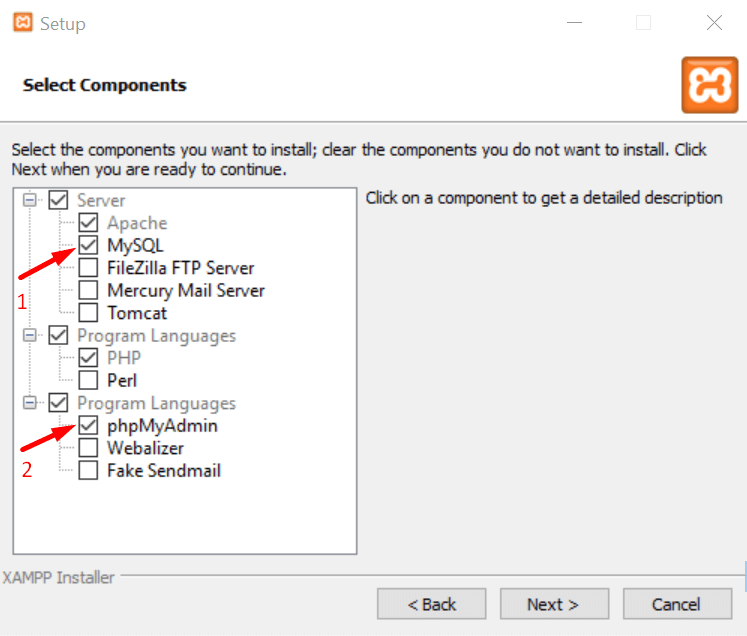
- In the next step, you will see some checkboxes that are already marked. You only need MySQL and phpMyAdmin, so unmark all the others.
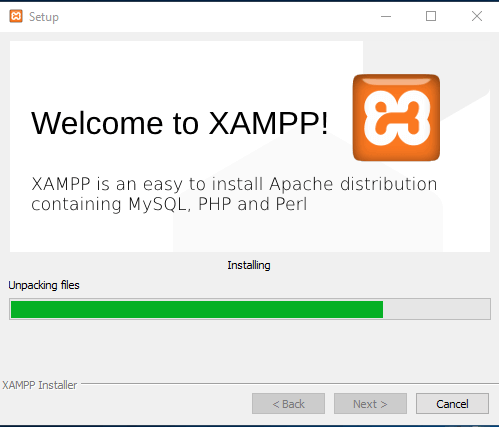
- After a few moments, you would see a welcome notice. That means your installation process is working perfectly.
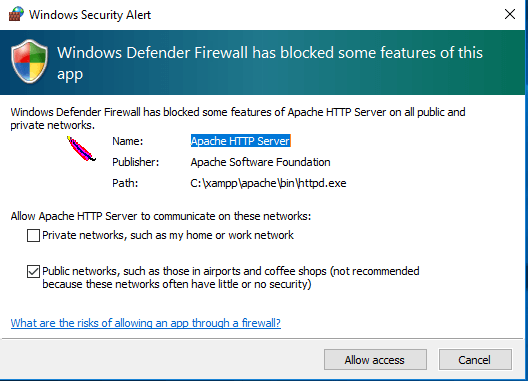
- If you have any antivirus software installed on your PC, you may see a security alert like this. Don’t worry, check any of the given networks and go ahead by clicking on the Allow access button.
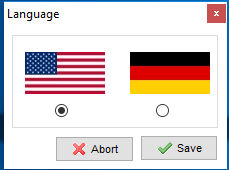
- You would see a language selection option, check one that you want and click on the Save button.
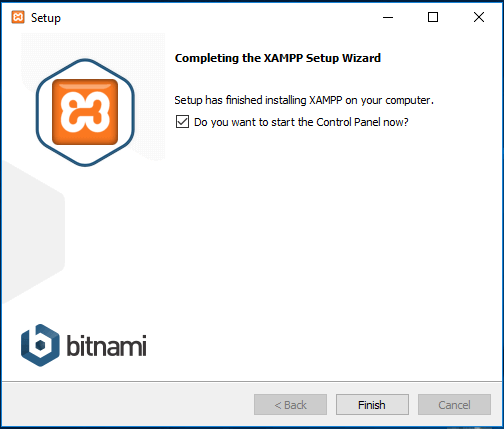
- You are almost at the end of the installation process. Just mark this question box and click on Finish button. The XAMPP control panel will automatically run on your device.
Congratulations! You have completed the XAMPP installation process!
Step 3- Download WordPress Latest Version
Now is the time to create a database and start installing WordPress on localhost. To do that, you need to download the latest version of WordPress.
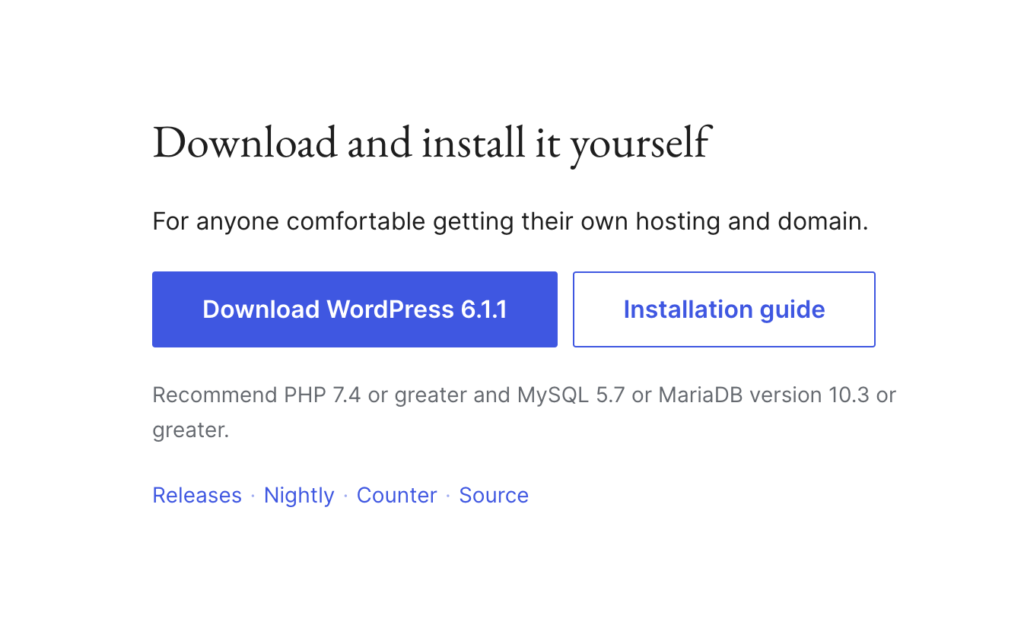
- Go to the WordPress official website, and click on the Get WordPress button from the top right side. You will be redirected to a new page.
- Now hit on Download WordPress button.
The download process might take a few moments to begin. You will get a zip file. Unzip the file and copy that for your next use.
Step 4- Create a Database
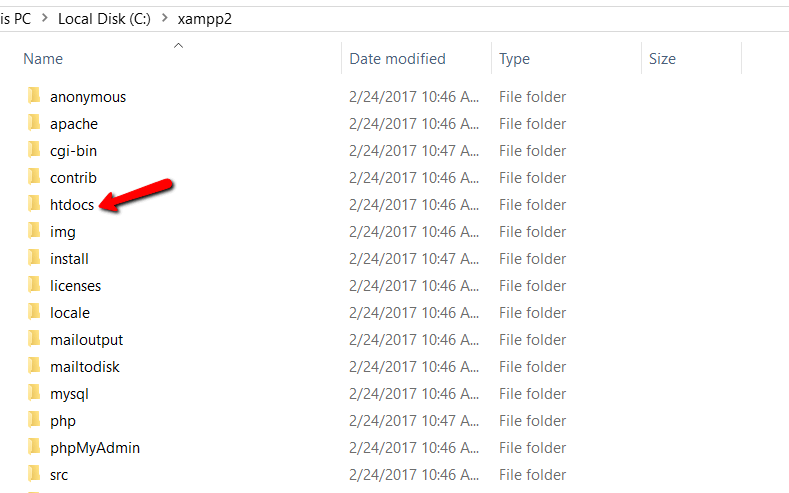
To create a database, first, you need to prepare a folder on your PC in which you want to save all the data of your local site.
- Go to your local disk, where you saved the downloaded XAMPP file.
- Select the htdocs folder and paste the WordPress latest version you copied earlier.
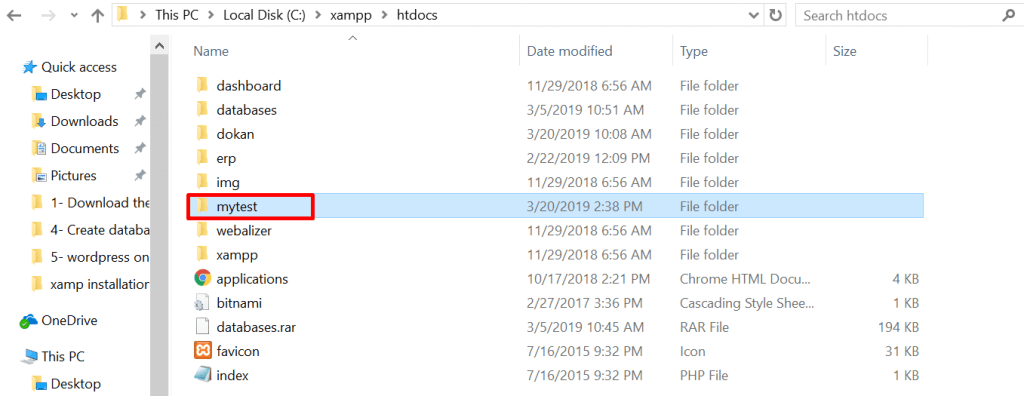
Now, rename the WordPress folder. You can avoid this option if you want to build your site with the name ‘WordPress’ itself.
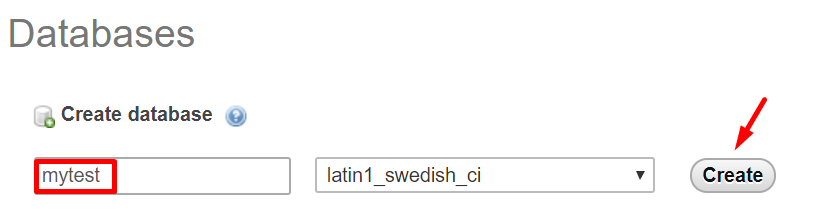
We named the folder here ‘mytest’. Check the below screenshot. You should remember the name you have selected for your database.
- Now, open a new tab on your browser and go to localhost/phpmyadmin
- Select Database
- Write the same name you have written on your local disk. And finally, click on the Create button. Your database will be created within a few seconds.
You have successfully created your localhost database. Now, is the turn to install WordPress on the localhost.
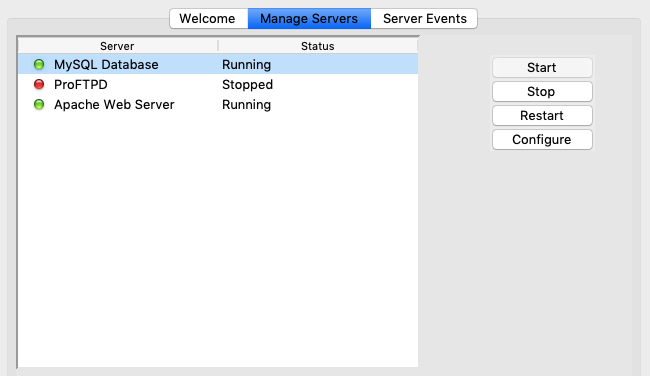
Note: Before going to the final step, you need to start both Apache Web Server and MySQL Database from the Xampp control panel installed on your PC or Mac. Without starting both of them, you can’t get access to PHPMyAdmin.
Just go to your app folder. Select the Xampp control panel and click on MySQL and Apache buttons. Have a look at below screenshot.
Step 5- Install WordPress on Localhost
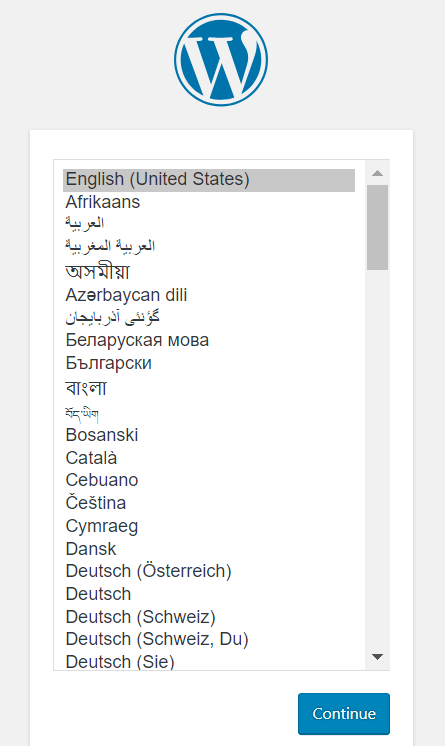
Open a new tab on your browser and write localhost/your given name (‘mytest‘ in our case) and hit on the Enter button. You will see a WordPress setup wizard like below.
- Select your language and click on continue
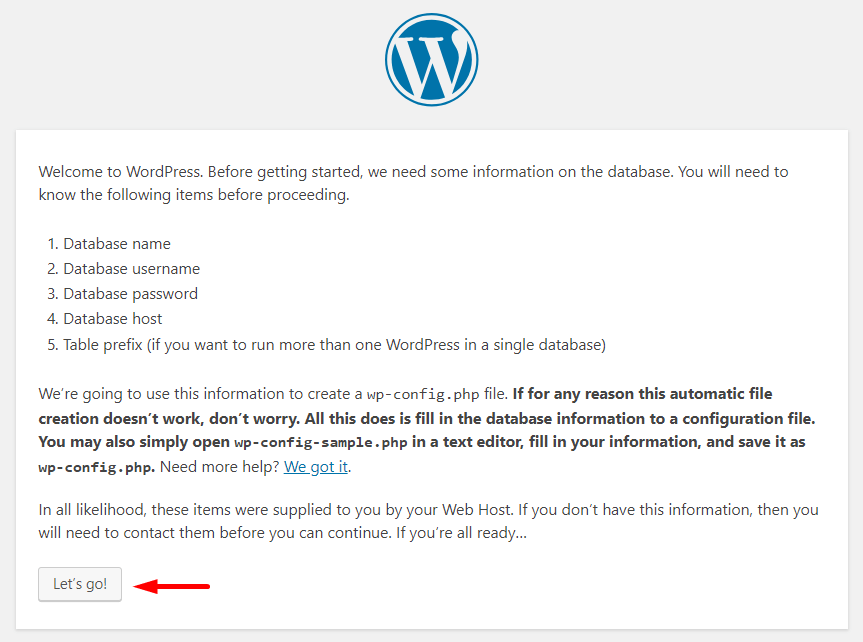
- You would see a welcome notice on behalf of WordPress. In the next step, WordPress will require
- A database Name
- A user name
- A password
- And a database host
- Just click on the Let’s go button
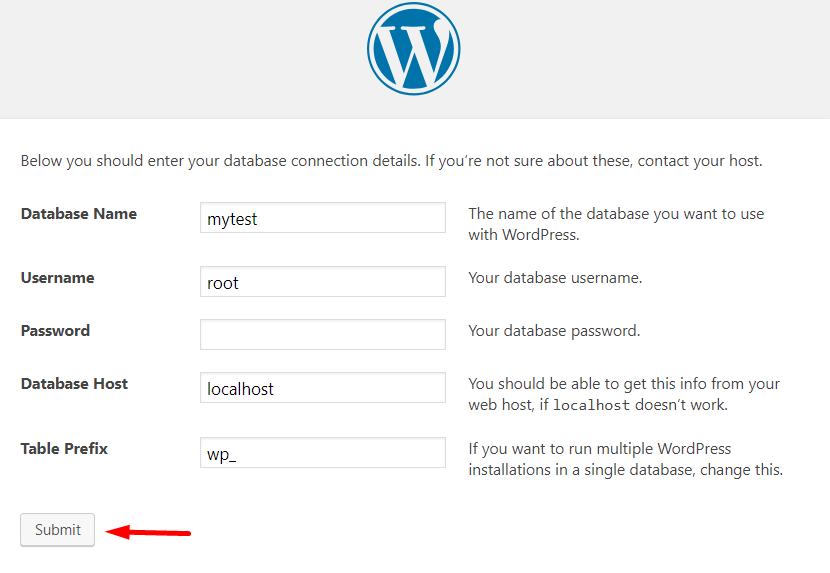
- These are the fields you can see in the below screenshot.
- Provide your database name, you can write ‘root’ as user name, and keep the password option blank- it’s better and you would find other fields filled up from earlier.
- Click on Submit button
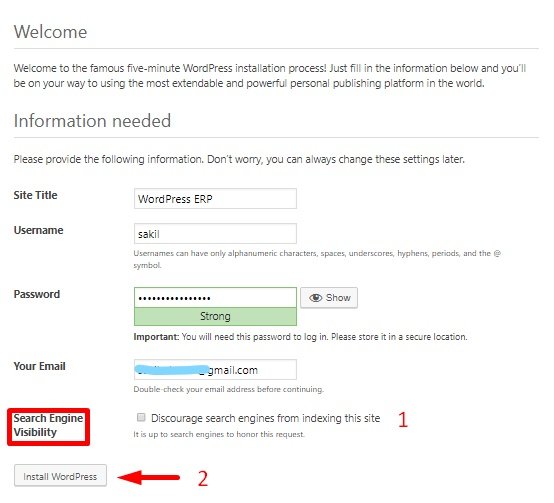
- This is your final step of installation.
- Give a name to your site. we named our site WordPress ERP here. You can also keep your database name as your site’s name.
- Write your username
- Give a strong password
- Write your personal e-mail address
- Carefully check the search engine visibility button. Otherwise, Google would start indexing your local site too!
- And, finally, click on the Install WordPress button!
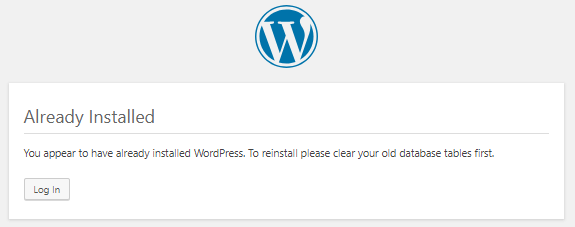
Yes, you have completed your installation. You should see a notice like below.
Check out the Site You Have Built
This is the time to check out your local site. How would it look like or how would it work? Give a check.
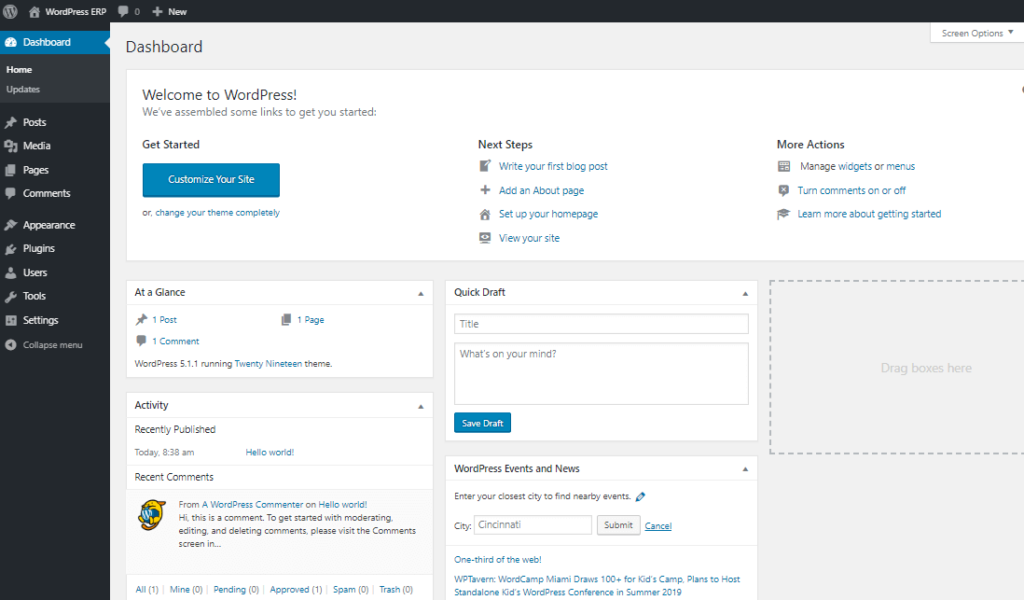
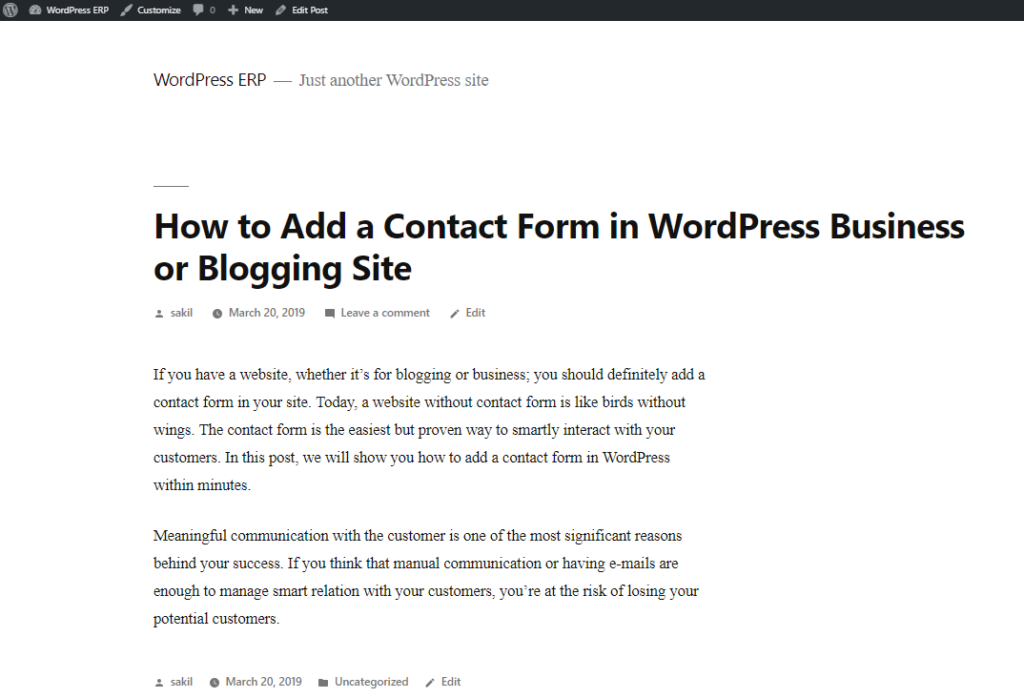
- This is your backend dashboard or admin panel, from where you would control everything.
- And this is your front-end dashboard.
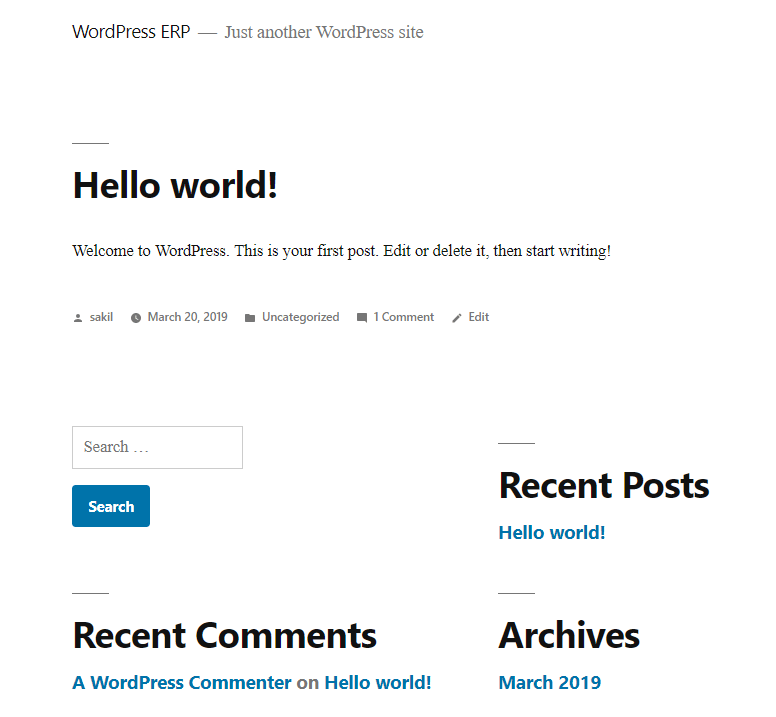
- You can check this by adding a new blog post or installing and activating a plugin/theme etc. We have published a blog post, it looks just like a live site- isn’t it?
So, this was the total process of building a personal testing site in a localhost environment. The process requires 5-10 minutes based on your capability.
Wrapping up on How to Install WordPress on Localhost
As CMS made it easy to build a website for people of any background, you can consider it as fun. Yes, building a website with WordPress is so easy these days. You already know- how to install WordPress on the localhost, so it’s your turn to build a site for learning WordPress or checking/testing any plugin/theme/update, etc.
WordPress started its journey just as a blogging platform, but over time it became the most powerful web platform for all sorts of websites. You can easily build an online shop or even a multi-vendor marketplace completely free of cost!
So, give it a try and let us know in the comment section below if there is any confusion. We are always here to help!